Airtable Integration
Before starting the integration, ensure you have generated an access token in your Airtable settings. Remember, the access token must have read and write permissions for the database it will manage. Without proper permissions, automations won’t execute correctly. Click to configure the access token in Airtable.
Click to configure personal access token in Airtable.
Click to clone the data structure from Airtable.
Important! Remember to add these 3 permissions:
- data.records:read
- data.records:write
- schema.bases:read
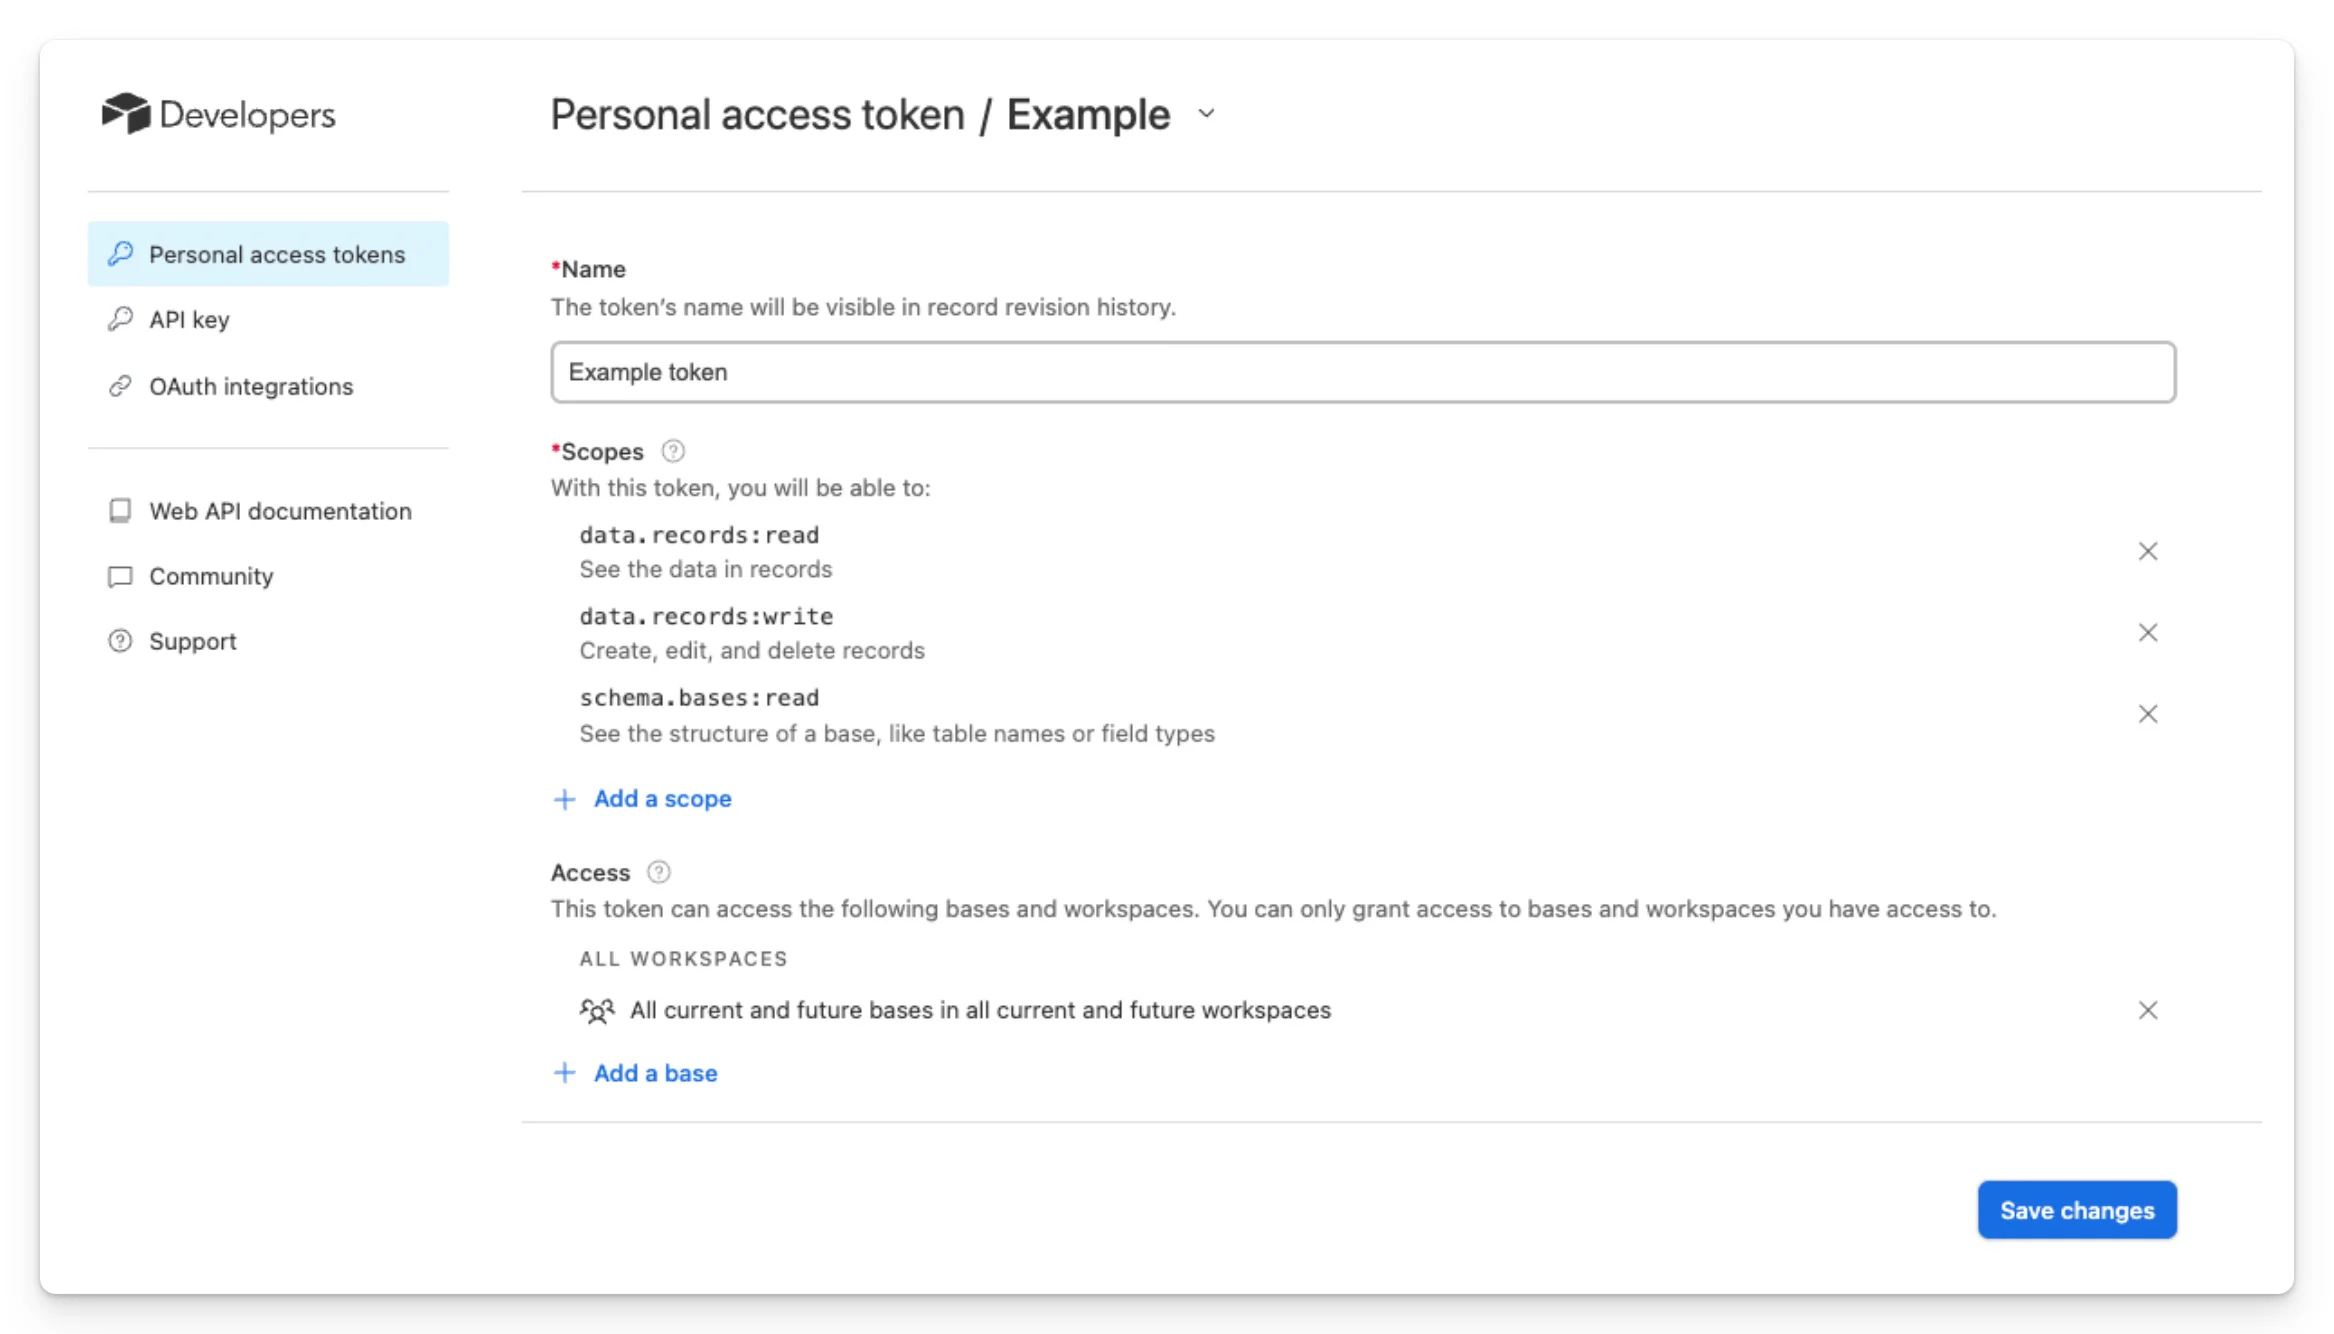
Also, below, be sure to select access to specific or all bases in the Access section.
With the generated token, you can proceed to configure the Airtable integration in Easycart.
Integration configuration
- Go to the Applications tab
- Click the +New application button
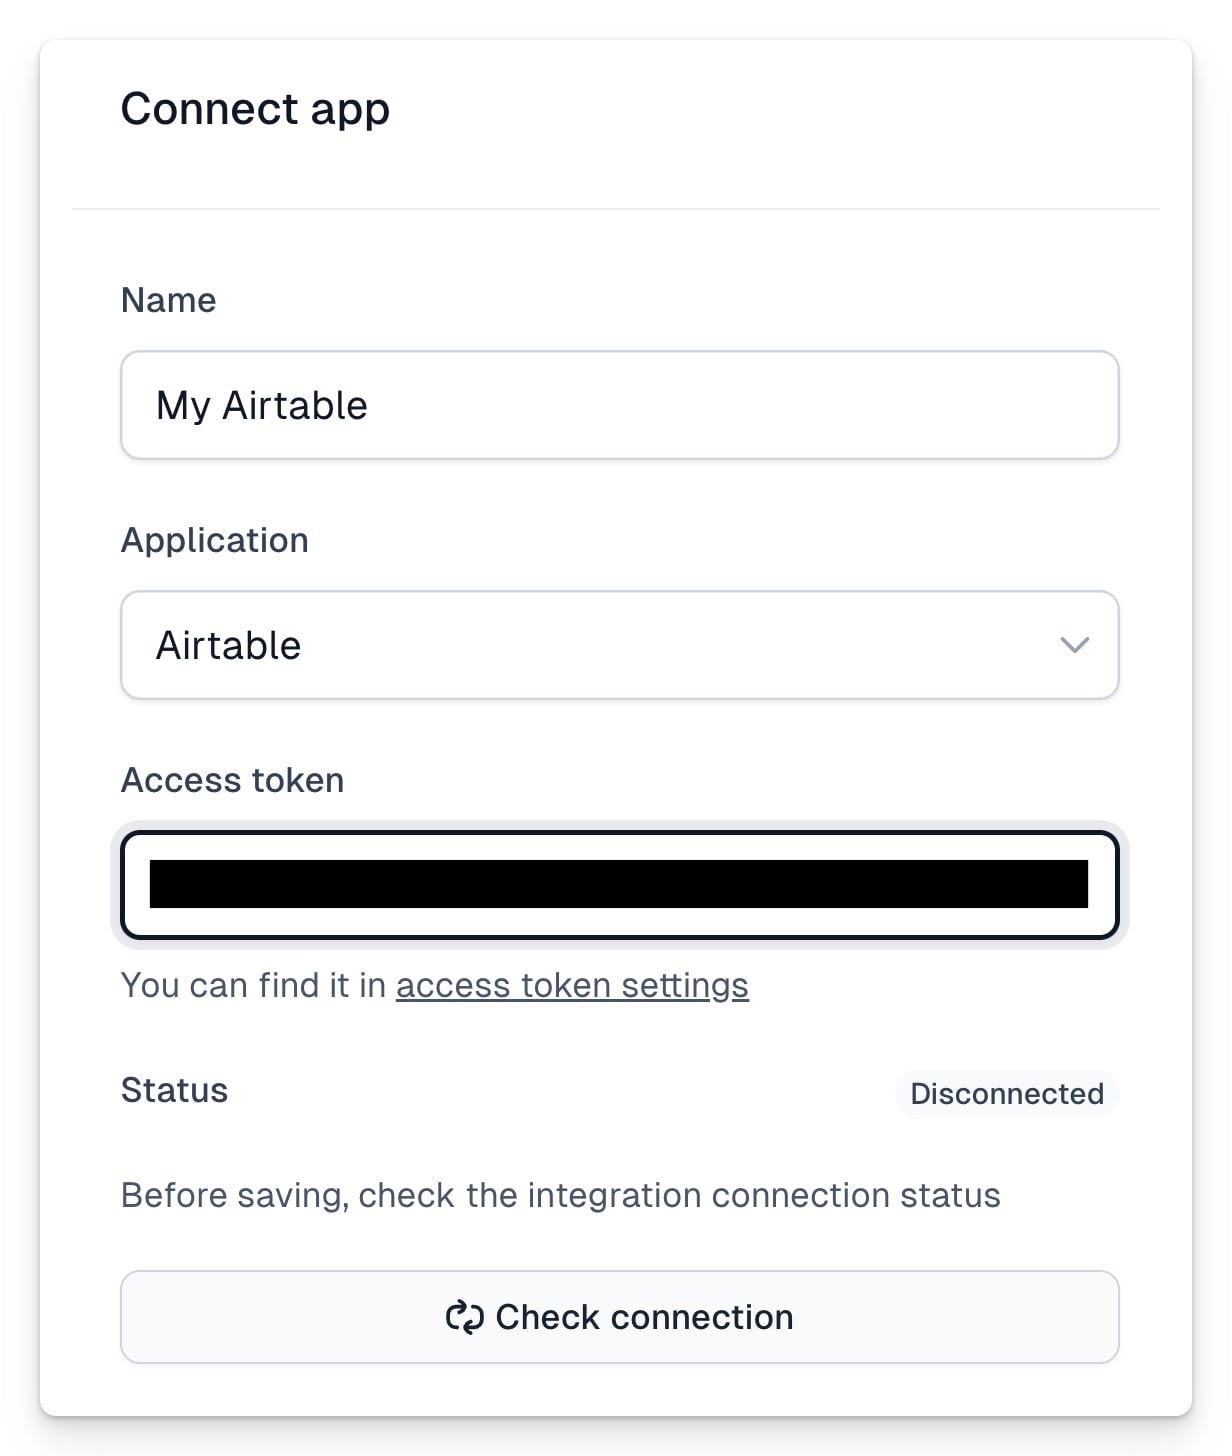
- Provide any name for the application
- Select the Airtable tool
- Enter the Airtable access token
- Select Check connection to ensure the key works
- Save the integration using the Save button
After successful configuration, you can use the integration in the Scenarios tab.
Specifically for Airtable data synchronization integration, we introduced a new event type called Order synchronization. At Easycart, we know that everyone has unique business processes, so to support universal data models, we created a special automation that synchronizes order and customer data after each order event.
Order synchronization automation is triggered when the following events occur:
- Order is fulfilled
- Order is returned
- Access expires
- Access has expired
- Subscription was created
- Subscription plan was changed
- Subscription was canceled
- Subscription expired
How does data synchronization work?
You just need to indicate a table whose format has the same fields as the Airtable database schema we prepared, and these fields will be synchronized. The automations recognize which columns are in the specified tables, and if you use supported fields, the data will be updated. Therefore, the structure you create depends solely on you and your business needs. Remember that schemas are individual for different models, so synchronizing the First name field in the customer table won’t work in the orders table.
Tables also have the ability to use fields that link records to other tables, e.g., the orders table has a Customers field that indicates which customer the order is assigned to.At any time, you can modify the table structure, but remember that when you add a new field, synchronization won’t work retroactively.
As we expand, we’ll add more fields to existing tables and add new data models, so we recommend checking for new data synchronization options.
Important: Each table must contain a required UUID field, which is plain text. We use it to recognize the customer and order record, allowing us to update data whenever it changes in the Easycart.
The name, type, and options of fields must be the same as in the schema, as we recognize fields to be updated based on this.
Before adding automation, make sure you already have the structure ready in Airtable.
Click to clone the data structure from Airtable.
Creating automation for data synchronization:
When creating automation, you need to specify the Airtable base and the tables we will synchronize for orders and customers.
How to add data synchronization automation?
- Go to the Scenarios tab
- Click +New scenario
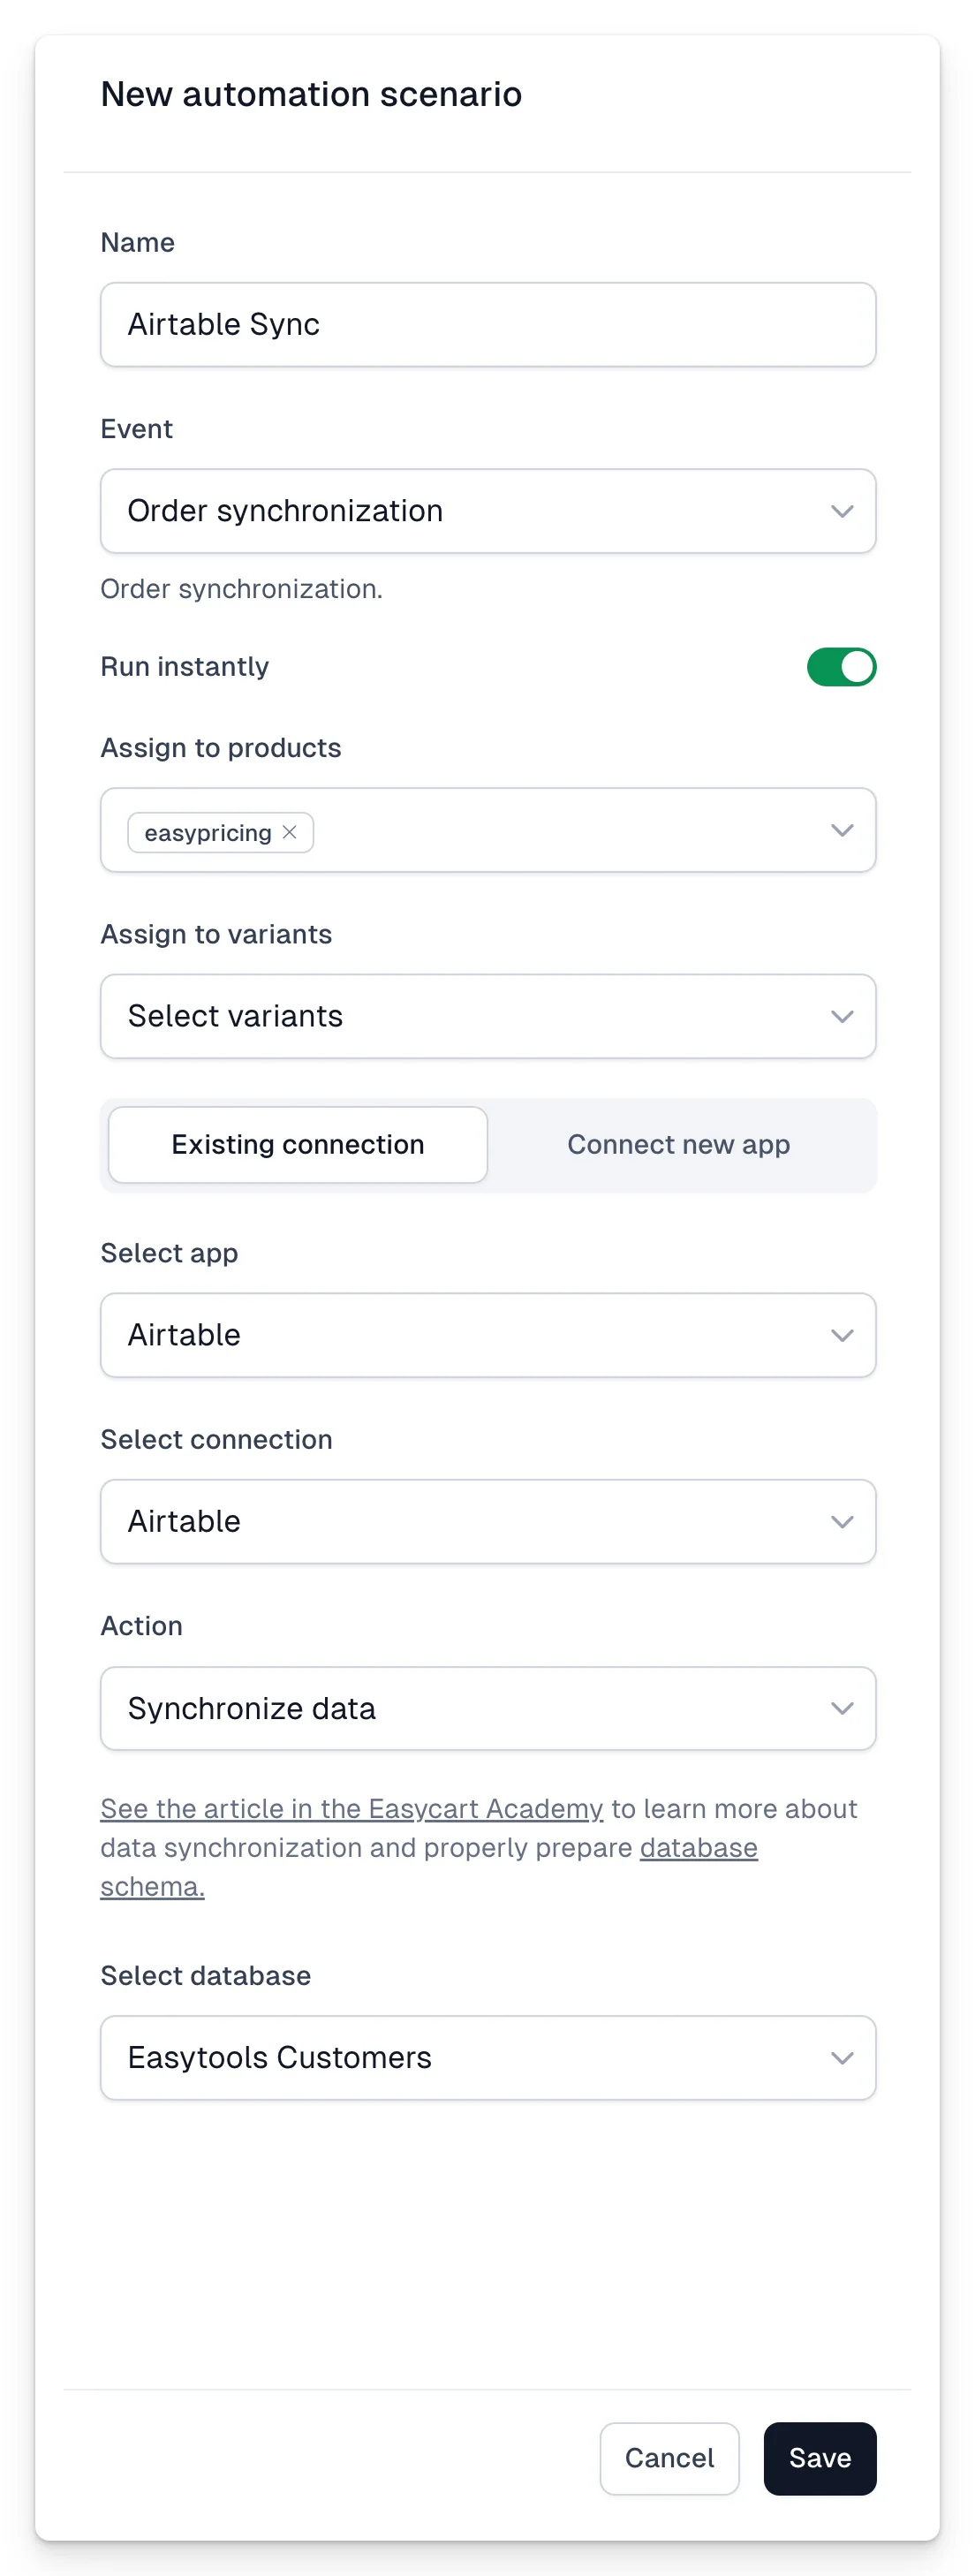
- Select the Airtable tool
- Choose the Order synchronization event
- Assign automation to the appropriate product and then variants
- Select an existing Airtable connection and action
- Choose the Airtable base where the tables to synchronize are located
- Indicate the customer and order tables
- Save the automation using the Save button
Remember that you can add any number of automations, allowing you to synchronize order data for various needs and business processes after purchase.