You can use Easytools to sell your products and control access to your subscriptions on Kajabi. Simply set up an automation scenario to activate or deactivate Kajabi offers.
Integration with Kajabi
To create automation with Kajabi, we’ll use a webhook, so you only need to name the integration to activate it. Here’s how:
1. Go to the Store → Automations section. 2. Select Apps from the top menu. 3. Click +New app in the top right corner. 4. Enter the connection Name and choose Kajabi from the list of applications. 5. Click Check connection. 6. Save the integration.
Configuring automation
After setting up the integration with Kajabi, configure a scenario to activate or deactivate a Kajabi offer based on cart events or subscription status.
When using external providers like Easytools, you have two available actions: Activate offer for the client or Deactivate offer for the client.
Getting the webhook URL from Kajabi
In both scenarios, you’ll need the webhook URL from Kajabi to create automation. Here’s how to get it:
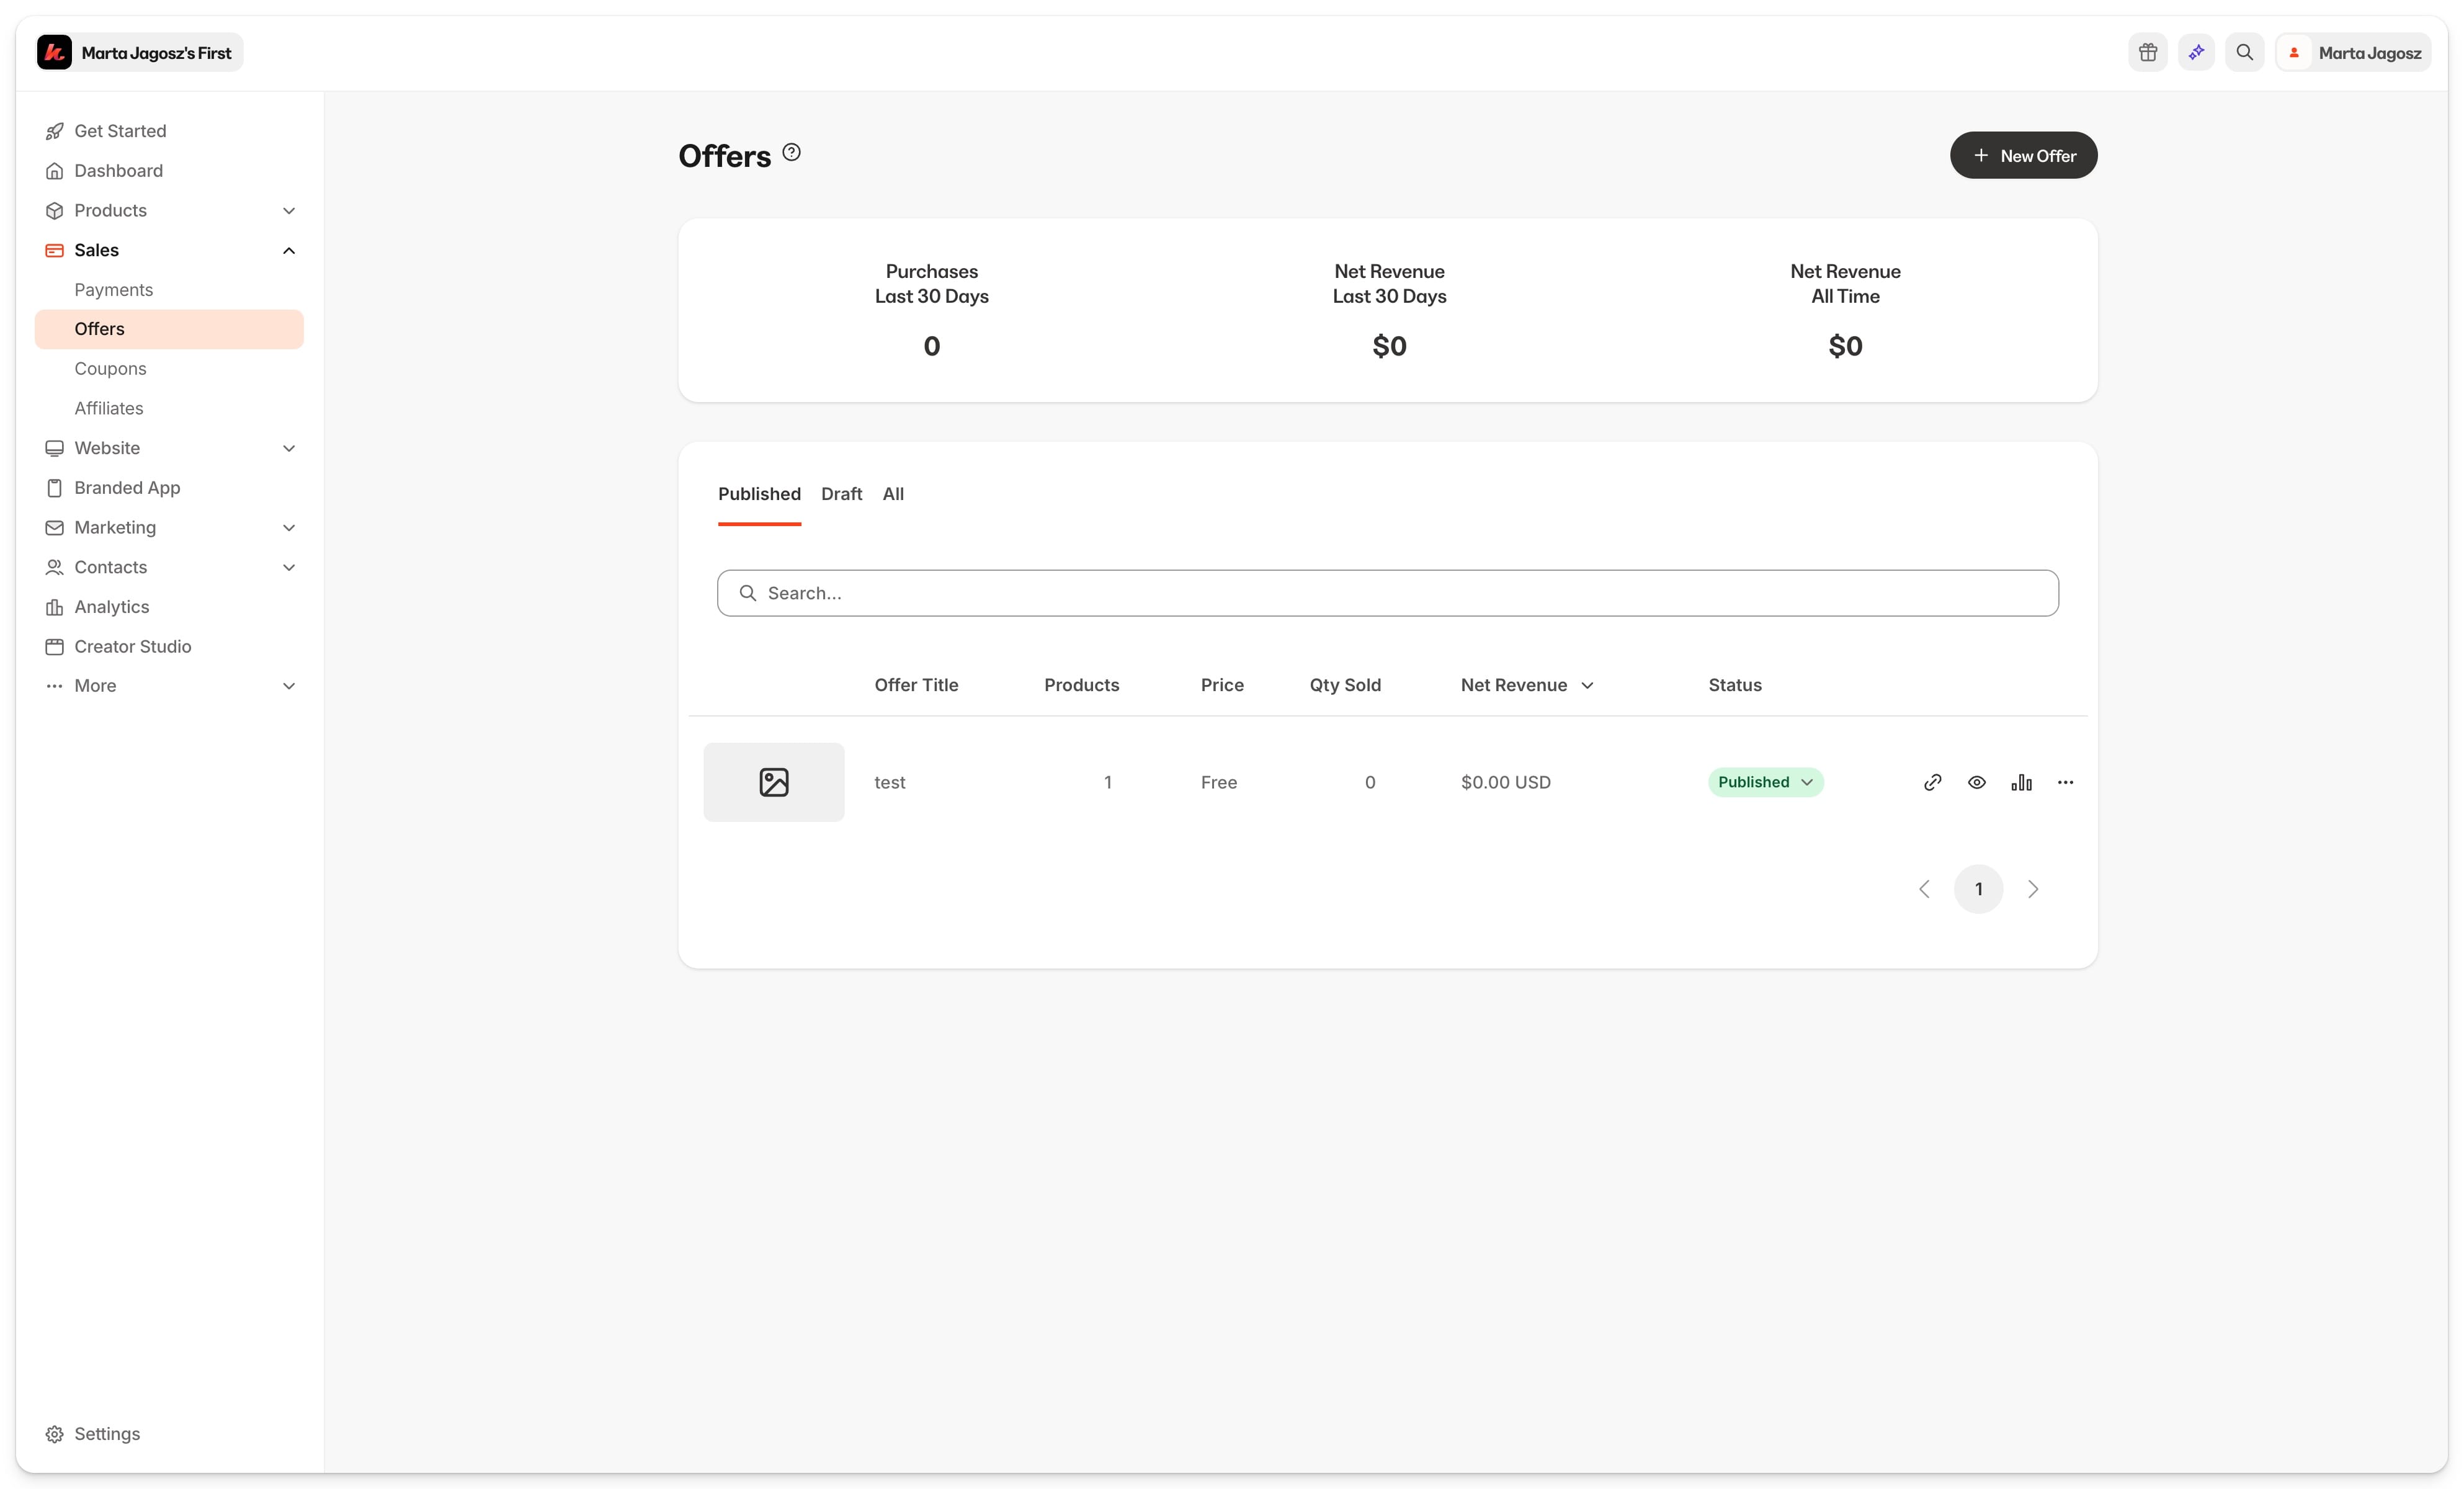
1. Go to the Sales → Offers tab in your Kajabi account.
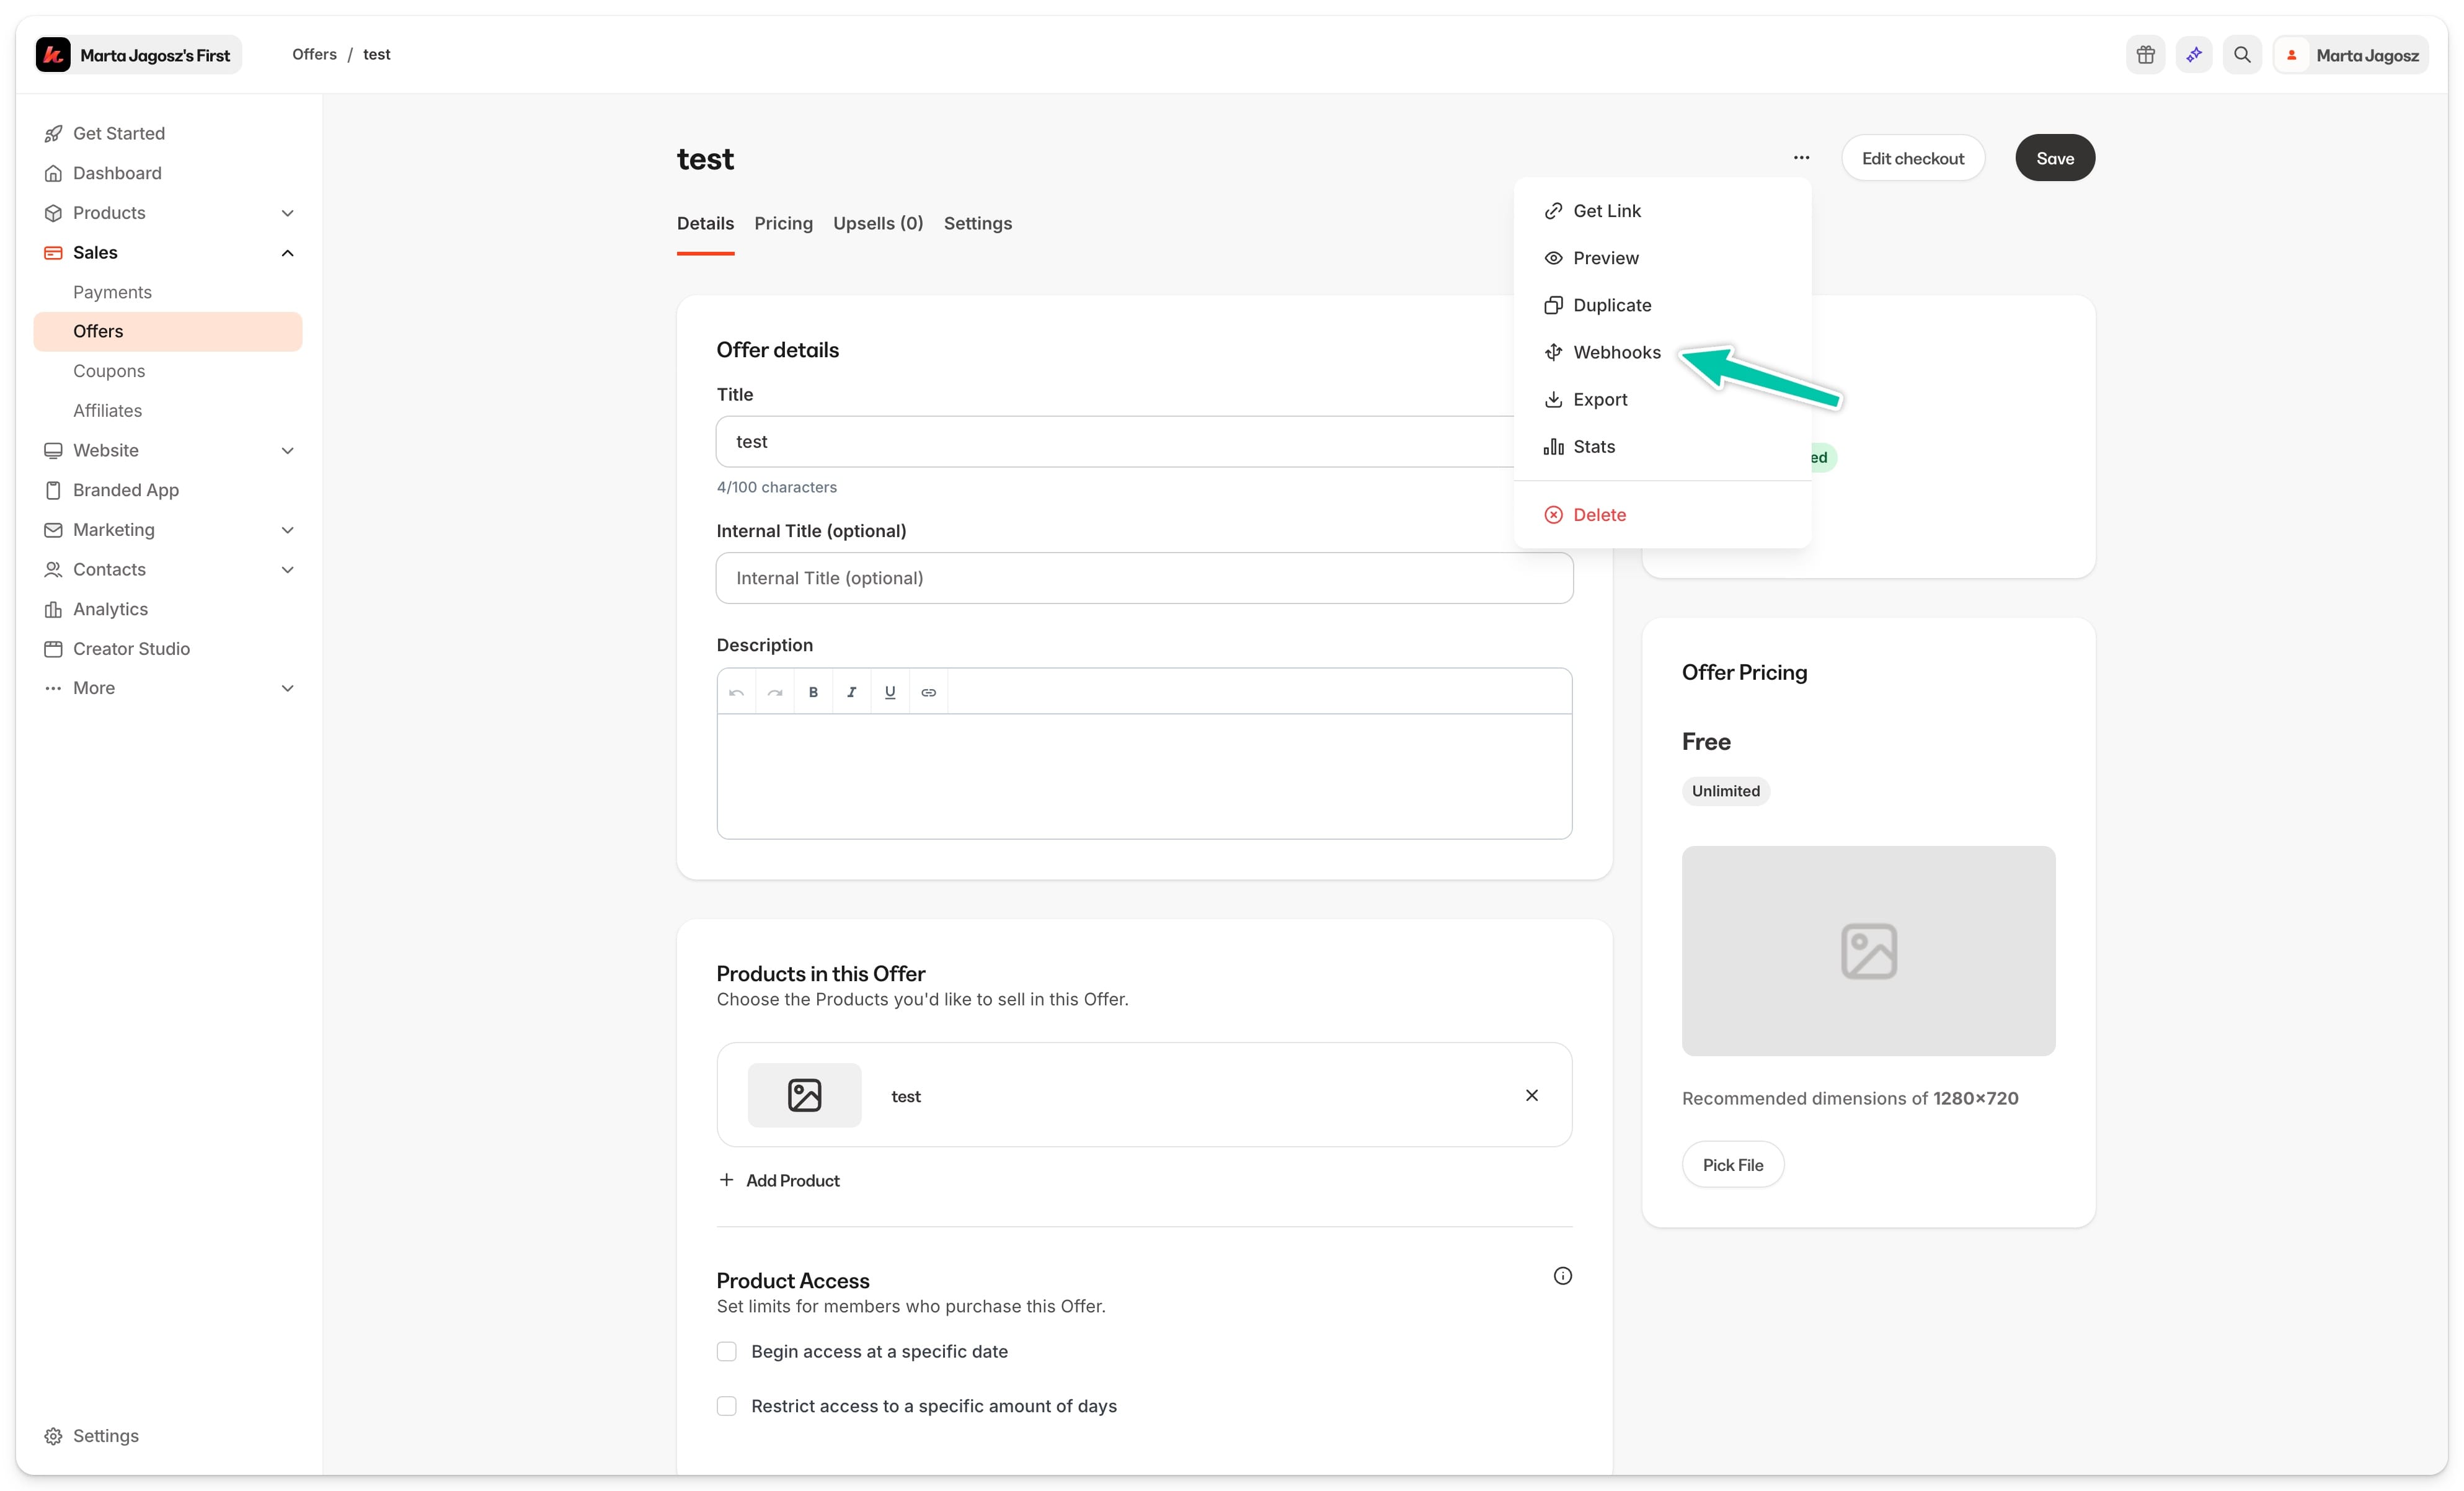
2. Click on the product for which you want to get the webhook. 3. Click on … to see more options. 4. Select Webhooks.
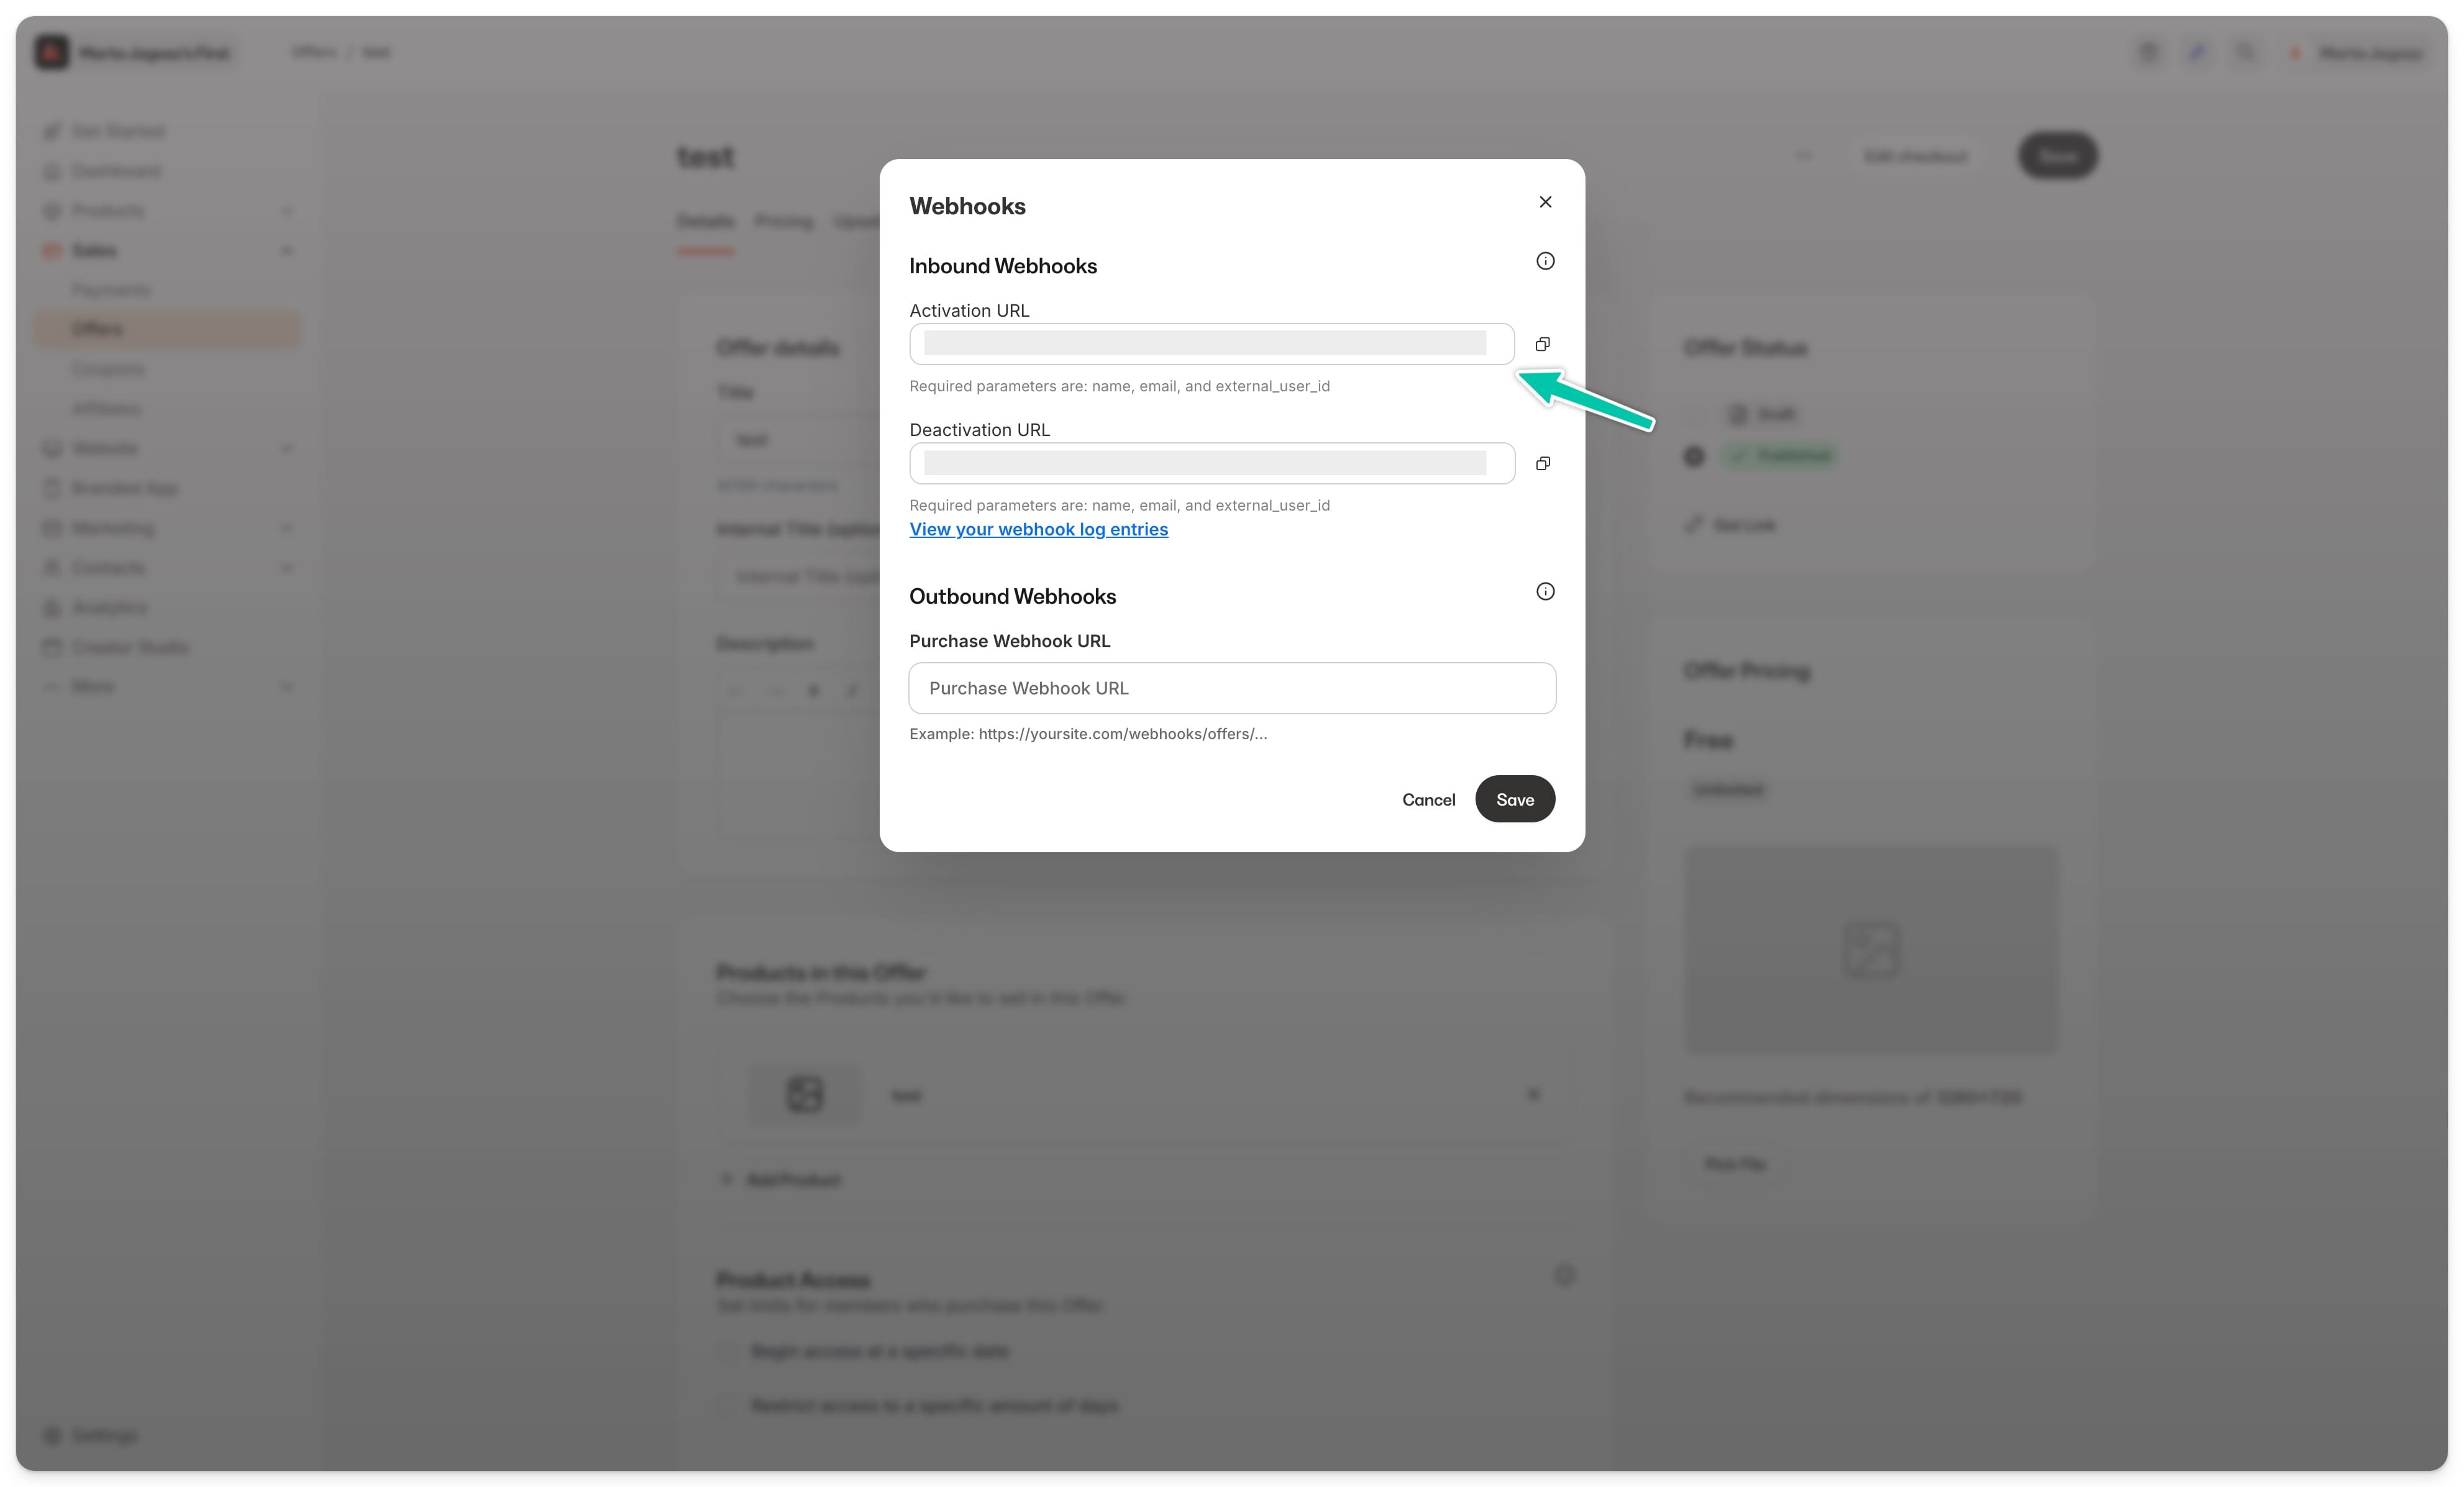
5. Copy the Activation URL (offer activation webhook) or Deactivation URL (offer deactivation webhook) from the popup window with webhook details.
Remember, webhook addresses are assigned to a single offer in Kajabi. If you want to assign access to multiple offers after purchase, you must copy additional webhook URLs and create more automations. For a more detailed tutorial on obtaining the webhook URL, refer to Kajabi’s help article.
Activate offer for the client
To automatically add a client to a Kajabi offer after purchase, configure the “Activate offer for the client” automation for the Order completed event. Here’s how:
1. Go to the Store → Automations section. 2. In the top menu, select the Scenarios tab. 3. Click +New scenario in the top right corner. 4. Enter a Name. 5. In the Event field, select Order completed. 6. Assign the Product and Variants for which you want to run the scenario. 7. In the Select app field, select the previously created Kajabi integration.
You can also create a new integration at this stage by selecting Connect new app, which will guide you to create a new connection.
8. In the Action field, select Activate offer for customer. 9. Then, paste the offer activation webhook. 10. Click Save.
Deactivate offer for the client
When a subscription expires and you want the client to be automatically removed from a Kajabi offer, configure the Deactivate offer for the client automation for the Access expired event. Here’s how:
1. Go to the Store → Automations section. 2. In the top menu, select the Scenarios tab. 3. Click +New scenario in the top right corner. 4. Enter a Name. 5. In the Event field, select Access expired. 6. Assign the Product and Variants for which you want to run the scenario. 7. In the Select app field, select the previously created Kajabi integration.
You can also create a new integration at this stage by selecting Connect new app, which will guide you to create a new connection.
8. In the Action field, select Deactivate offer for customer. 9. Then, paste the offer deactivation webhook. 10. Click Save.