Build an offer page for multiple products
Display your products on a sleek offer page and enable easy purchases by integrating with Easycart.
Now let’s dive into the details of how you can create a storefront for multiple products using Easyoffer. You can do this by either importing your products from Easycart or by manually adding products from different sources.
A storefront created automatically for your Easycart products
When you create products using Easycart, we automatically generate a storefront and add all your products to it. To access it, go to Store ➔ Storefront. There, you can preview your page, edit it, or manage its publication. Your storefront will also automatically be available in the Offer pages tab.
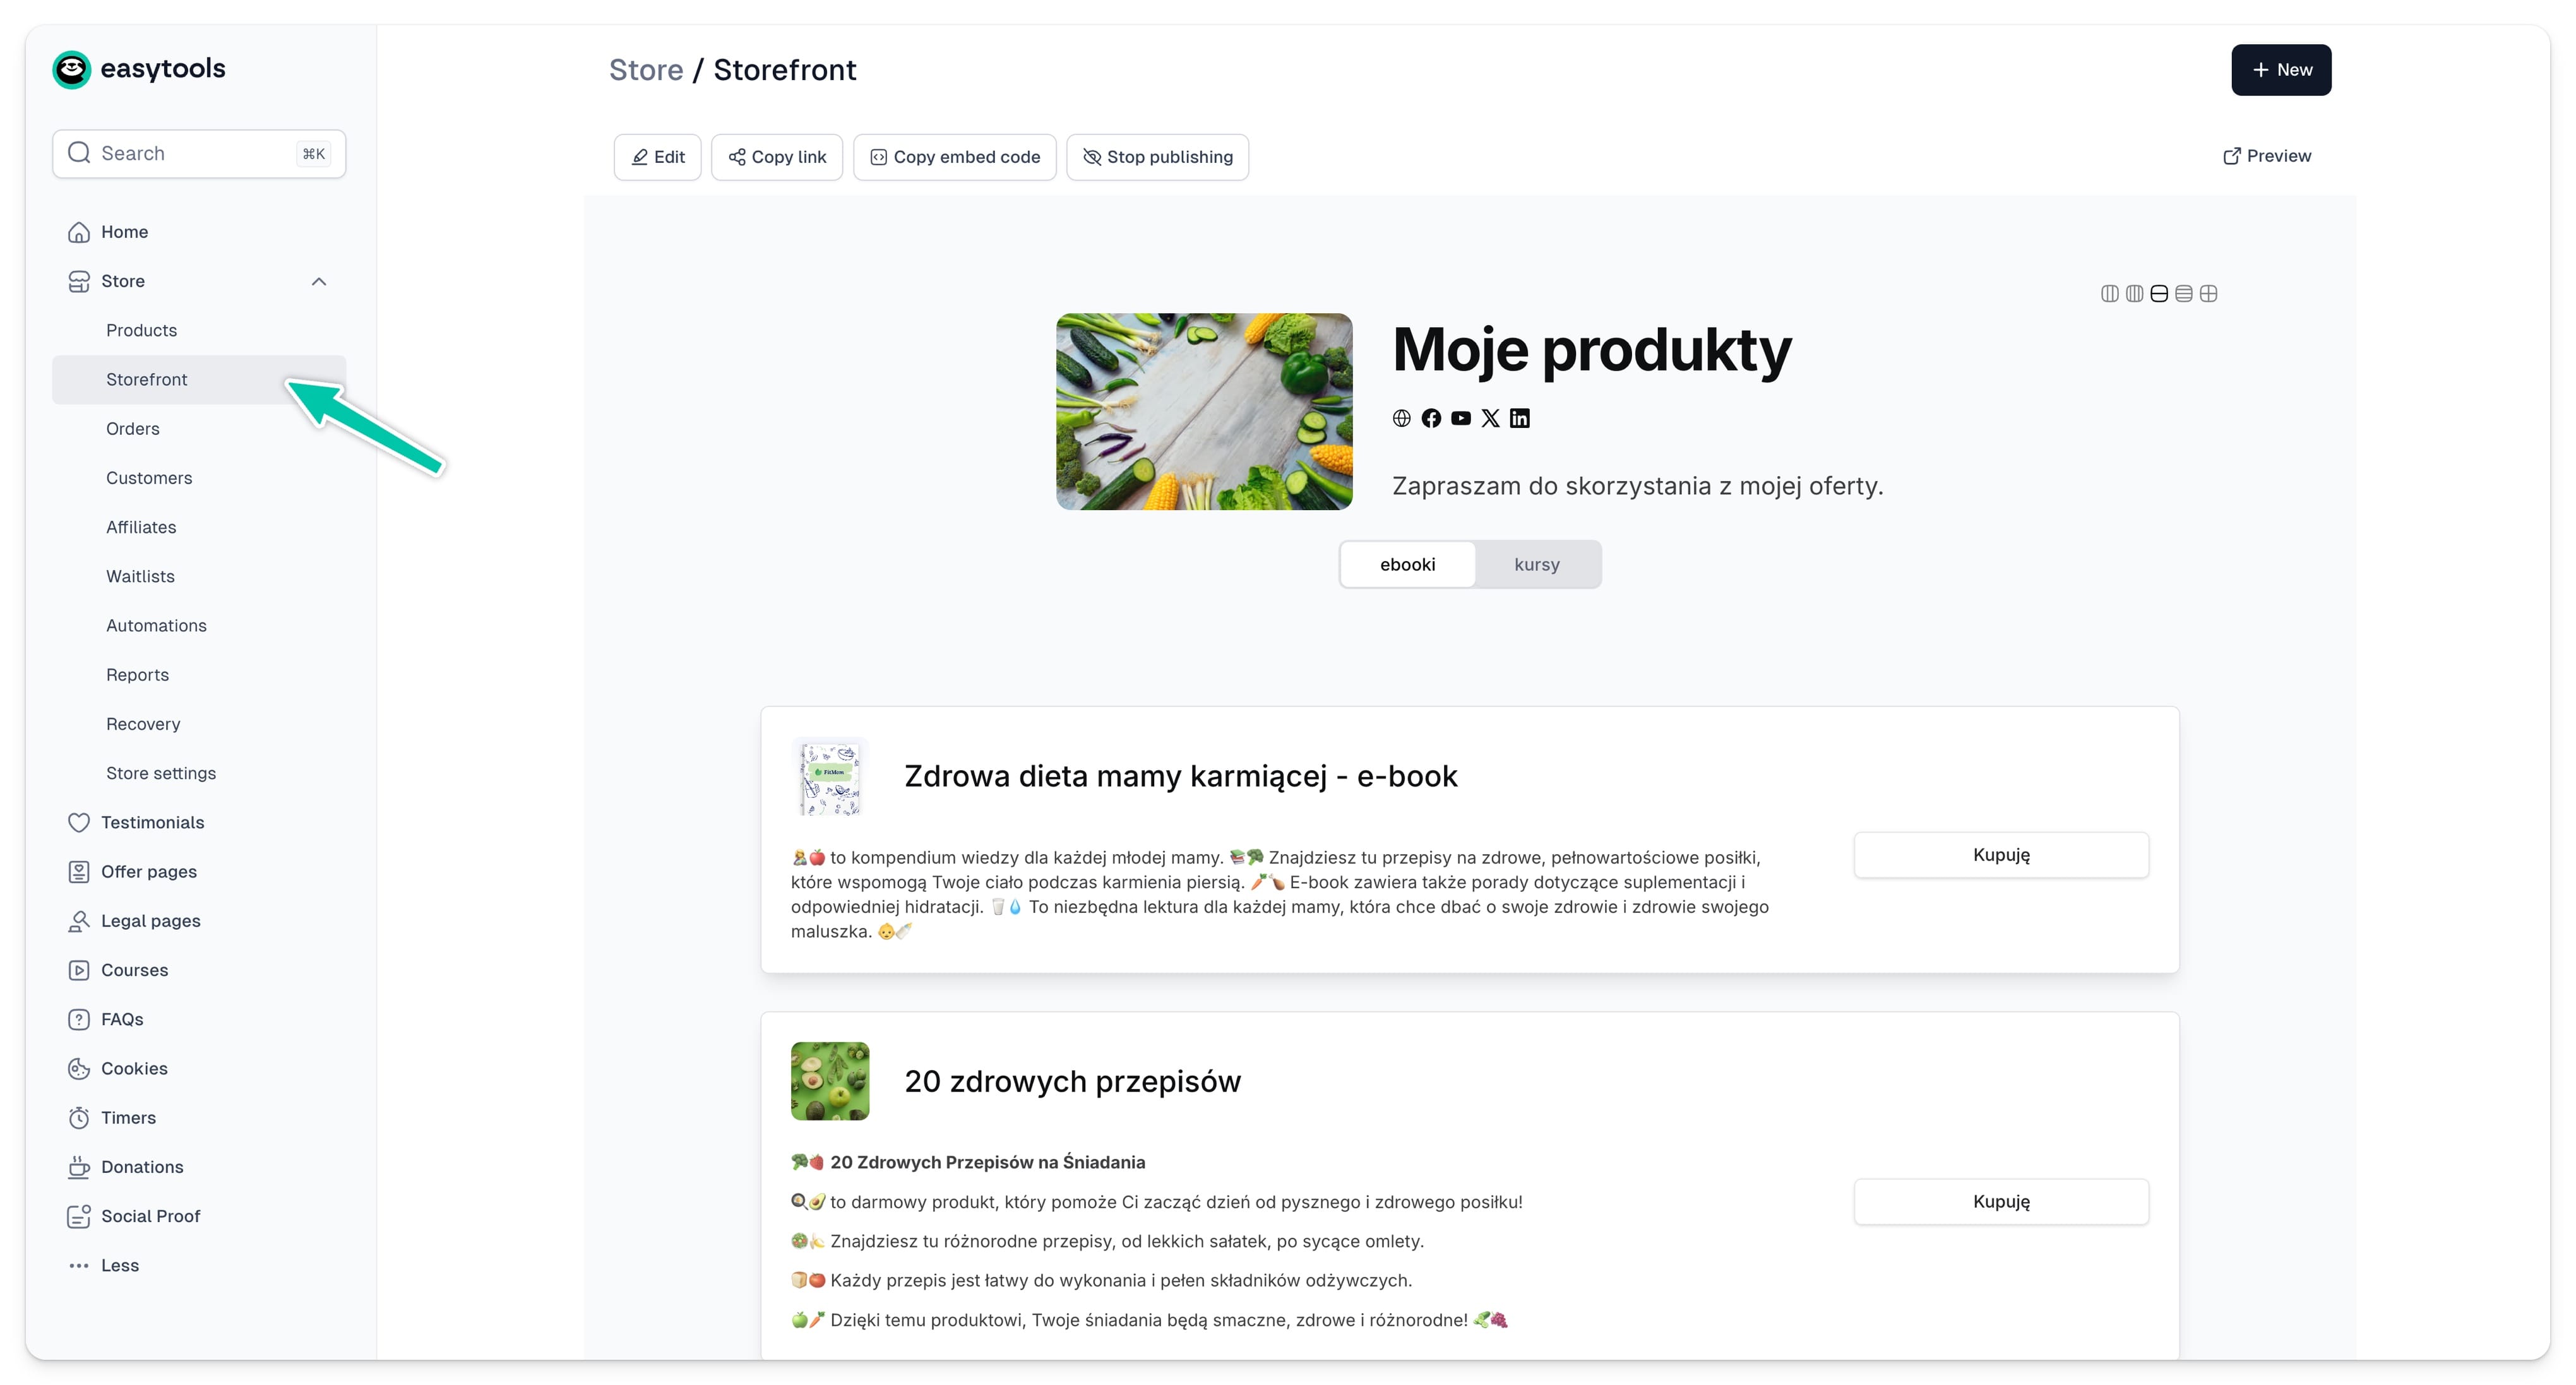
Please note that your auto-generated storefront won’t be published online until you publish it.
But before you publish your storefront, we recommend using the Easyoffer configurator to adjust it to match your brand and needs. You can do this by clicking the Edit button in the Storefront tab or by proceeding to Offer pages and opening your project.
Each tenant can only create one storefront project that will automatically synchronize with multiple Easycart products.
Create a pricing section with AI
- Go to creating a project in Easyoffer, in the Pages → Pricing sections tab.
- Click + New pricing section.
- Choose the option Start without a product.
- In the text window, enter a prompt describing how your page should look.

Before generating the pricing page, you can choose the layout style and the color variant. By default, we offer dark and light themes. You can also create your own custom color palette.
Pricing table generation by AI works asynchronously, so you don’t need to wait for the project to be created. You can leave the tool, and the AI will continue generating it in the background.
Manually adding products to your storefront
Another option is to manually add multiple products to our storefront. This way, if needed, you can use Easyoffer to showcase products that are not sold via Easycart.
To manually add your products:
- Go to the Offer pages tab in the Easytools panel.
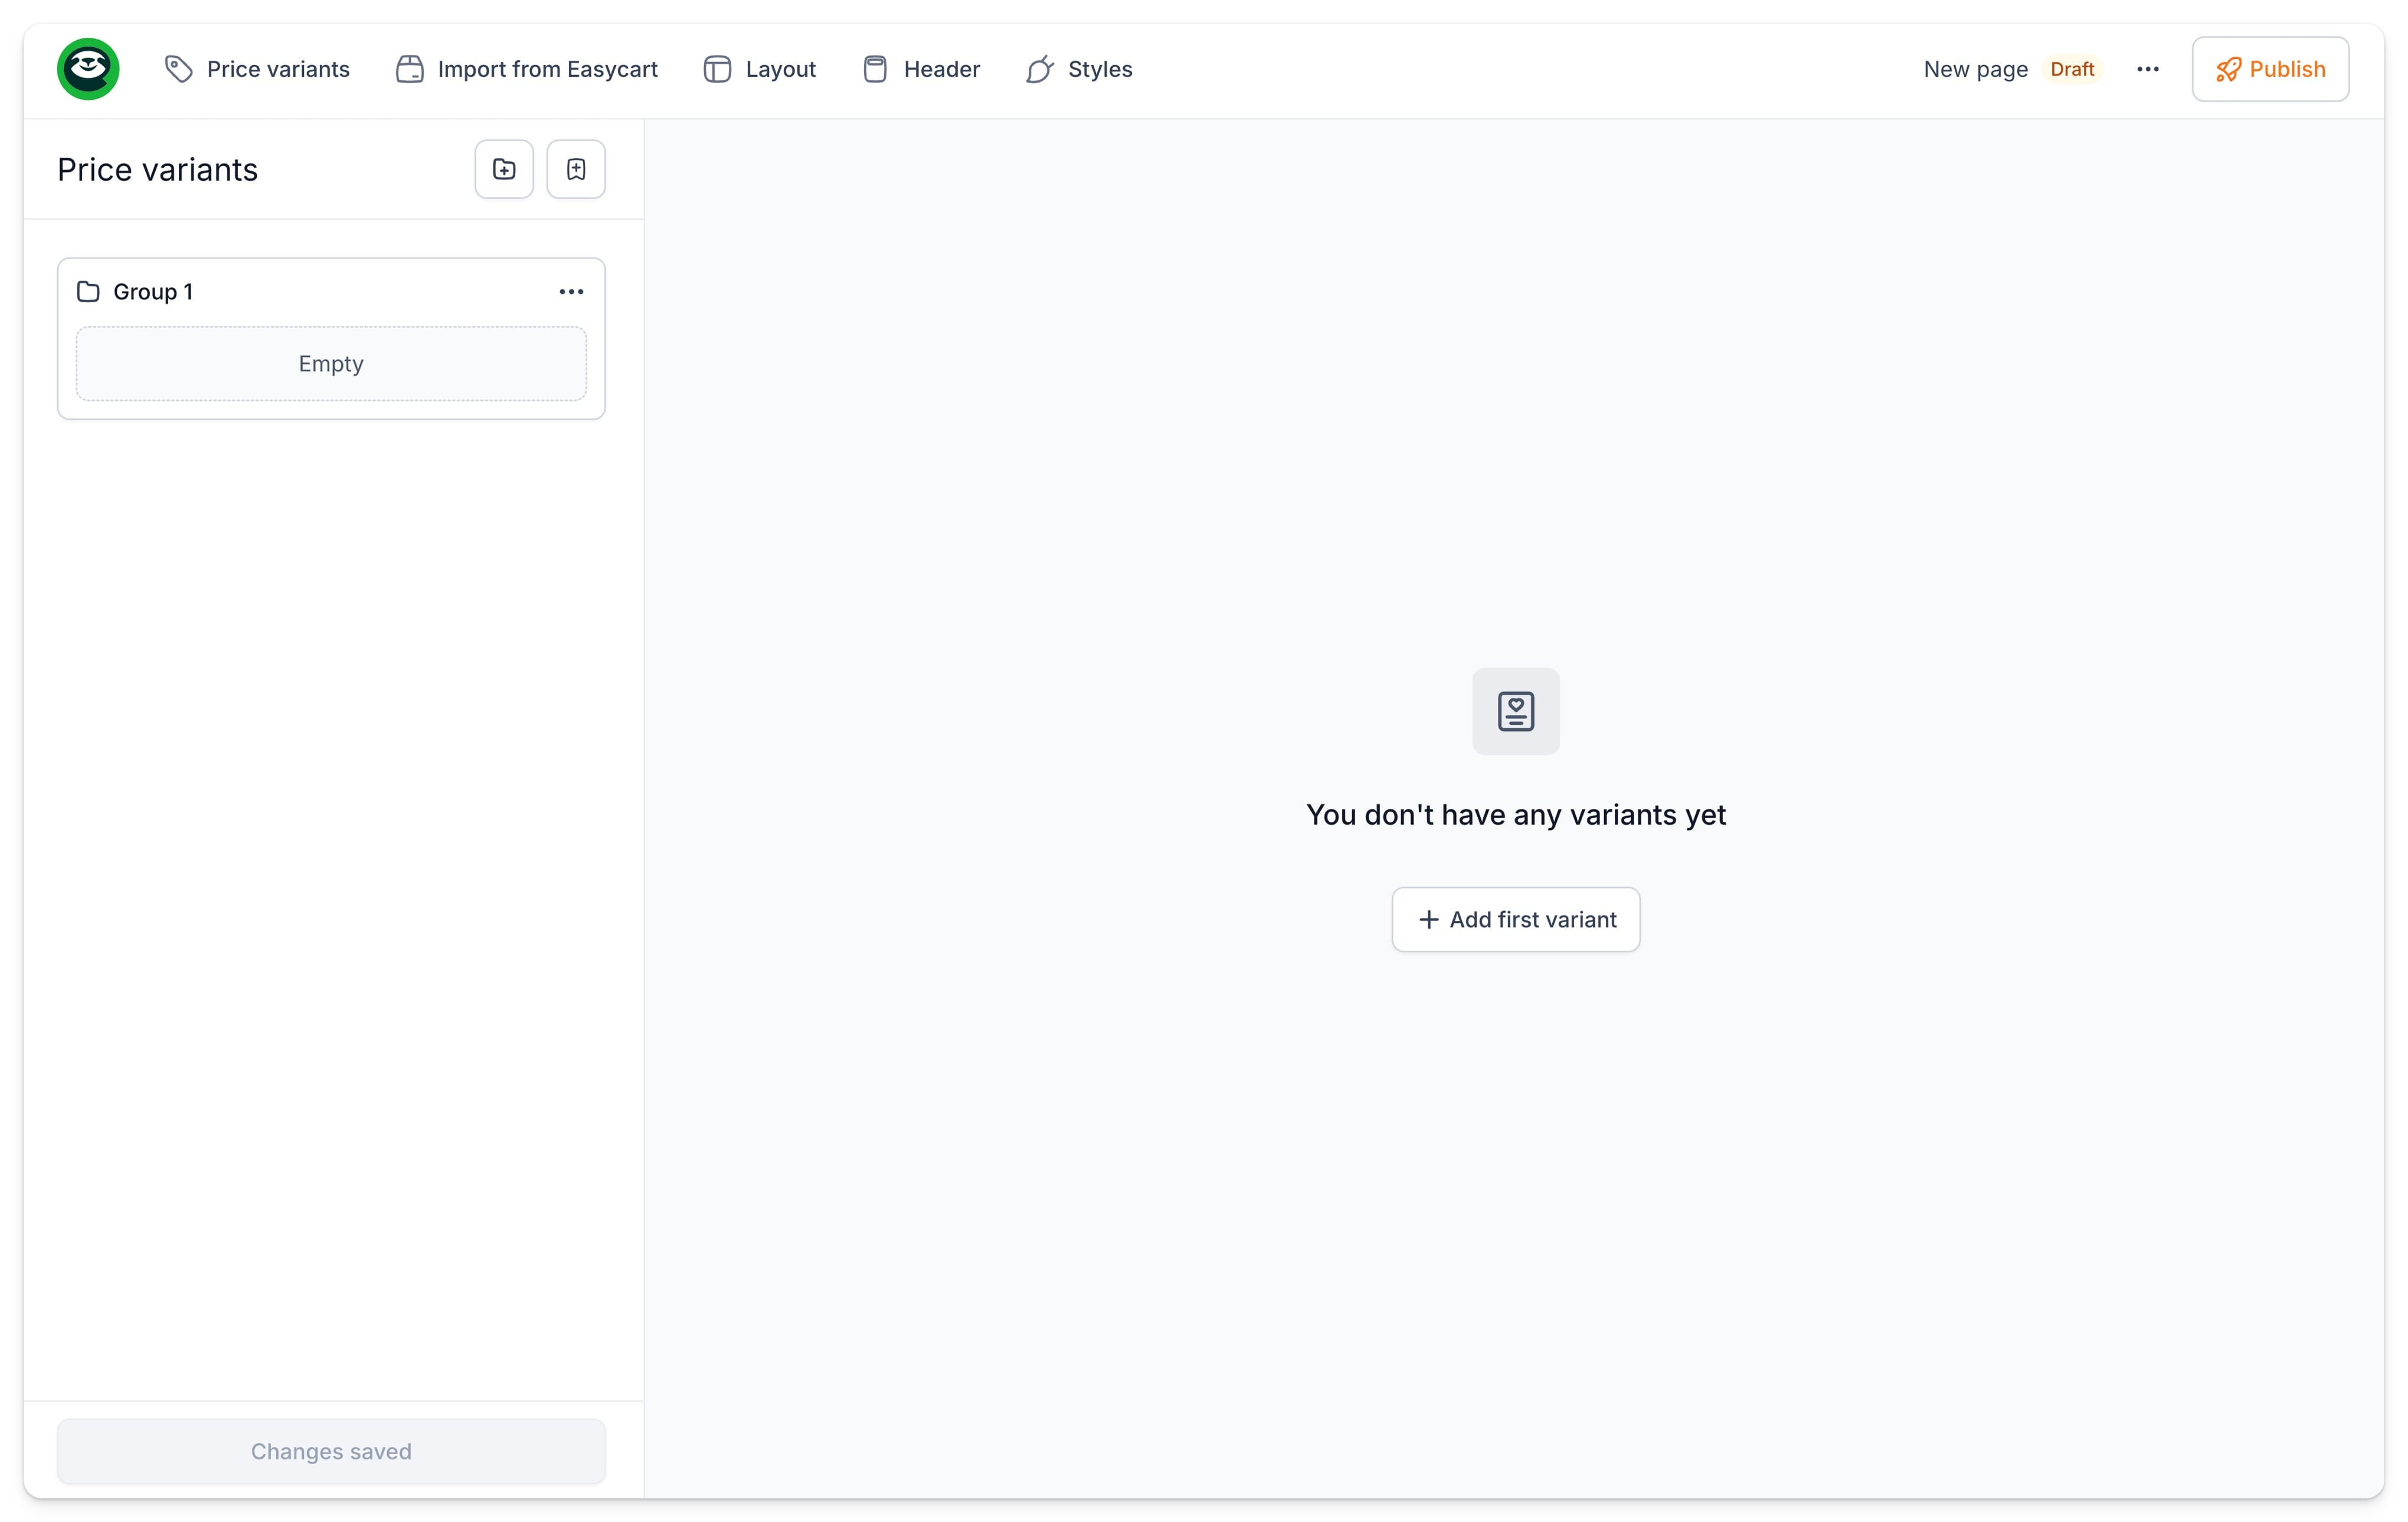
- Click +New offer page.
- Click +Add first variant.
- Set the details of your variant.
- Click Save.
This allows you to manually add as many products to your storefront as you like.
Please remember that if you want your storefront to function as an online store, you need to include buy links to your manually added products to enable purchases.
Editing price variants
When you already have some products in your Price variants list, you can both organize them and edit the details of each variant.
To organize your products into categories:
- Go to the Price variants tab.
- Click the folder icon to add a new category.
- Or click ... on the existing category to edit its details.
- Type in the category name in the Title field.
- Click Save.
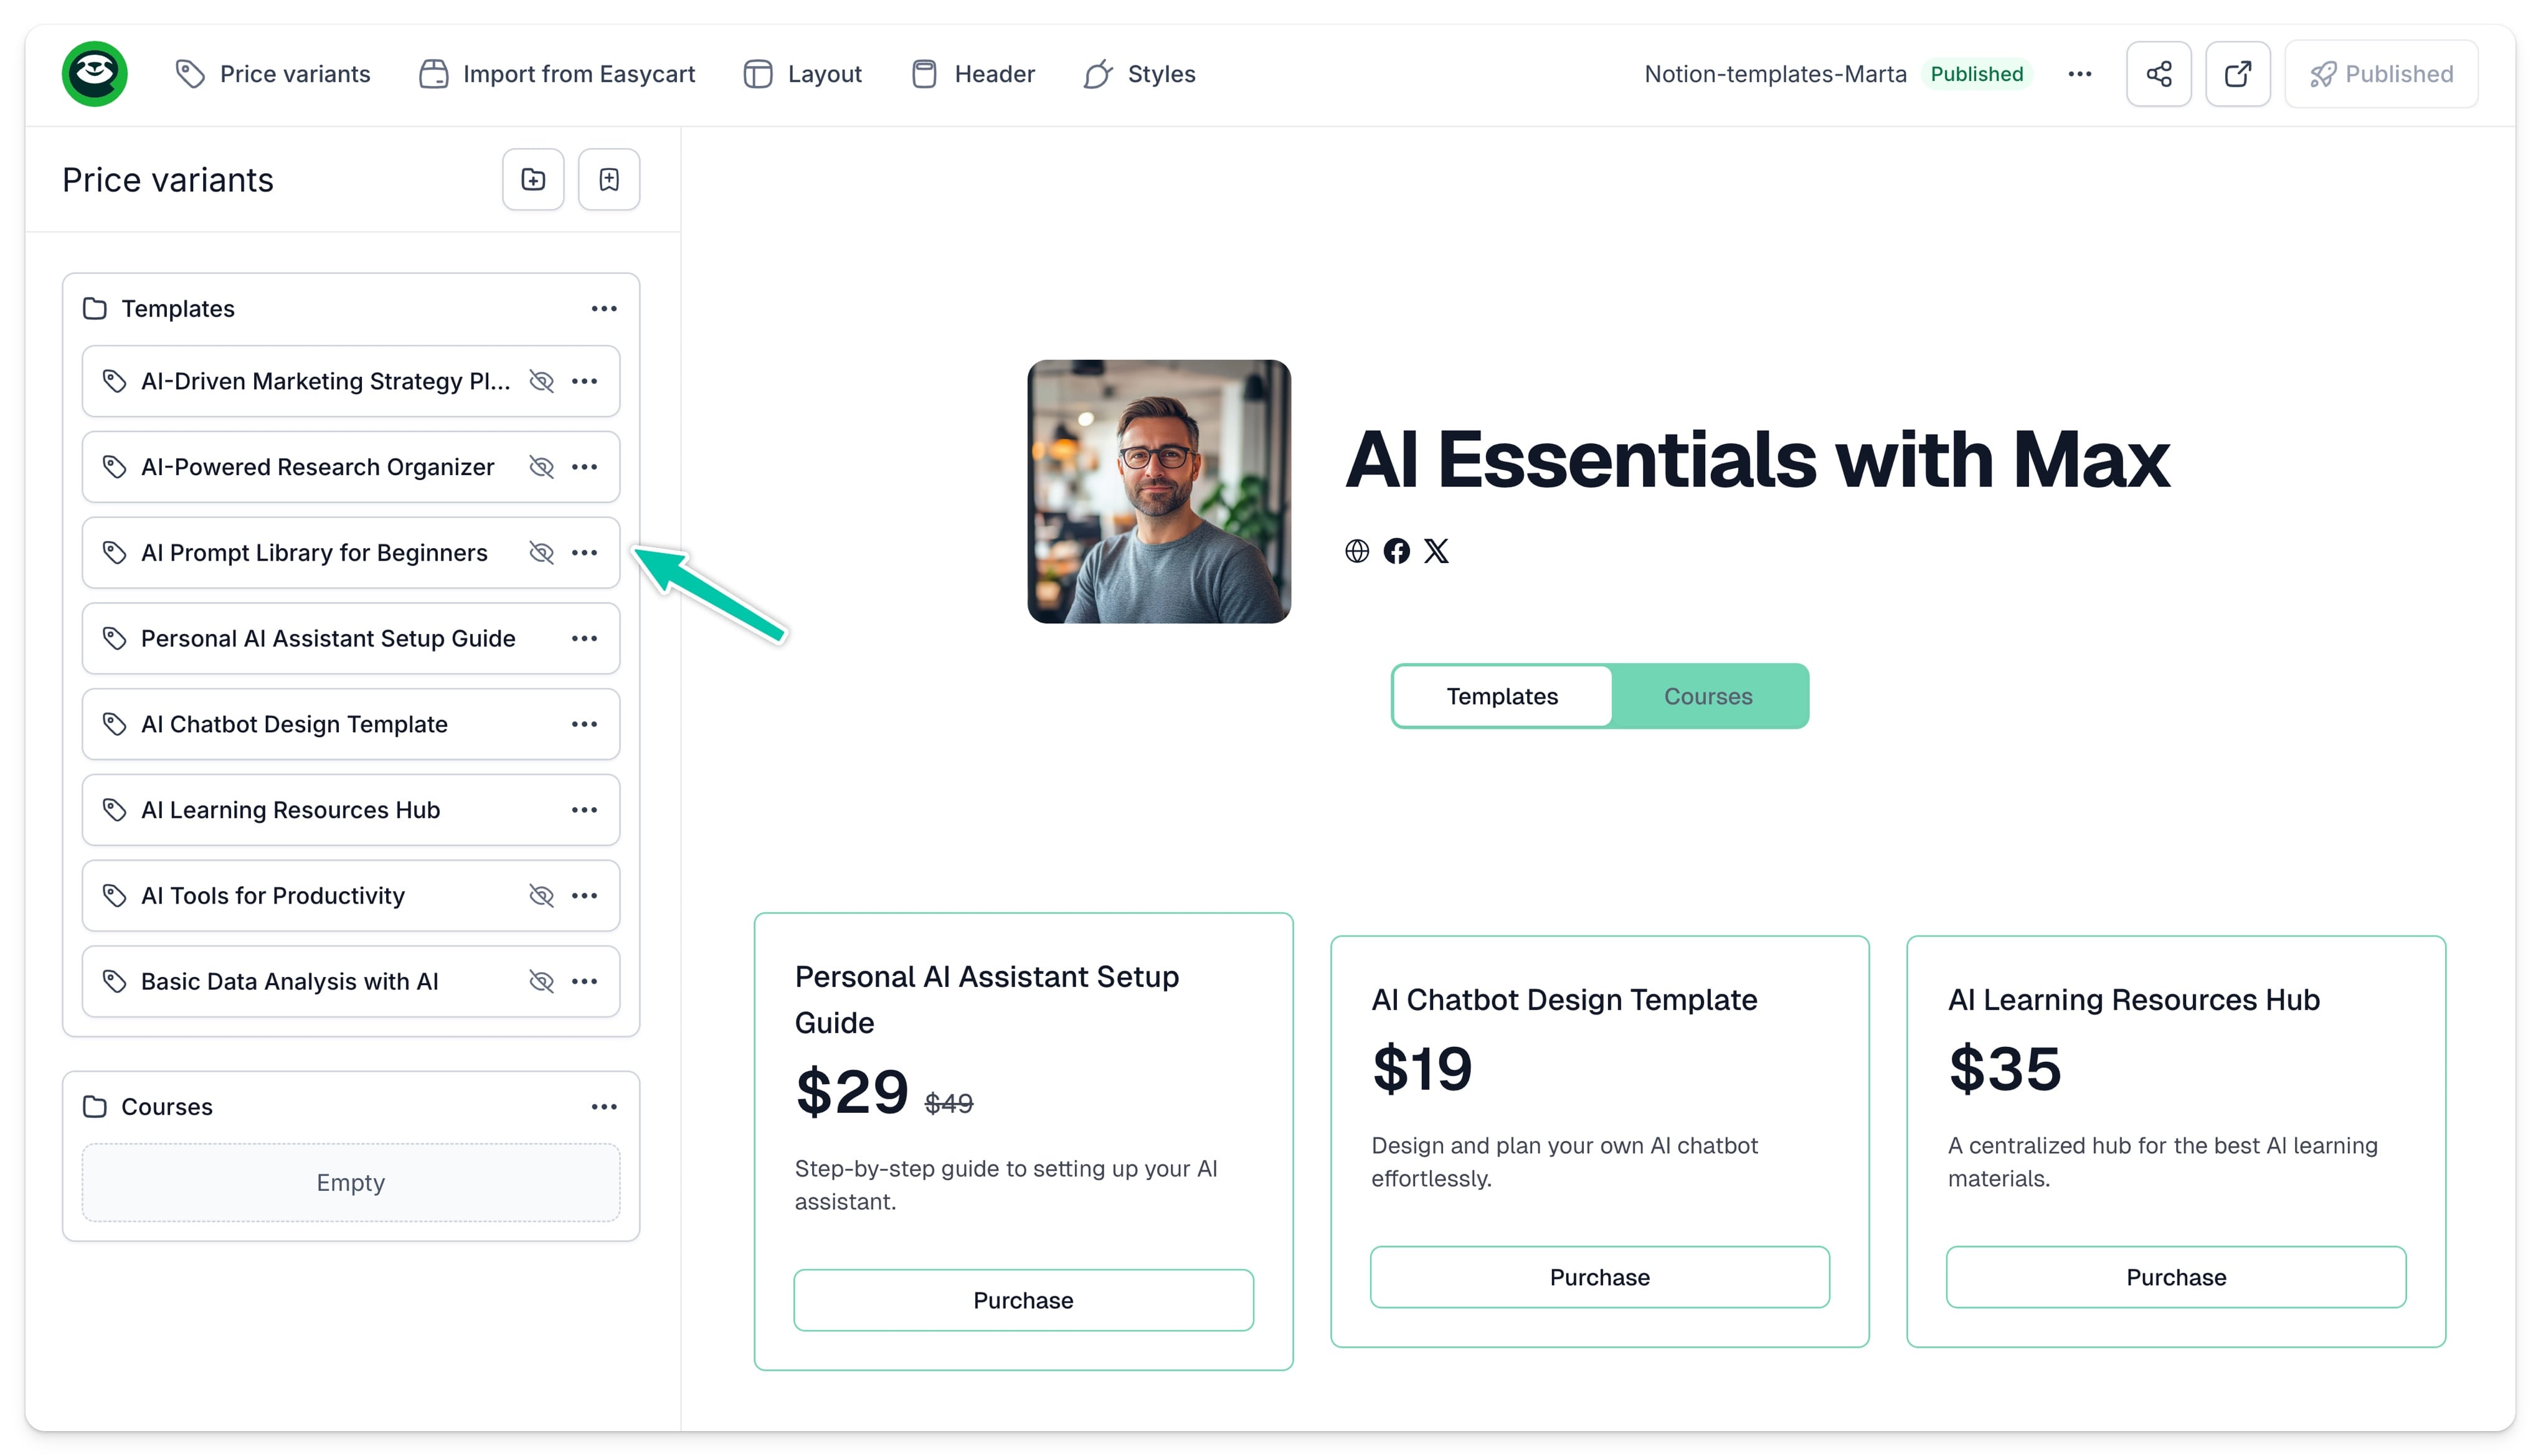
This way, you can add as many categories as you need. To organize your files under these categories, simply drag them to where they belong. You will see on the preview that each category will be displayed as a separate tab on your storefront, and assigned products will display within it automatically.
To edit product details:
- Go to the Price variants tab.
- Click ... on the tab of the product you want to edit.
- Edit the details of the product.
- Click Save.
Please note that for storefronts automatically generated and synchronized with Easycart, some changes won’t be possible, as certain fields will besynchronized with Easycart products, such as the price.
The product details that you can edit include:
- Price - the current price of your product.
- Promo price - the higher price, that will be crossed out and displayed next to the main price.
- Currency - we recommend using a three-letter currency code, such as USD
- Buy link - link that directs customers to checkout
- Badge - additional information that will be displayed at the top part of the product card
- Description - any additional details about your product
- Bullet points - list of positive and negative features
- Image - upload an image that will be displayed on your product’s card
- Action button label - e.g., Choose or Purchase
Customizing offer page layout
Now let’s explore different layout options to display your products in the most effective way. Here’s how you can edit the storefront layout:
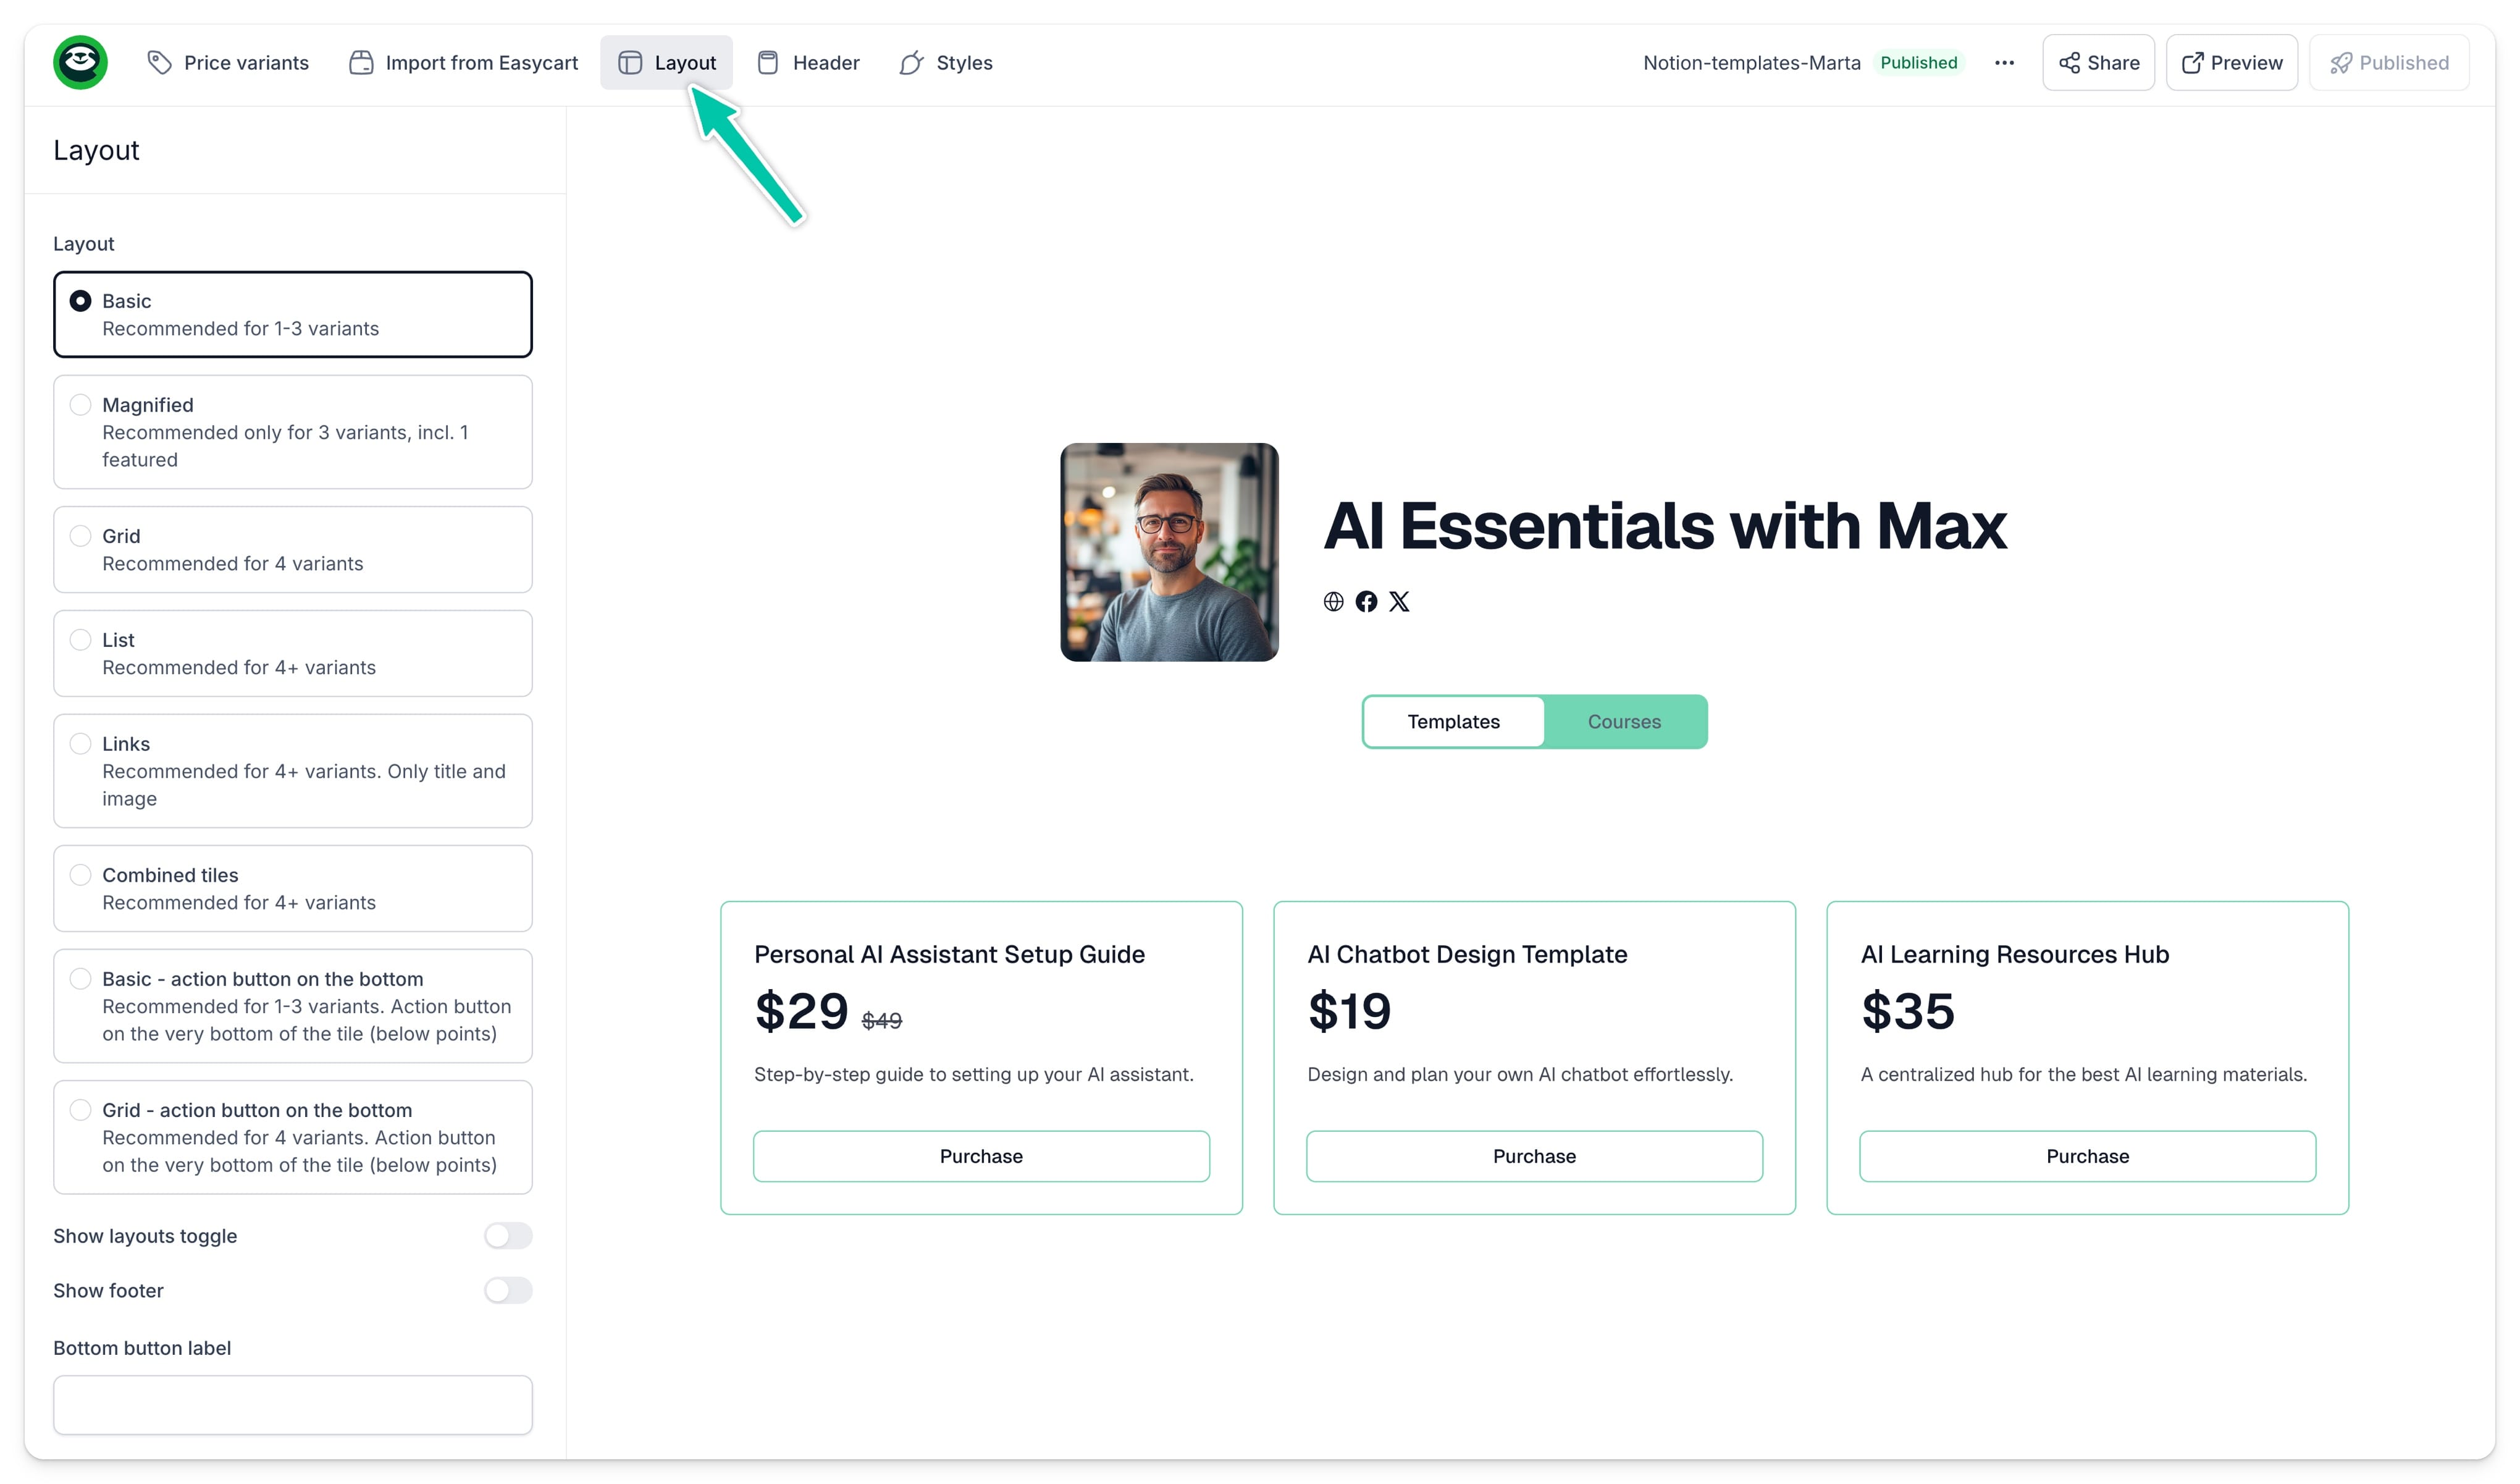
- Go to the Layout tab in the top menu.
- Choose the Layout that works best for you.
- Decide if you want to let users toggle between different layouts.
- Decide if you want to display a footer (we appreciate if you do so!).
- Add an additional button at the bottom of your storefront by entering the Bottom button label.
- Add a link to the Bottom button link field.
- Edit the default CTA label for product cards.
- Edit the default Header for features list.
- Click Save.
Adjusting offer page header
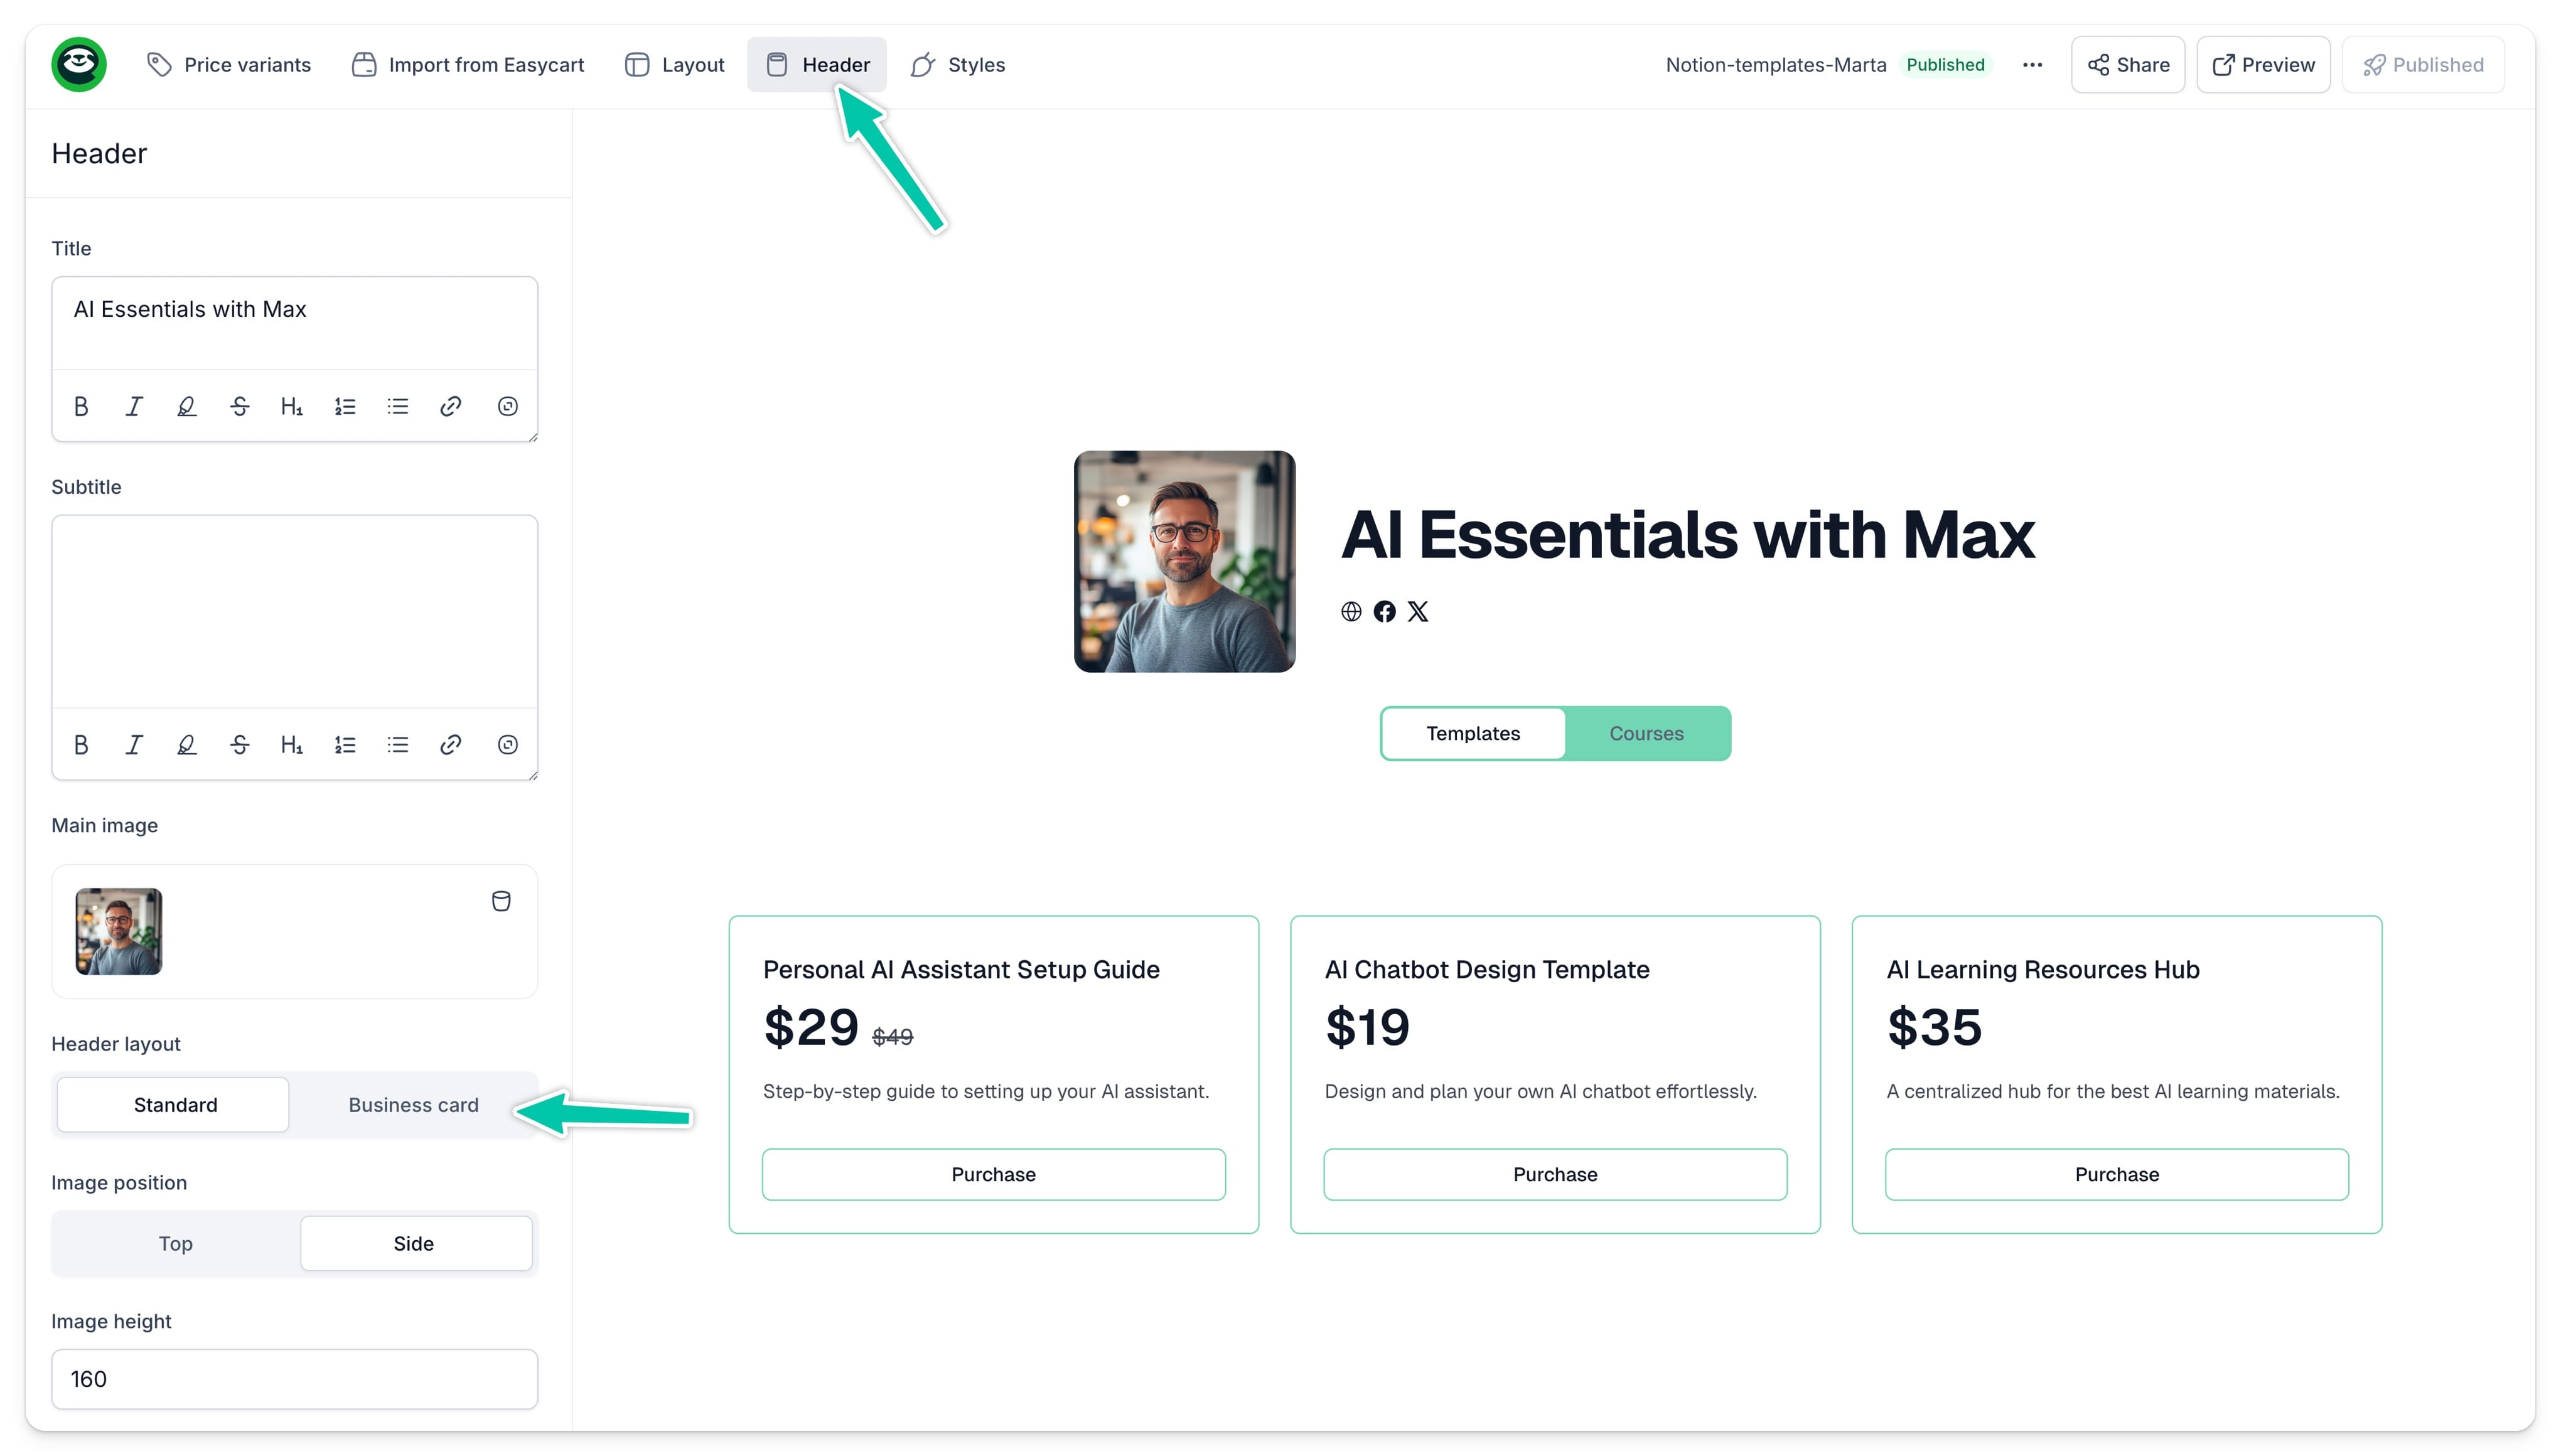
To make your storefront sleek and appealing, you can edit its header by going to the Header tab.
There, you can add a Title and Subtitle, upload a Main Image, and choose the header layout—pick from Standard and Business card layouts and preview them to decide which one will work best for you.
You can also adjust the main image position and display details. It’s also worth adding links to your social profiles. You can do this in the Social Media tab by clicking ... next to the icon of the social profile you want to display.
All changes you apply will be visible on the preview in real time.
Customizing offer page styles
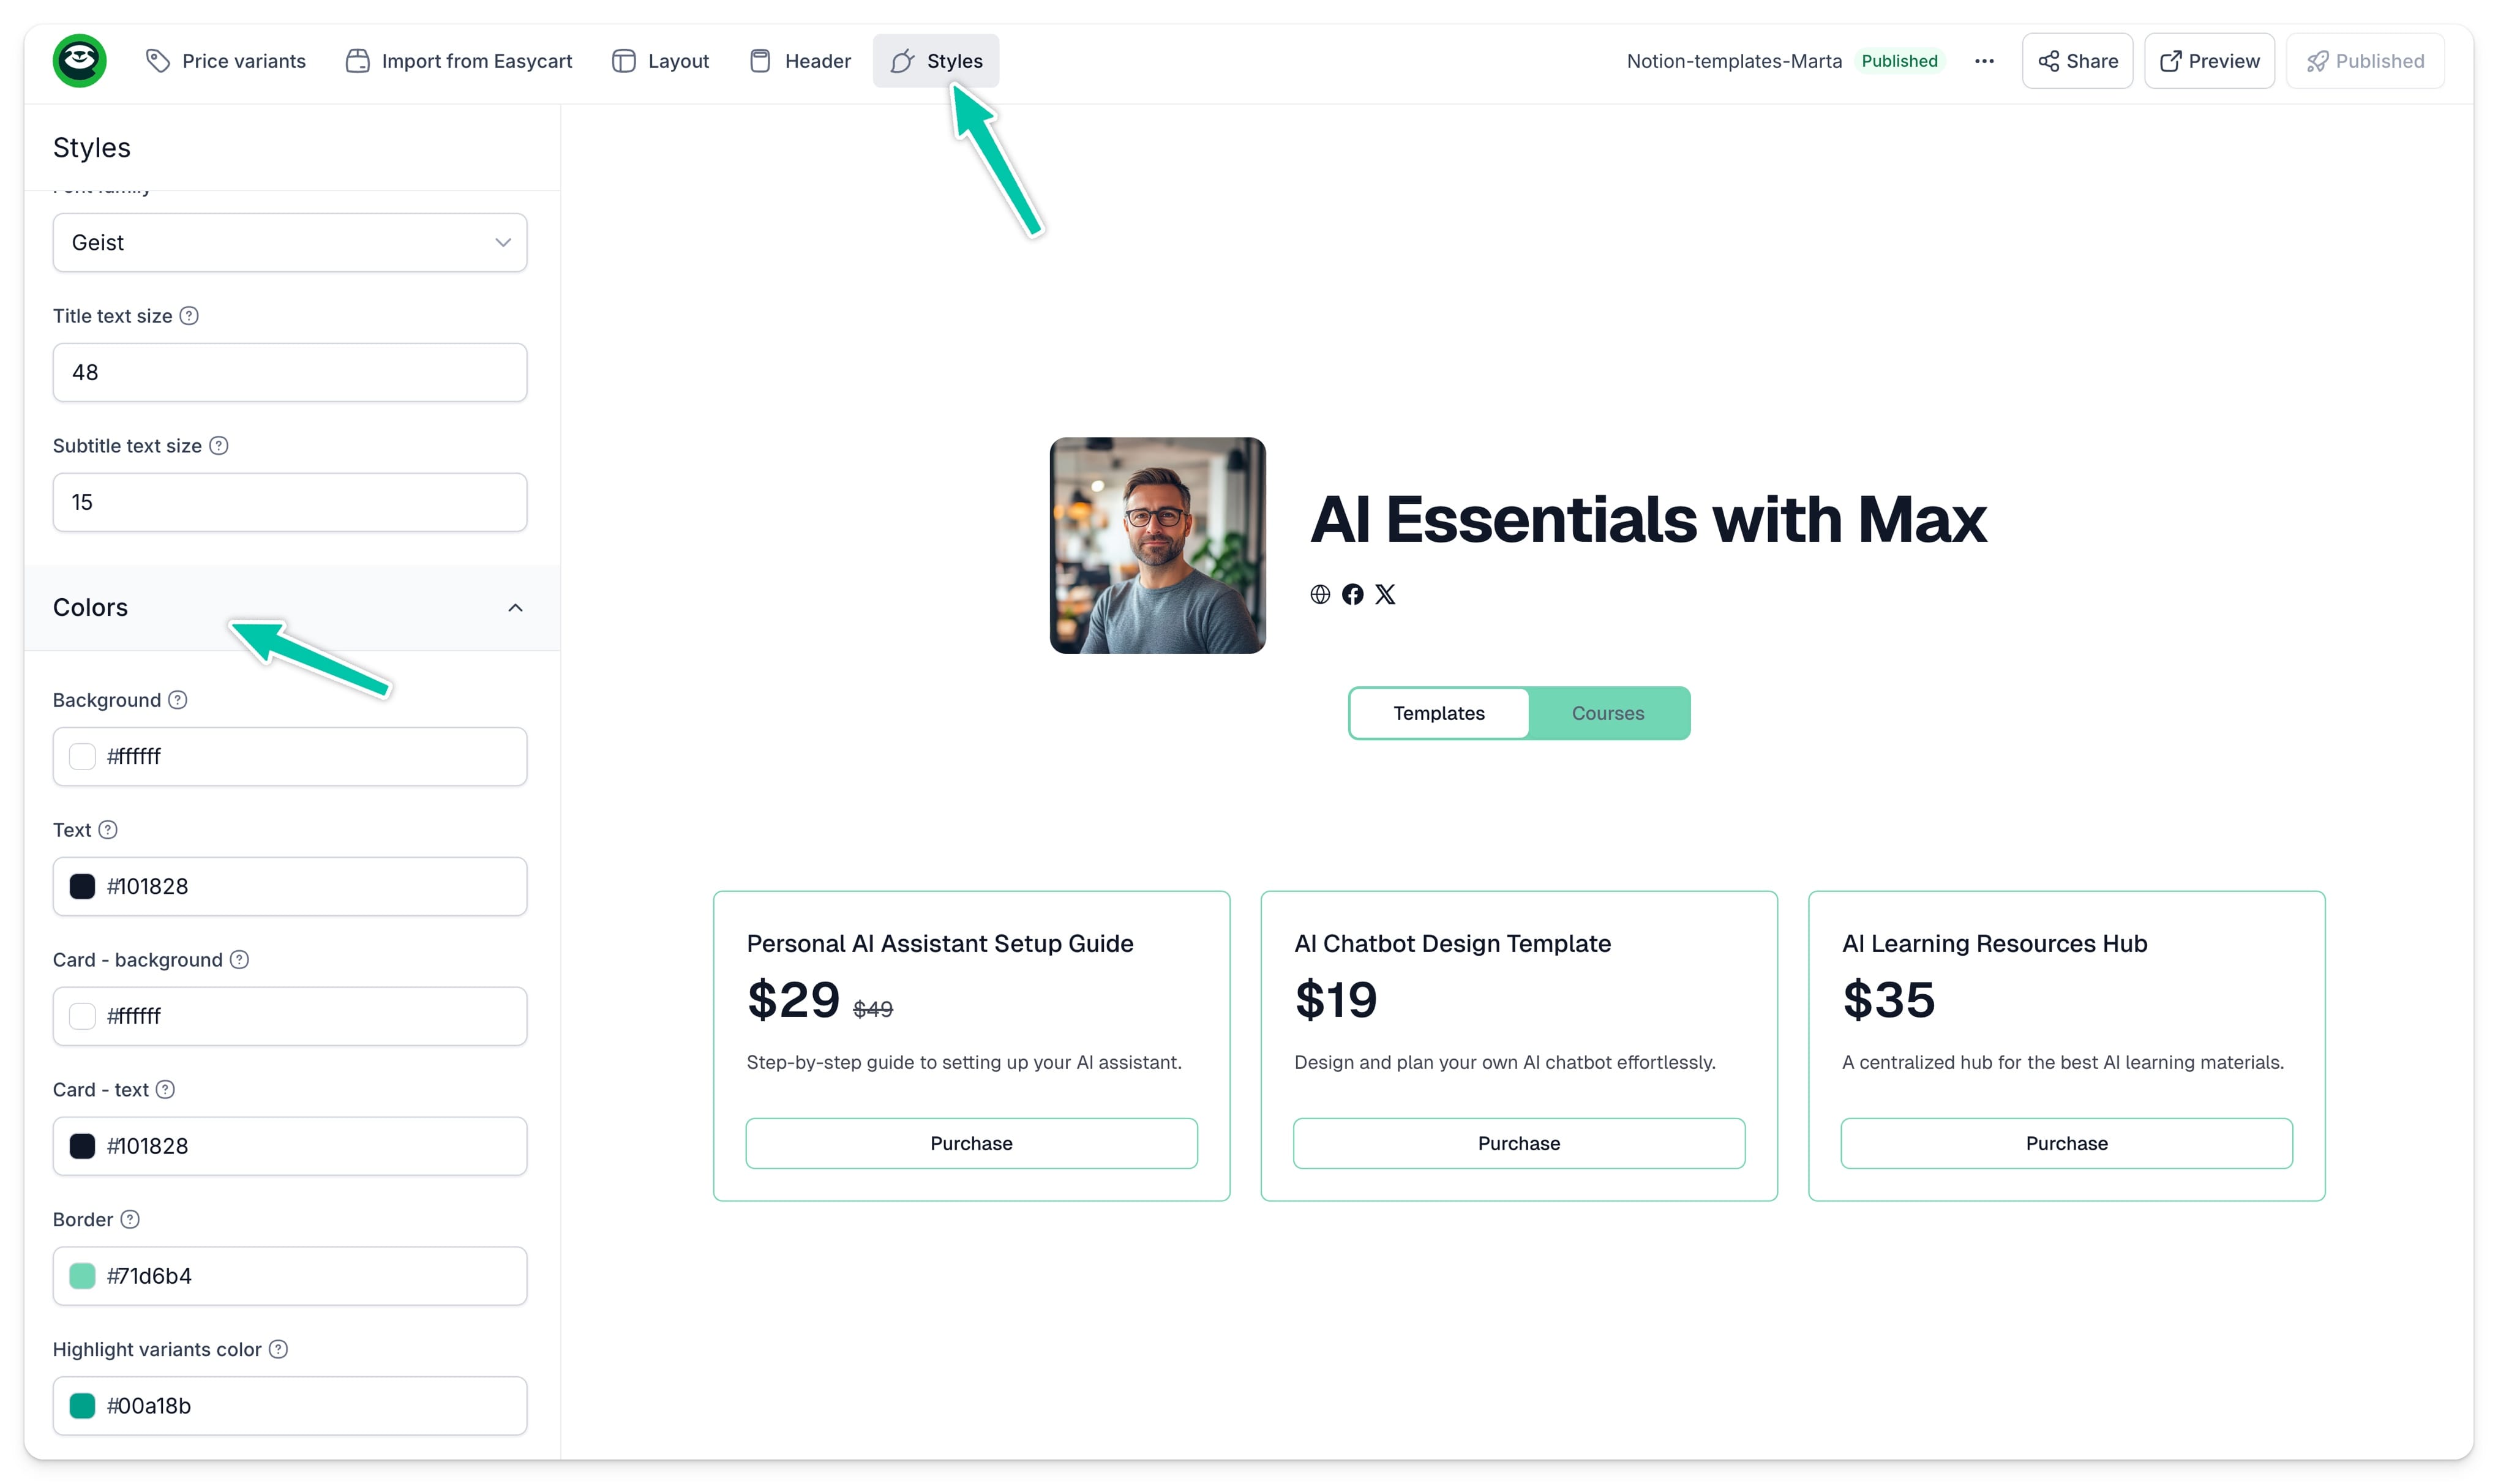
Finally, let’s adjust the overall styles and look of your storefront to make it in line with your brand. Here’s how you can do it:
- Go to the Styles tab in the top menu.
- Choose one of our predefined Themes.
- Or, adjust all colors manually in the Colors section.
- Choose a Font family.
- Adjust the Title text size and Subtitle text size.
- Click Save.
You can later freely update those details anytime, even after publishing your storefront and embedding it on your website. We will implement any changes as soon as you click Publish.
Publishing your offer page
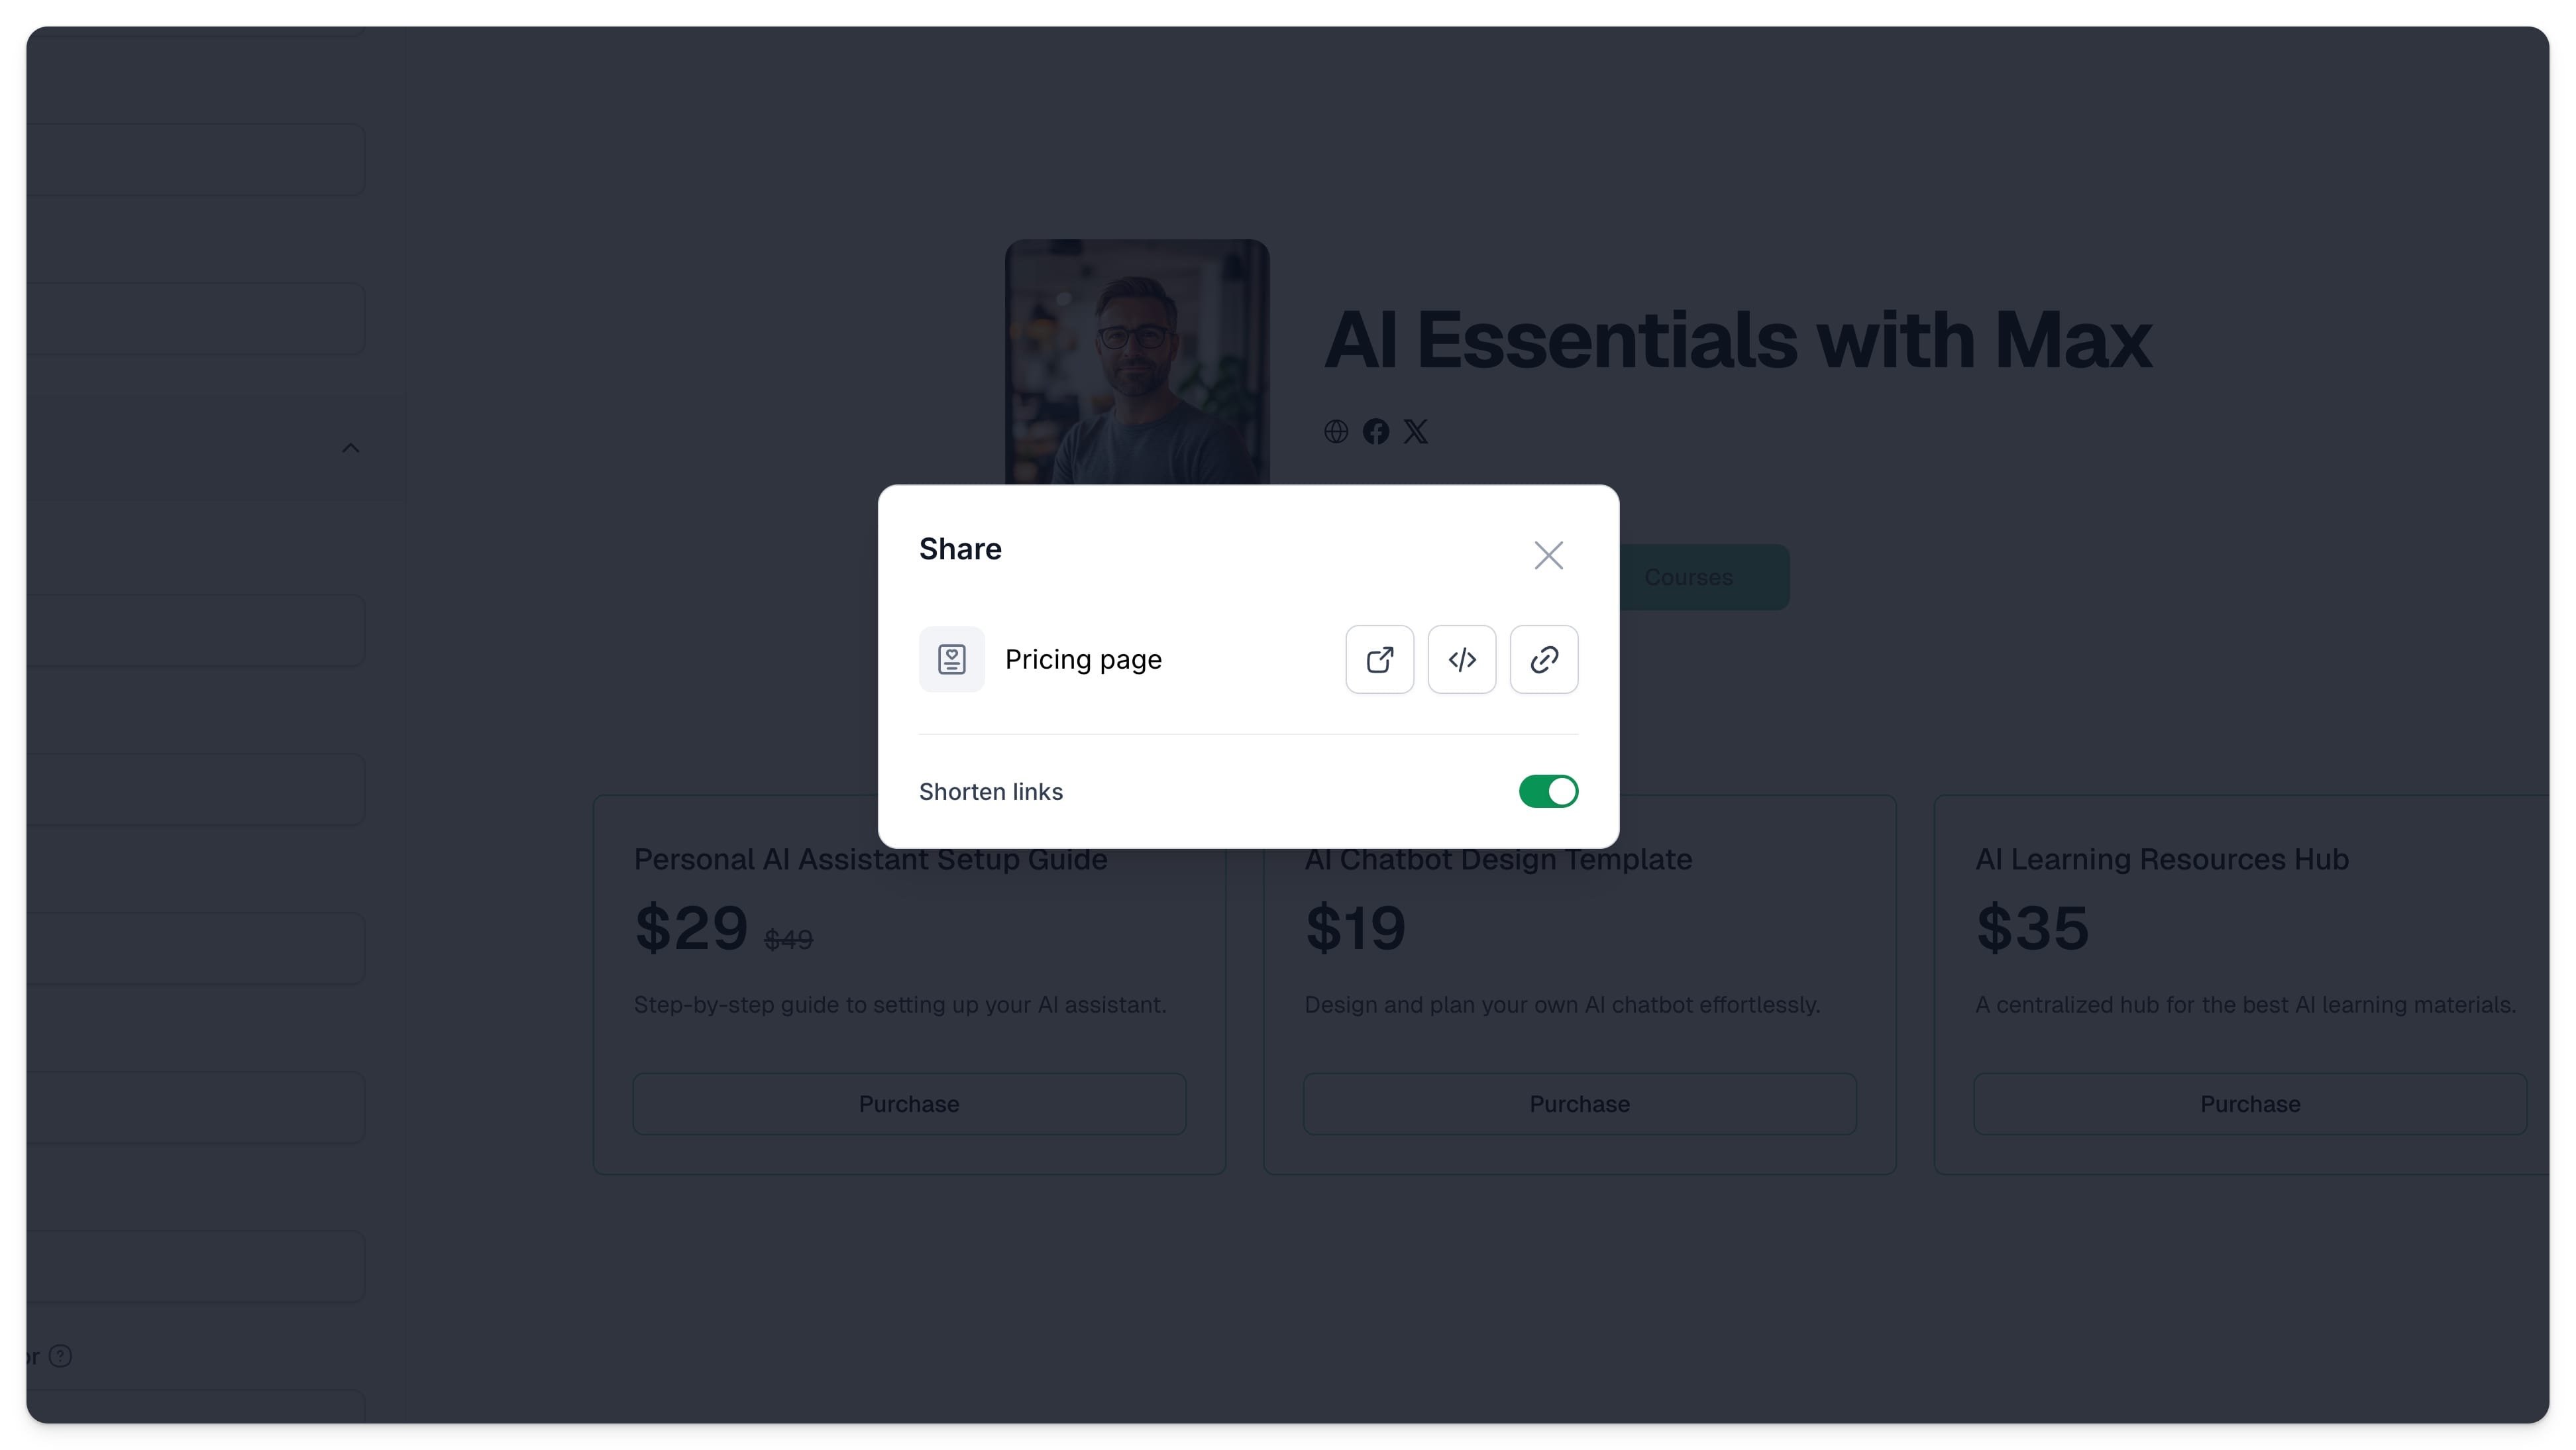
Now, that your storefront is ready, you can publish and embed it. Just click Publish and Copy link or Copy embed. Learn more about sharing and embedding your storefront, here.


