Looking to sell your Discord membership? Check how you can easily integrate with Easytools and set up automations that will add or remove users from your server based on their subscription or purchase status.
Integrate with Discord
First, to start creating scenarios, you need to integrate your Discord server with Easytools. Here’s how you can do it:
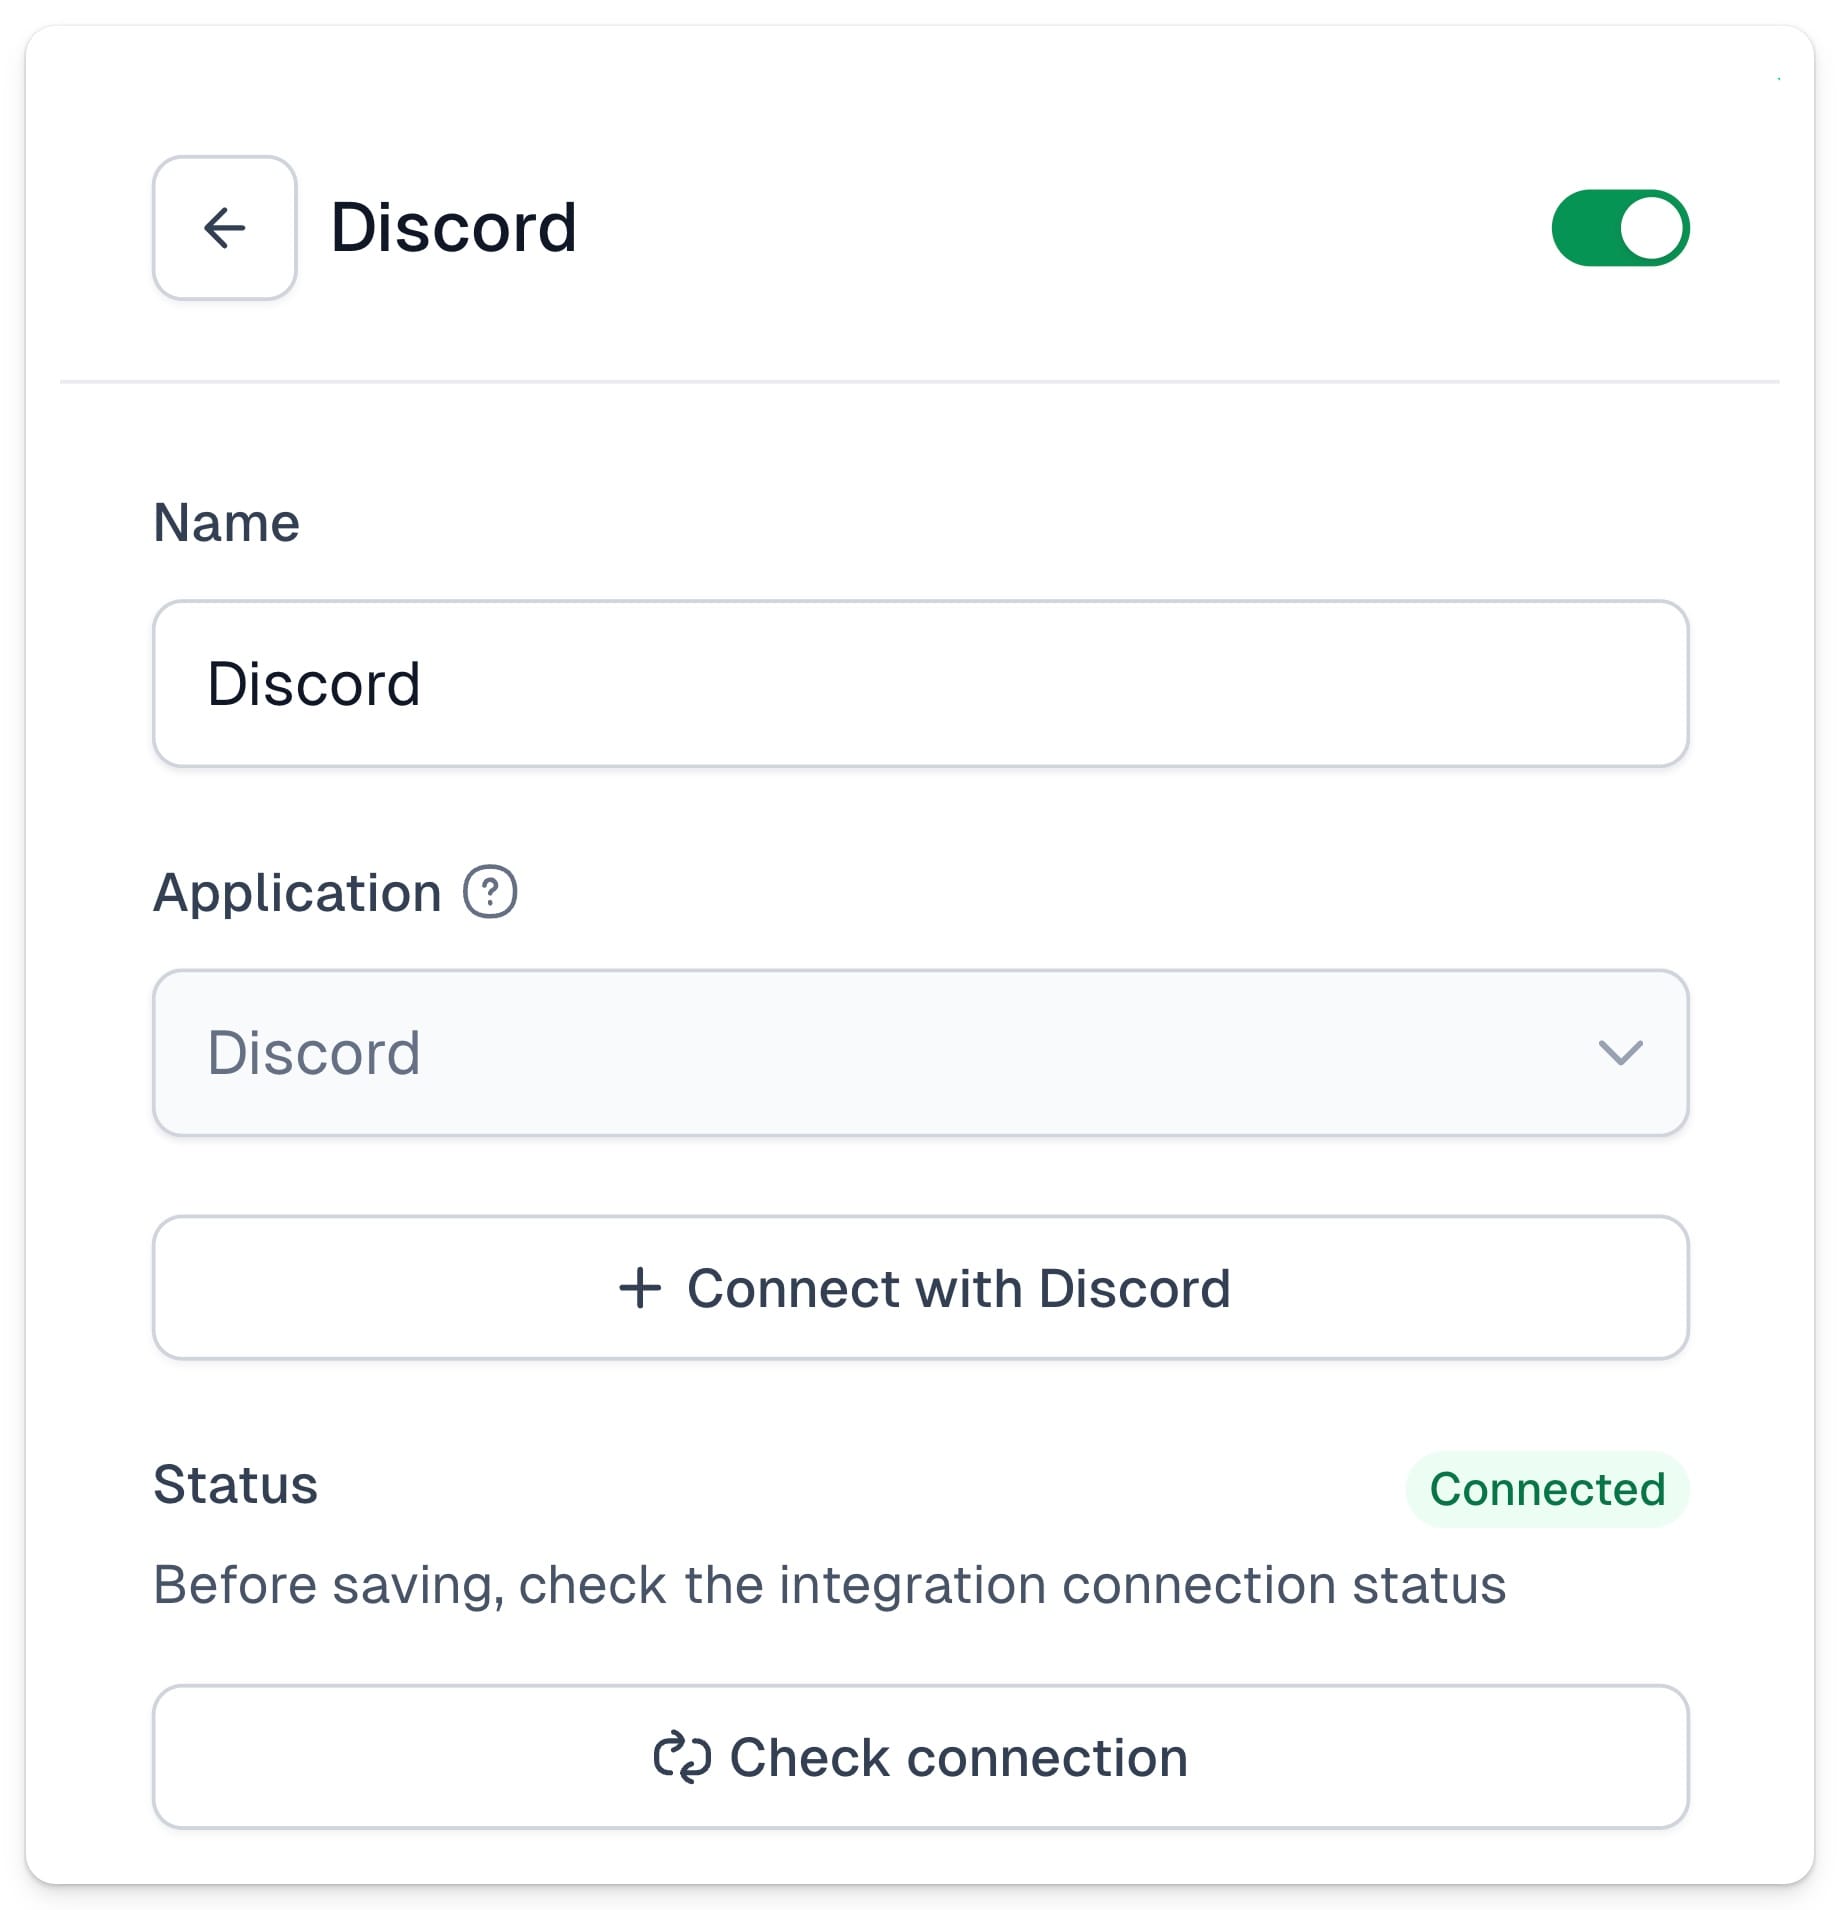
1. Go to the Store → Automations section. 2. Select Apps from the top menu. 3. Click +New app in the top right corner. 4. Enter the connection Name and choose Discord from the list of applications. 5. Click +Connect with Discord.
6. Now login to your discord account and allow Easycart to access your Discord account.
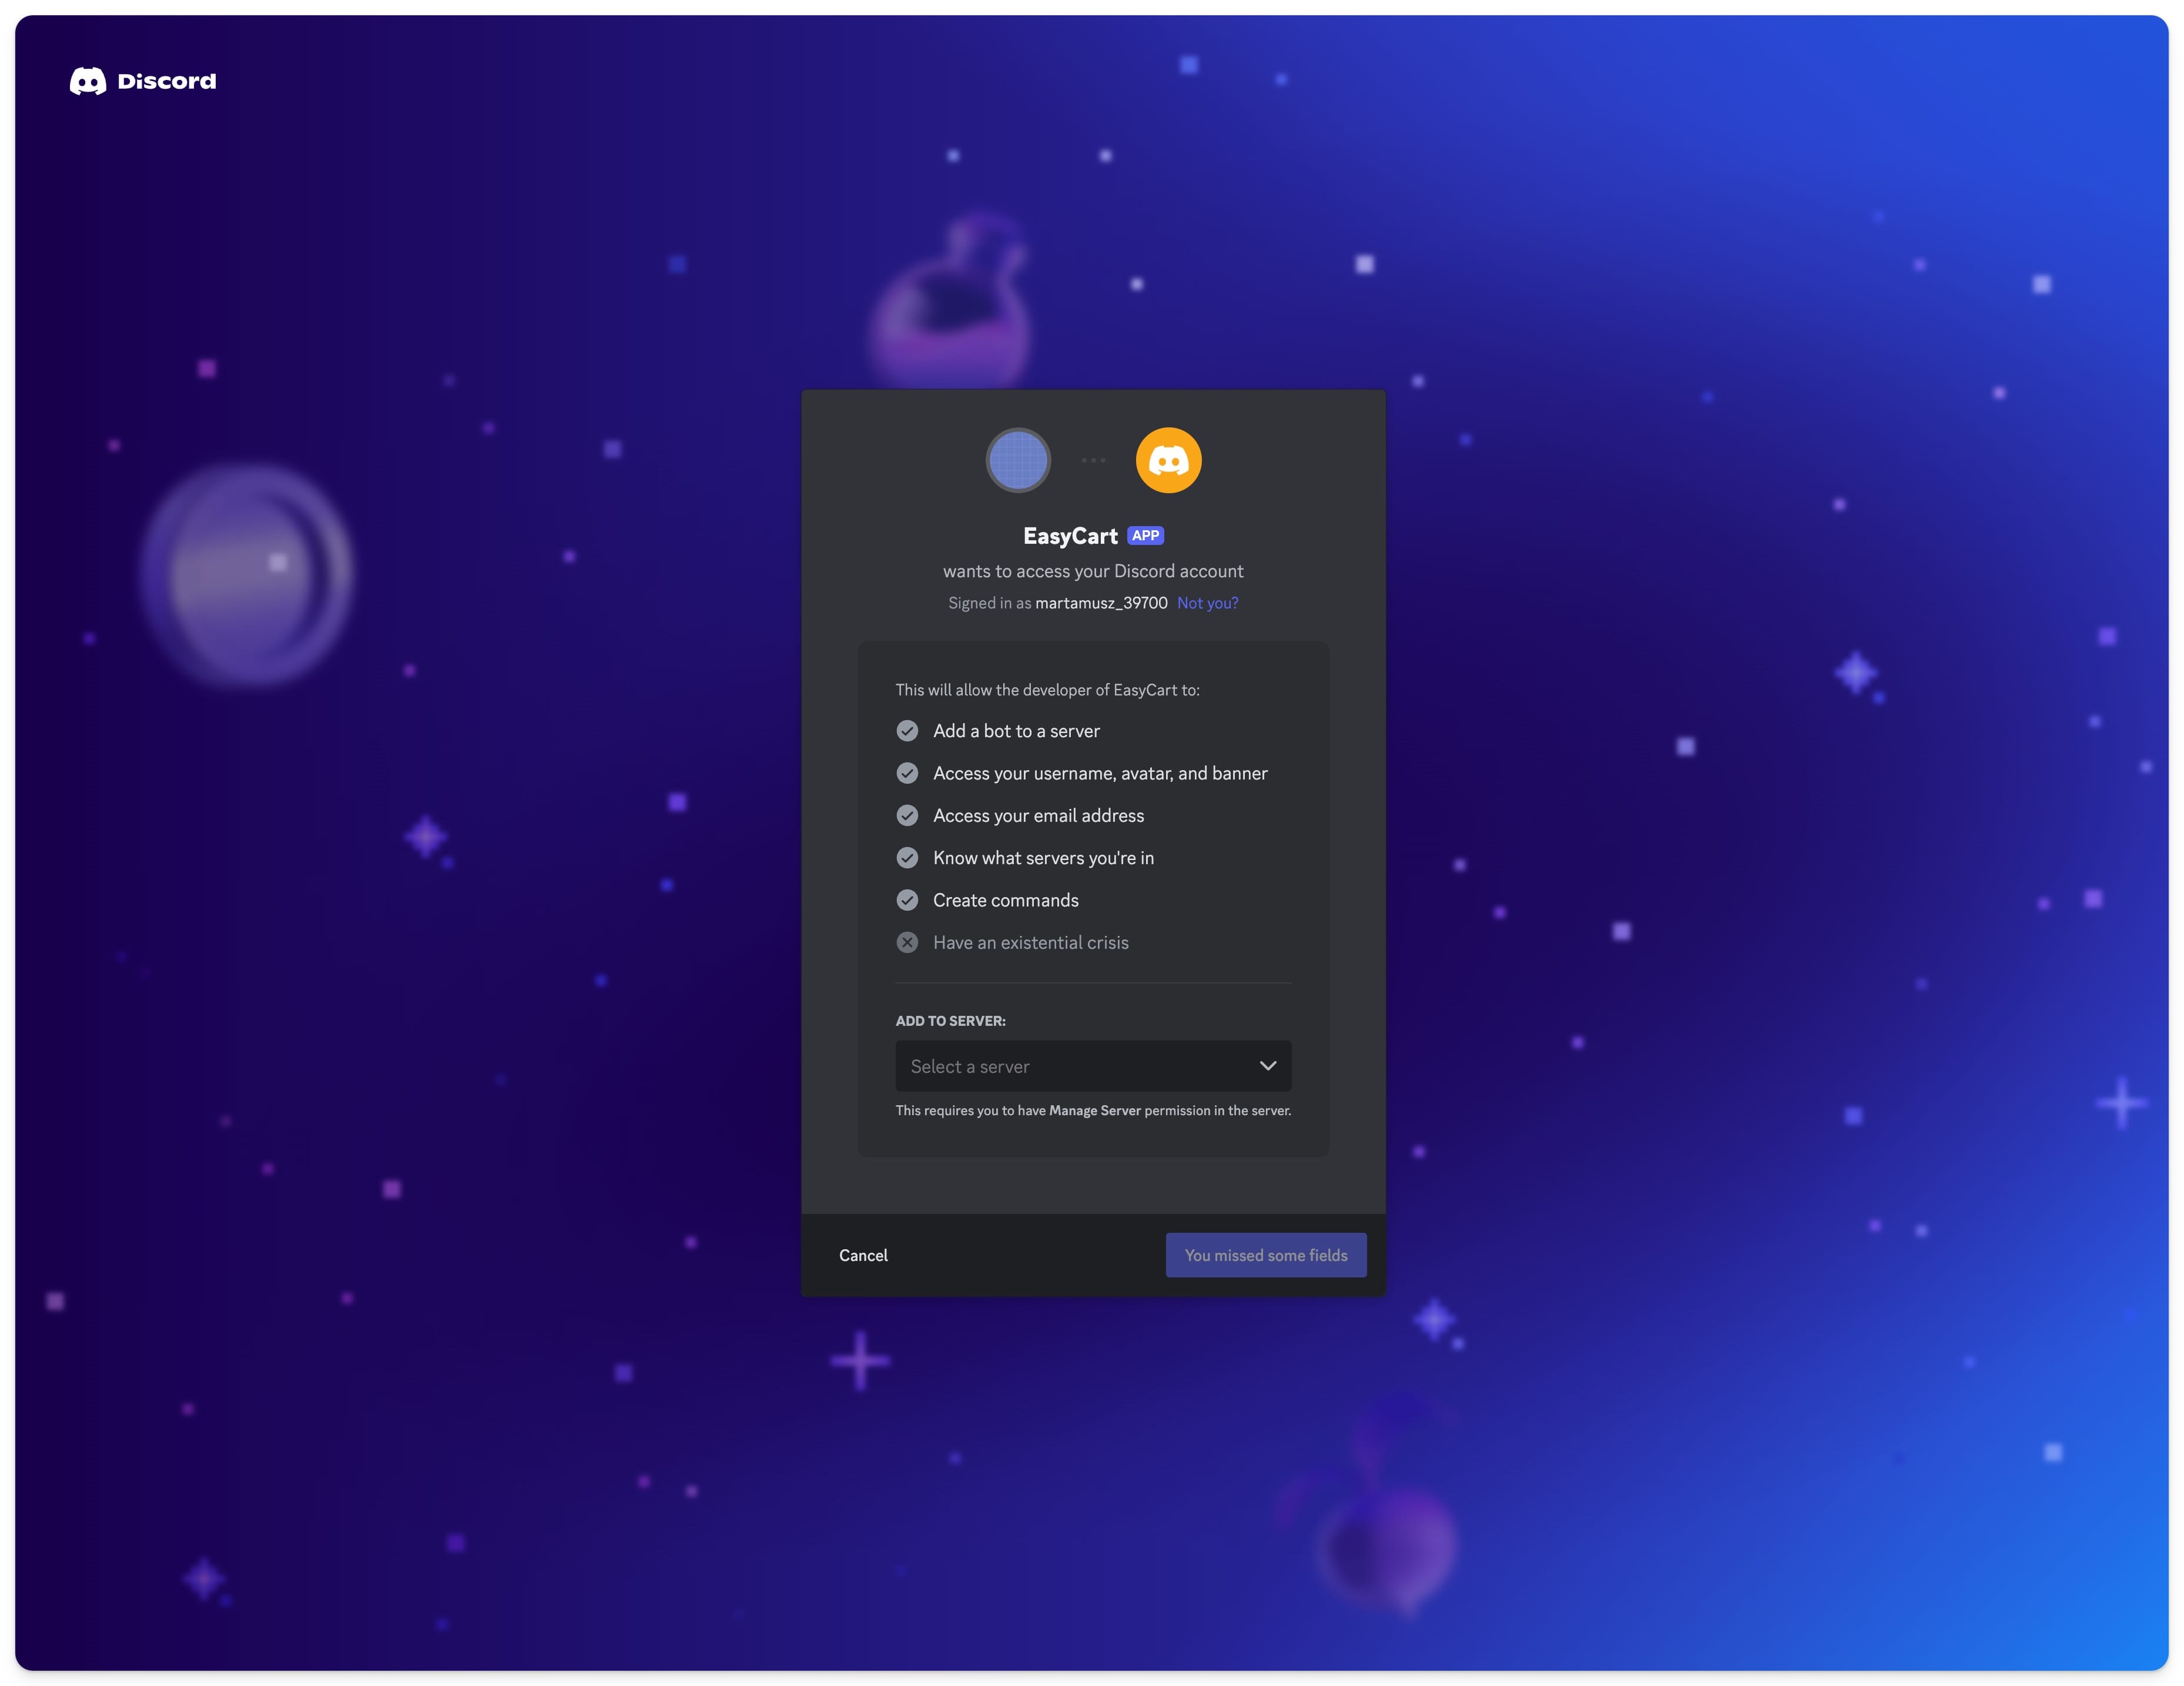
7. And authorize Easycart with Administrator permission on your server.

Congratulations! Your integration is now up and running, and you’re ready to create your automations.
Selling paid Discord memberships
There are several automation scenarios you can run after integrating your server with Easytools. In addition to automatically granting access to the server after purchase, you can also revoke access or assign specific roles to your users.
Automatically grant access to the server
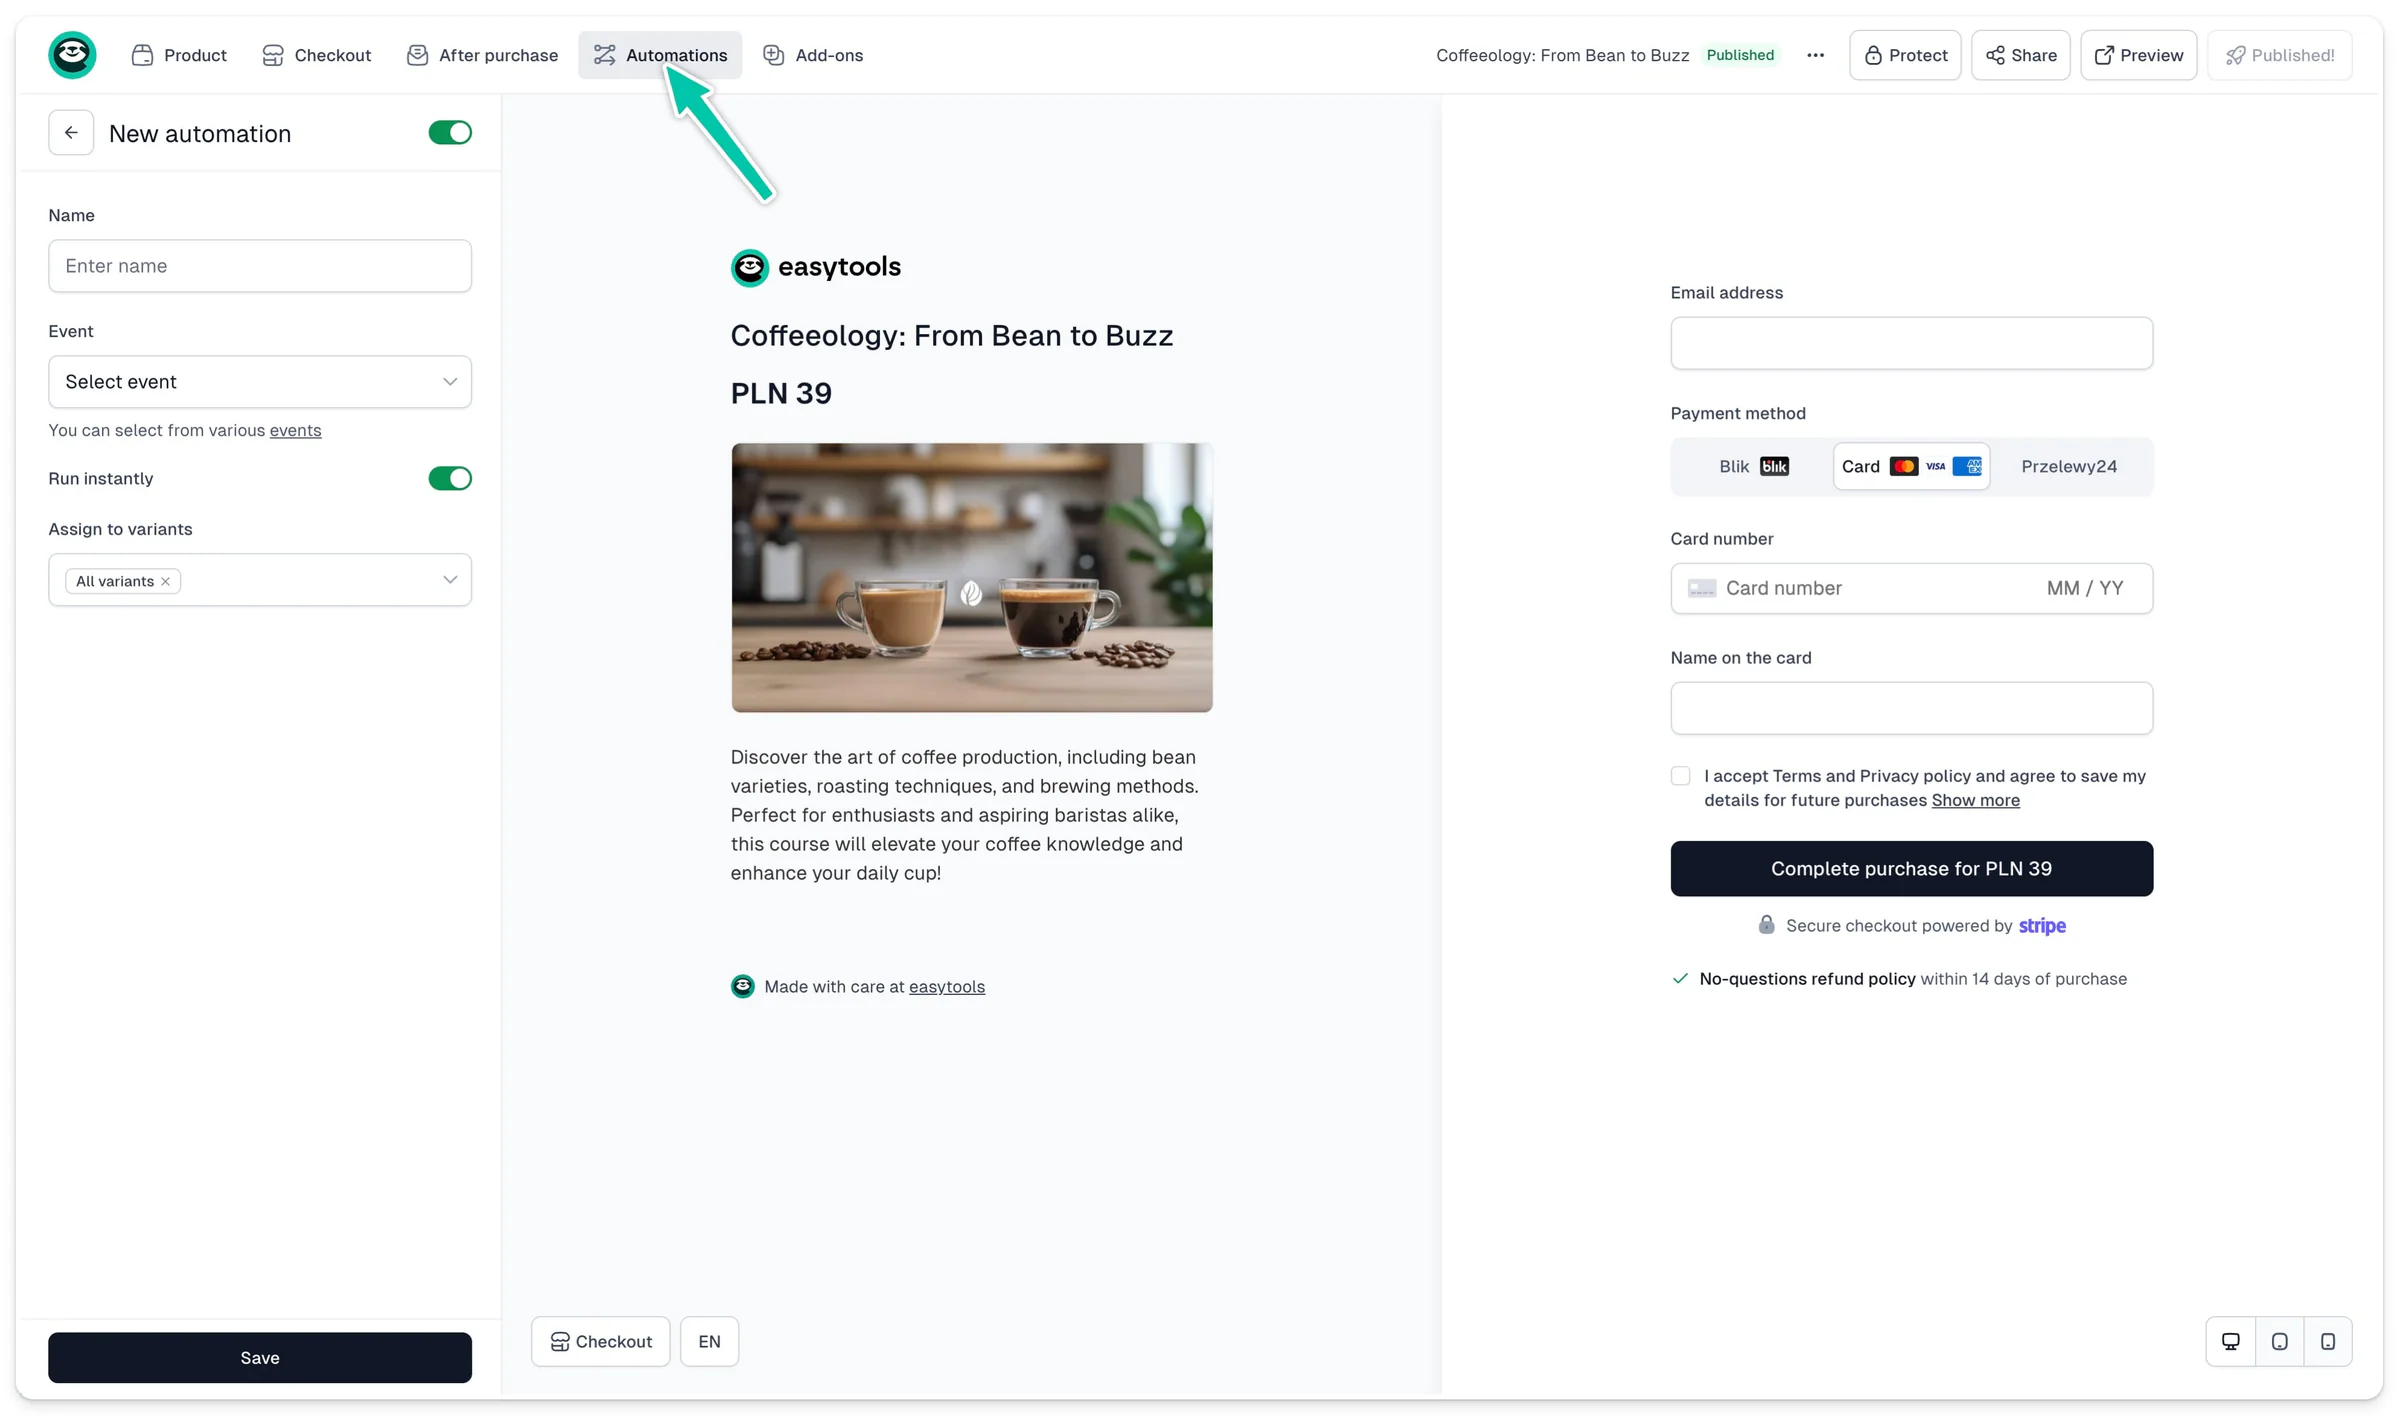
Let’s start with a simple scenario that adds those who paid for your membership to your server. You have two ways to do this: from the Automations panel or directly from your checkout configurator.
This automation will work for both subscriptions and one-time purchases. For the latter, you can set the number of days after which server access will be revoked.
To create automation scenario for granting server access:
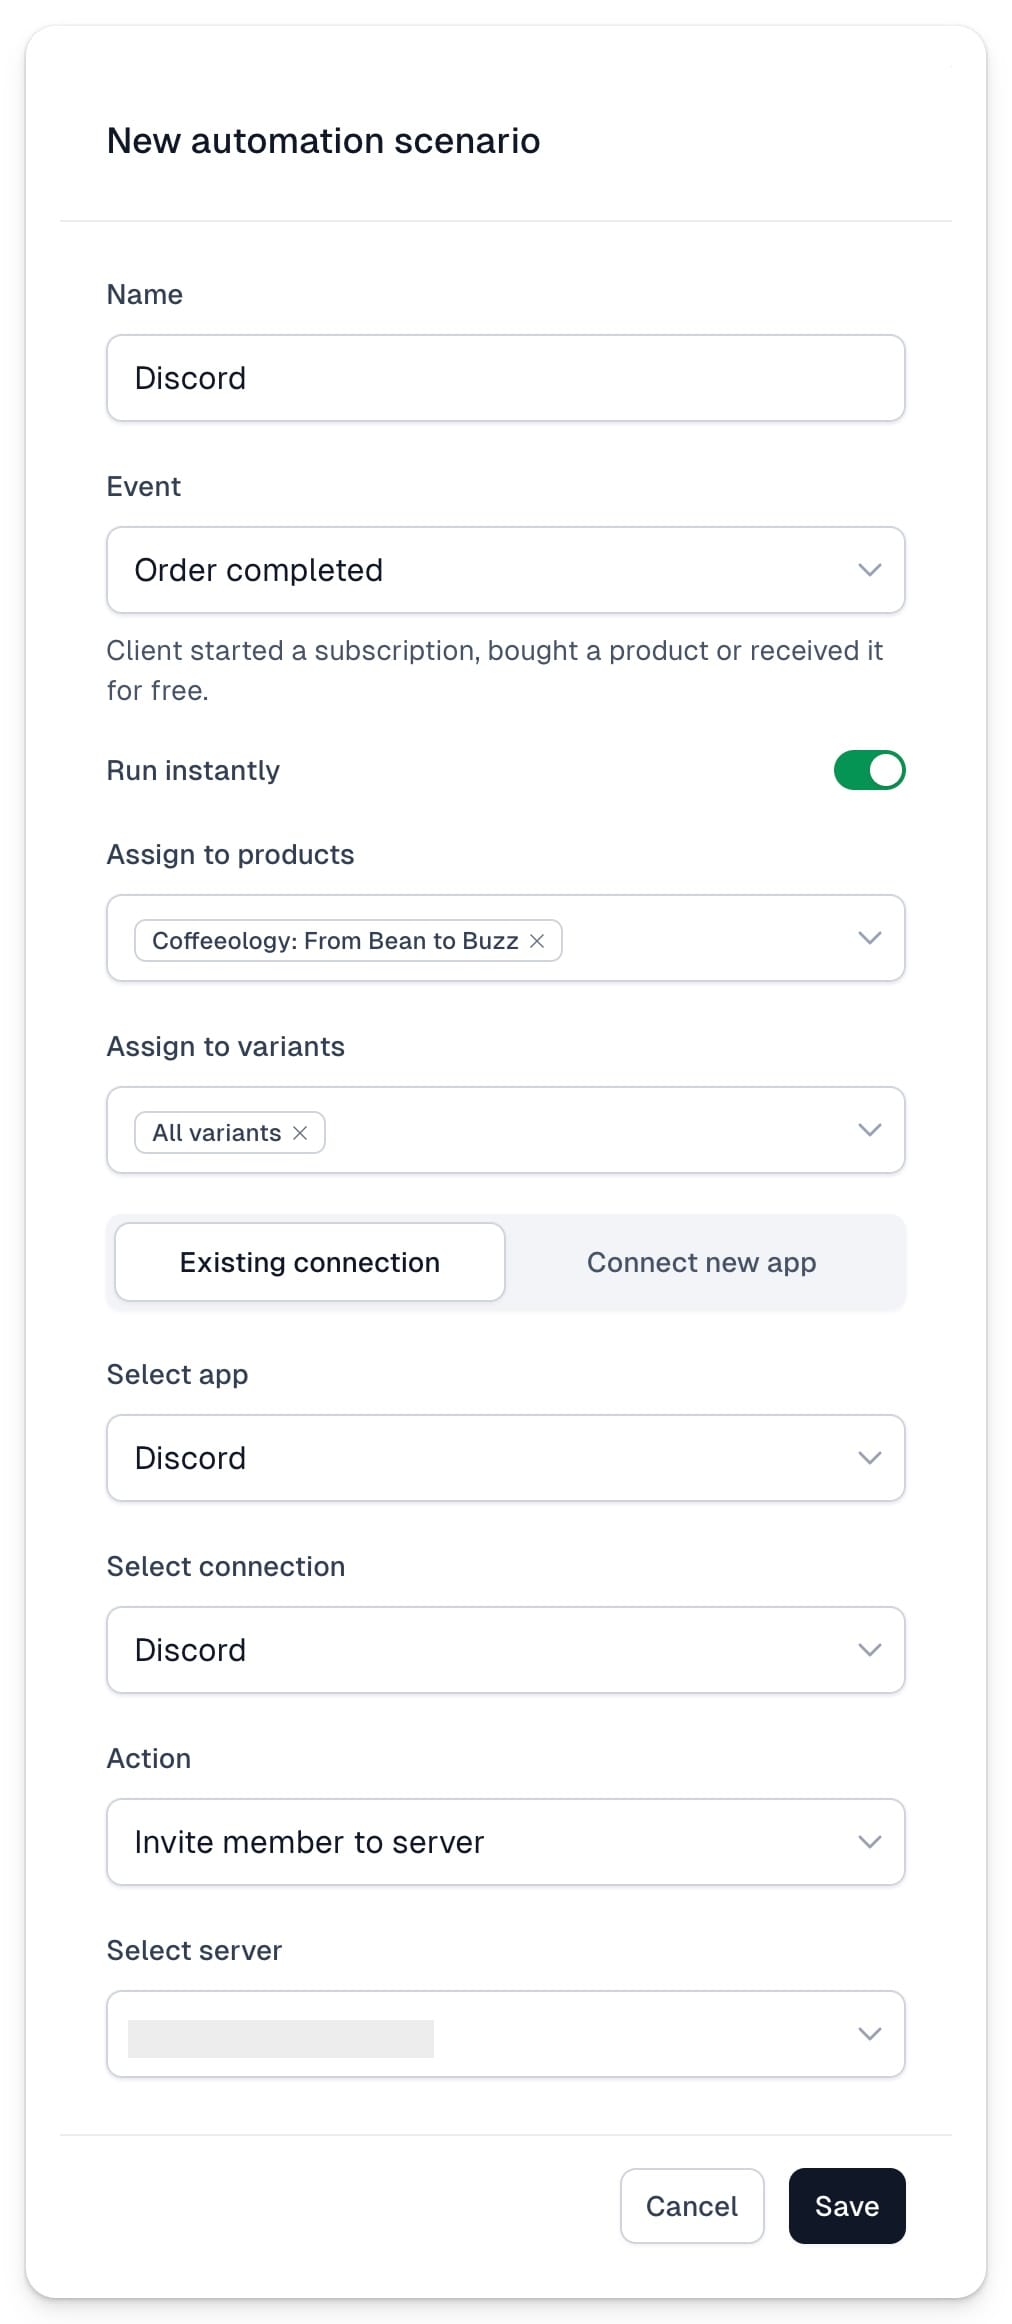
1. Go to the Store → Automations section. 2. In the top menu, select the Scenarios tab. 3. Click +New scenario in the top right corner. 4. Enter a Name. 5. In the Event field, select Order completed. 6. Assign the Product and Variants for which you want to run the scenario. 7. In the Select app field, select the previously created Discord integration.
You can also create a new integration at this stage by selecting Connect new app, which will guide you to create a new connection.
8. In the Action field, select Invite member to server. 9. Click Select server to add your server. 10. Click Save.
You can also create the scenario in exactly the same way in your checkout configurator:
- Go to Store → Products.
- Open your product.
- Click on the Automations tab in the top menu.
- Click +New.
- Follow the same steps described above to set up your automation.
Time-limited access for one-time purchases
If you decide to sell your server memebership as one-time purchases with certain time of access, you need to specify it in your cart configurator before your customer makes a purchase. Here’s how to do it:
- Open your Product.
- In the top menu select Product→Basic.
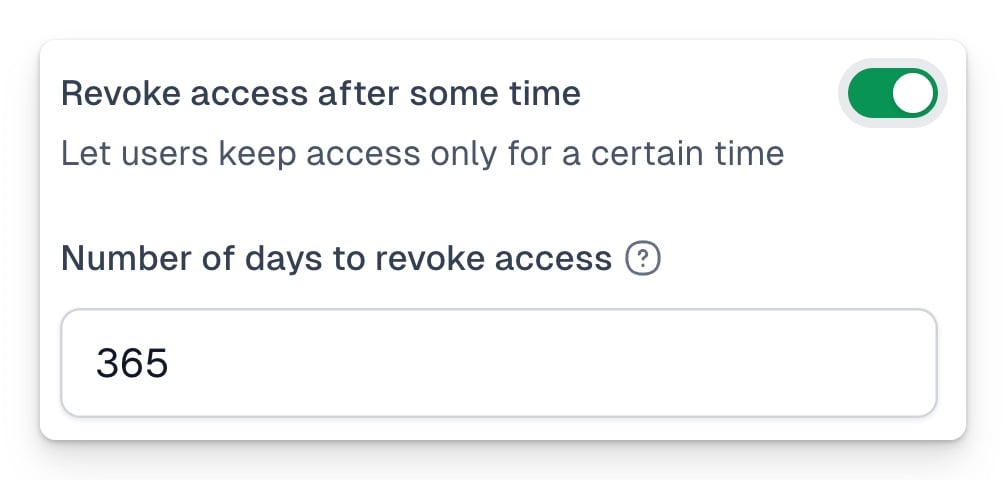
- Scroll down to Revoke access after some time and toggle this option on.
- Type in the number of days after which we should revoke server access.
- Save changes and Publish your cart.
Removing access from the server
There are two possible scenarios when you might want to revoke someones’ access to your server: when their subscription expires, or when they purchased one-time access with time limit, e.g. 365 days.
All automatic Discord action are based on customer’s purchase or subscription status. This means we can only automatically revoke their access if they were previously added to the server with Invite member to server or Assign role automation scenario.
For one-time purchases with a time limit, you don’t need to create a separate automation to revoke server access. When you specify the duration after which access will be revoked, we will automatically revoke the user’s access after that time period.
Expired subscription
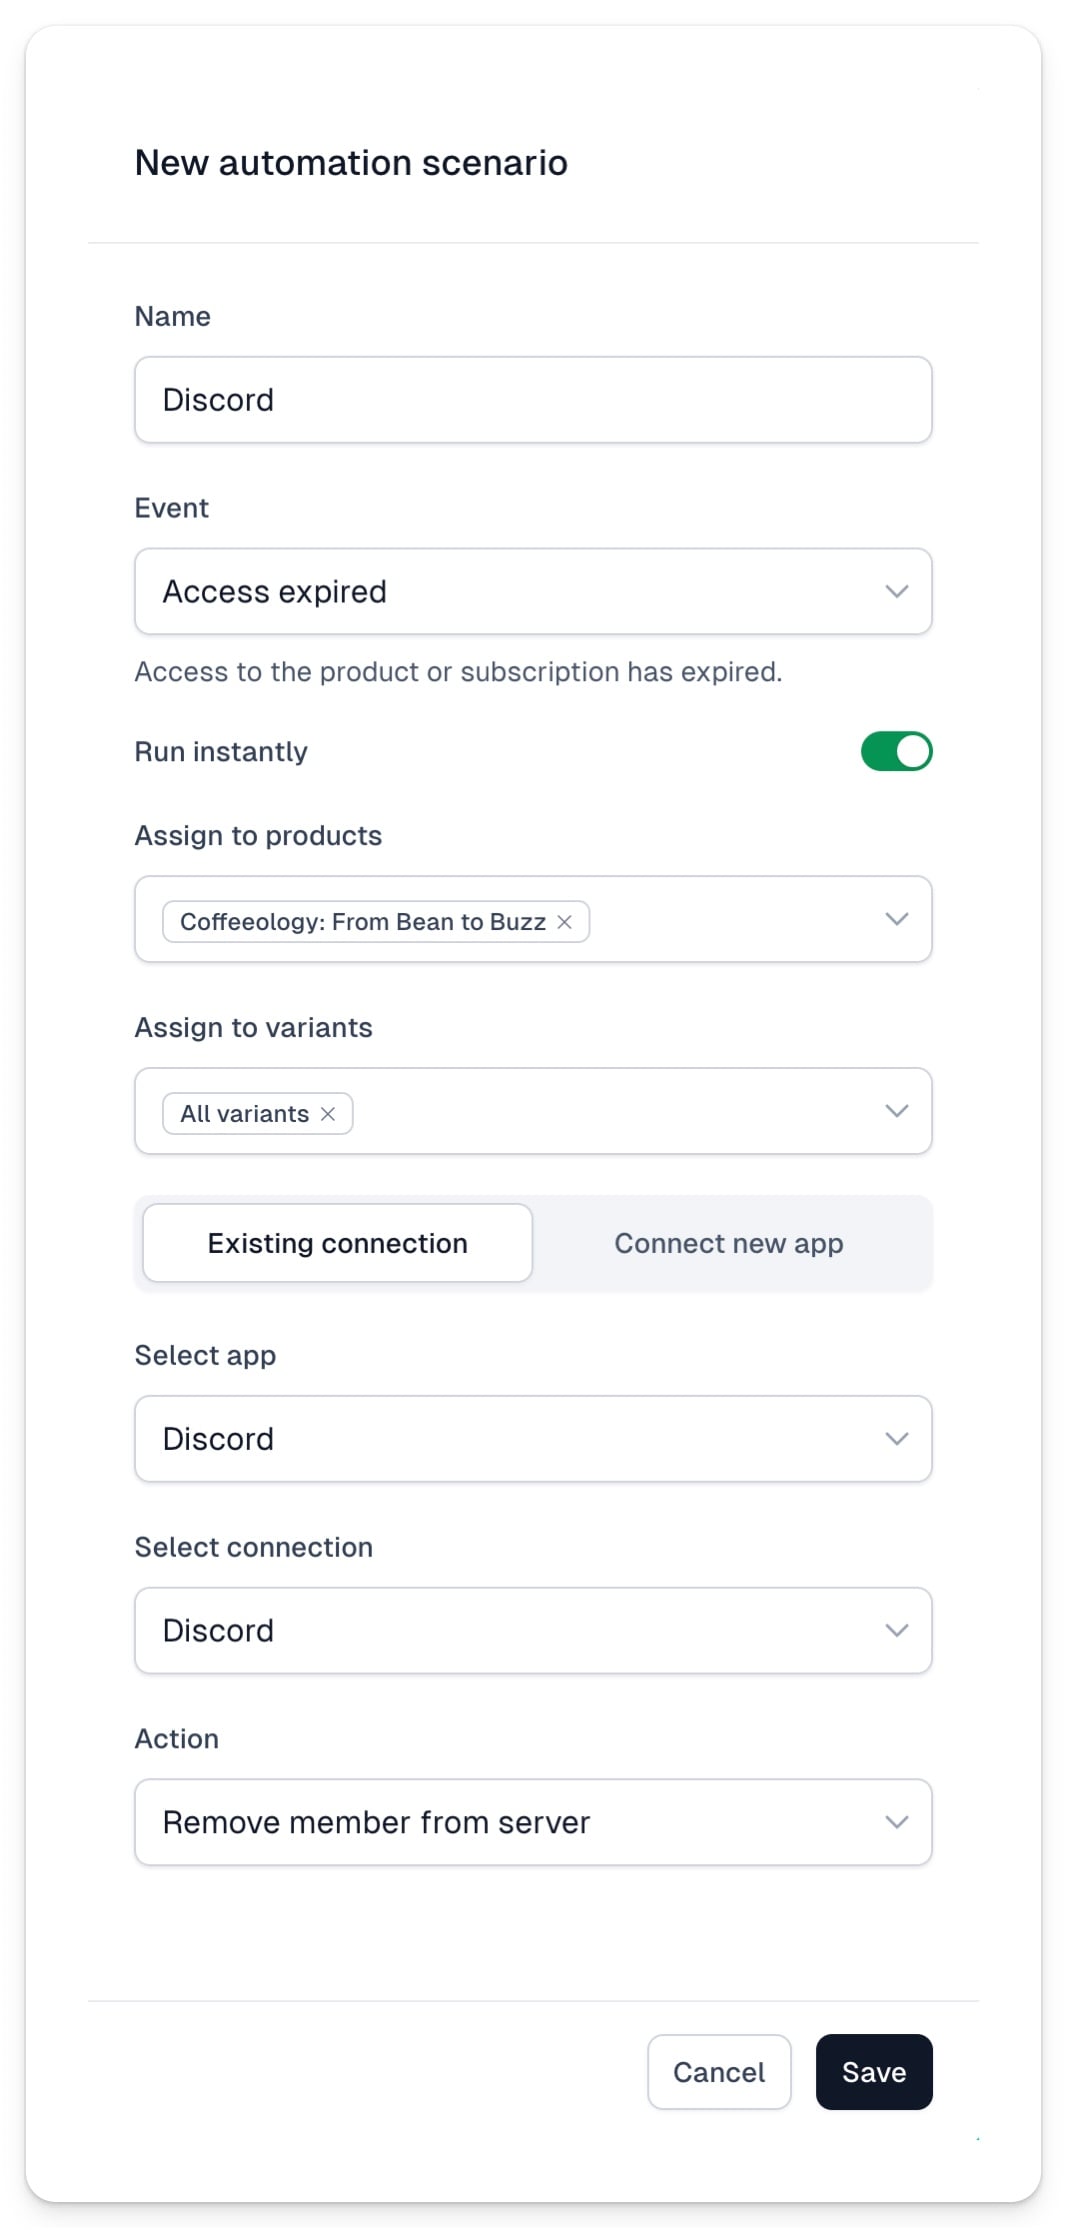
When a customer purchases subscription-based server access, you need to create a separate automation to revoke their access if their subscription expires. This can occur if they cancel their subscription or fail to pay for the next billing cycle. To create the automation, follow these steps:
1. Go to the Store → Automations section. 2. In the top menu, select the Scenarios tab. 3. Click +New scenario in the top right corner. 4. Enter a Name. 5. In the Event field, select Access expired. 6. Assign the Product and Variants for which you want to run the scenario. 7. In the Select app field, select the previously created Discord integration. 8. In the Action field, select Remove member from server. 9. Click Save.
Managing user roles
You can also use automation to assign or remove user roles. This is a popular business scenario: you can move customers to a specific group when they purchase access to certain materials, such as a course, or to an alumni group when their access expires.
Creating and assigning roles in Discord
To assign role to a user using automation, you first need to set up the roles on your Discord server. Here’s how to do it:
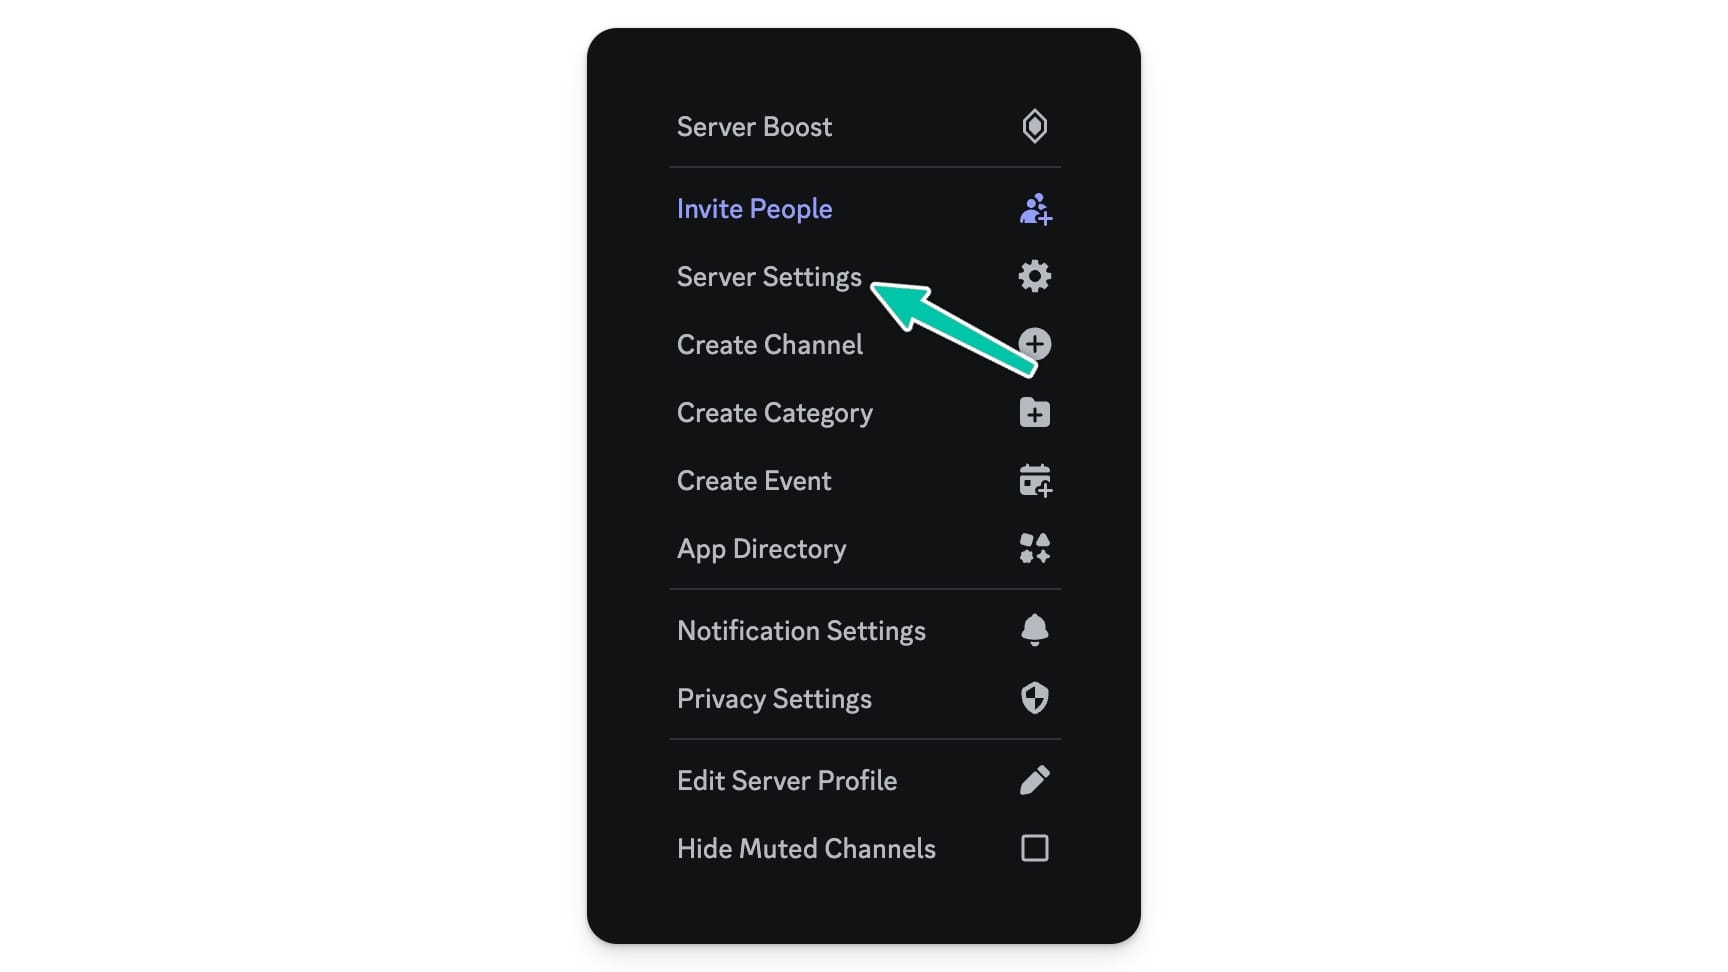
1. Open Discord and click on your server’s name in the top left corner.
2. Select Server Settings
3. Open the Roles tab and click Create a role
4. Set up the distinctive Role name
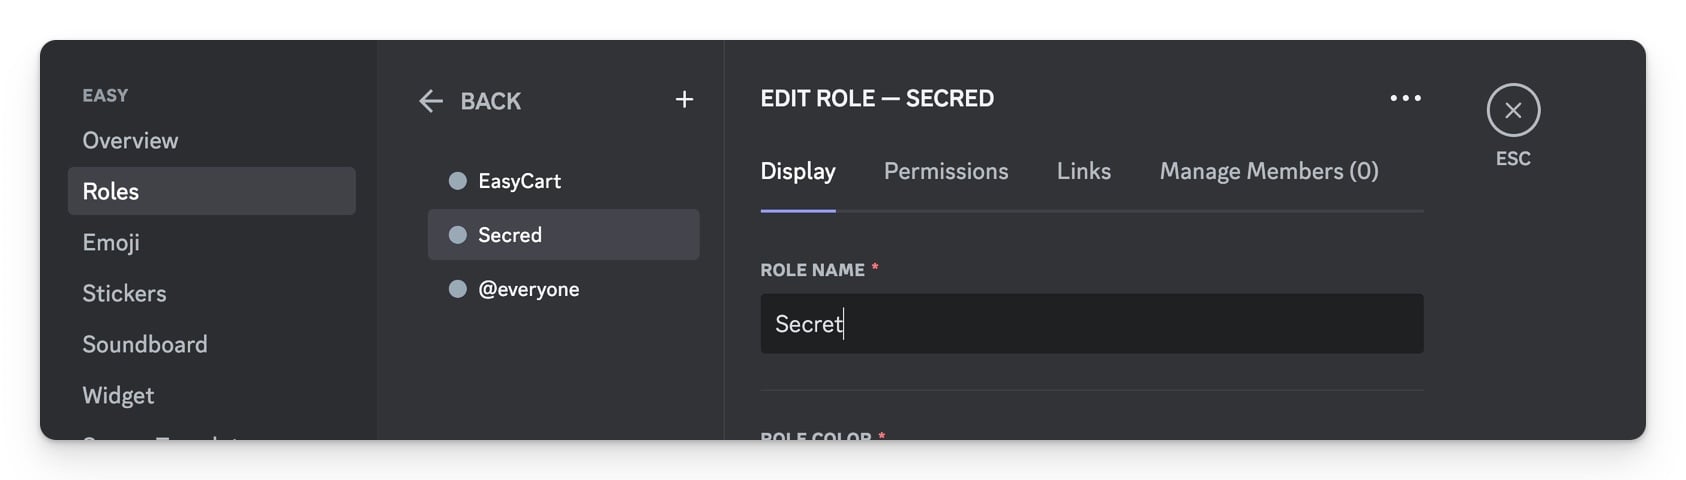
5. If you wish, set up additional role settings.
6. Save your changes by clicking Save on a popup that appears in the bottom of the view.
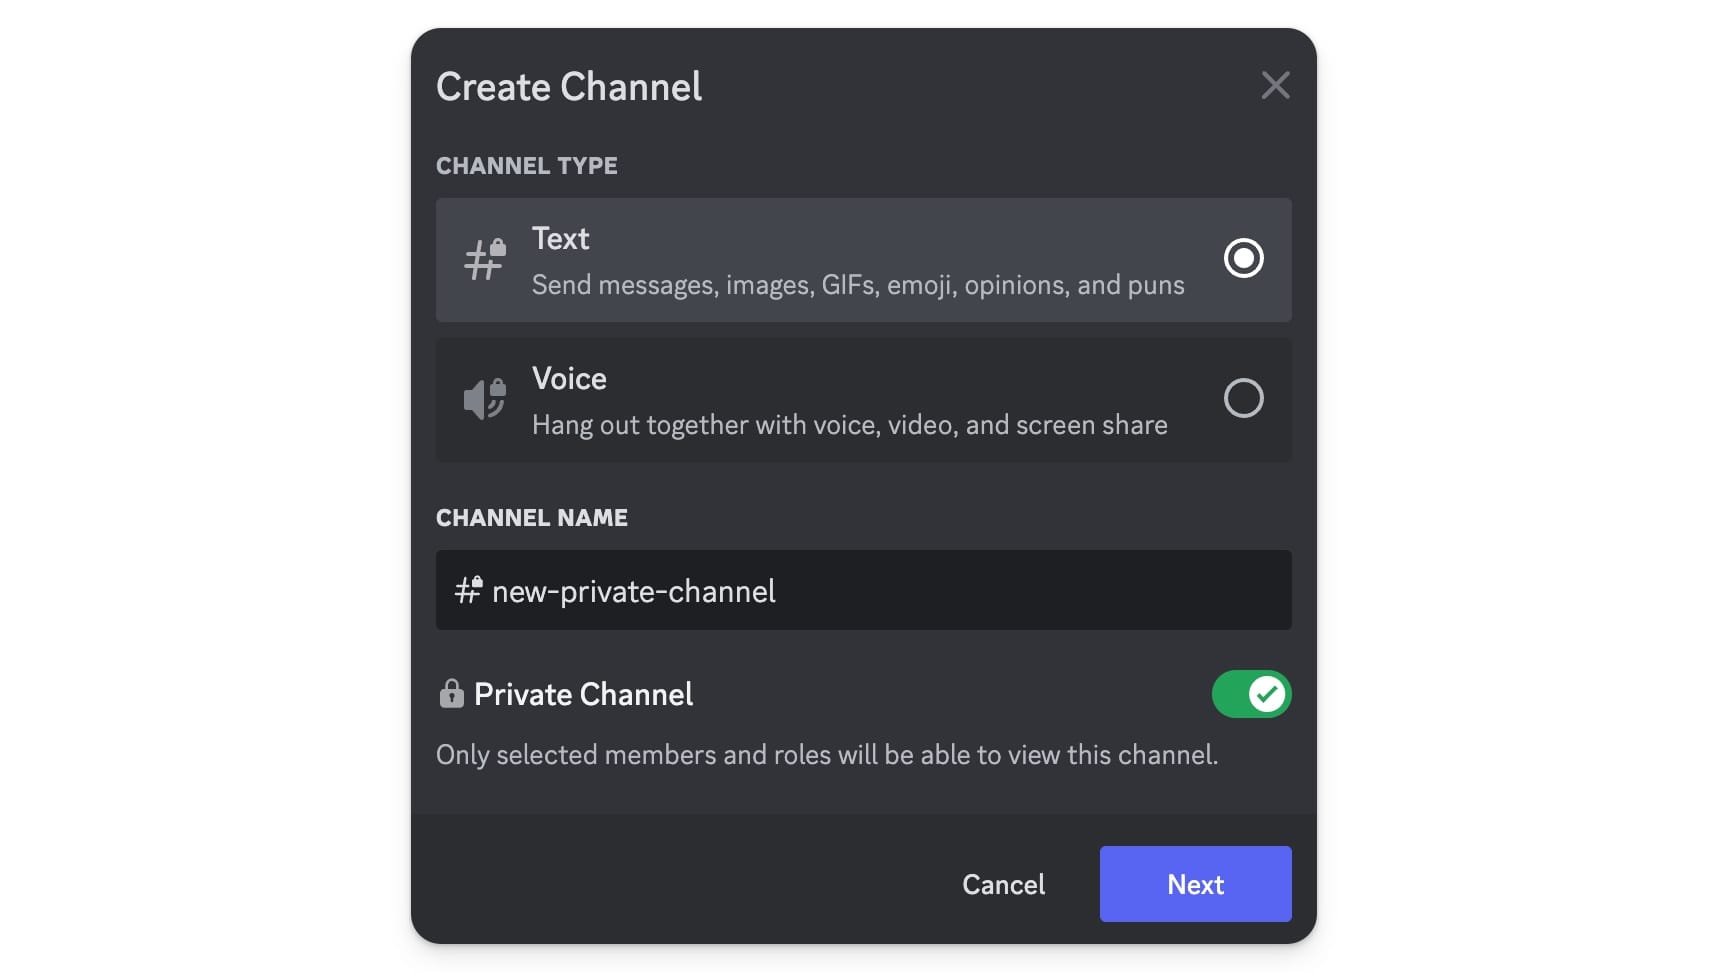
Now let’s create a new channel with the role, or assign your new to an existing channel.
When creating a new channel always remember to toggle the option to make the channel private:
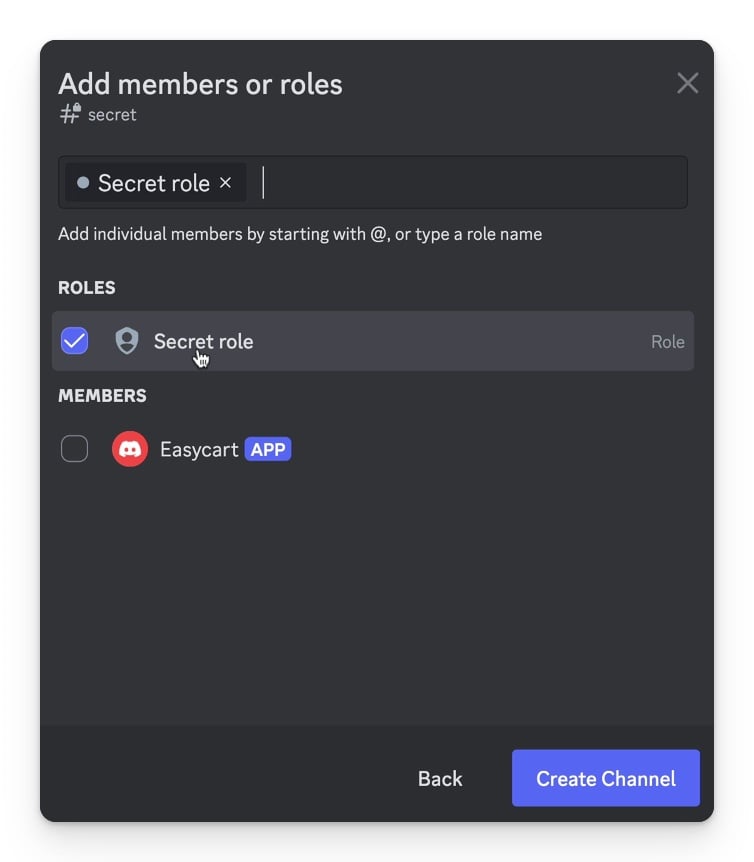
After clicking Next, you will be able to assign specific roles to that channel.
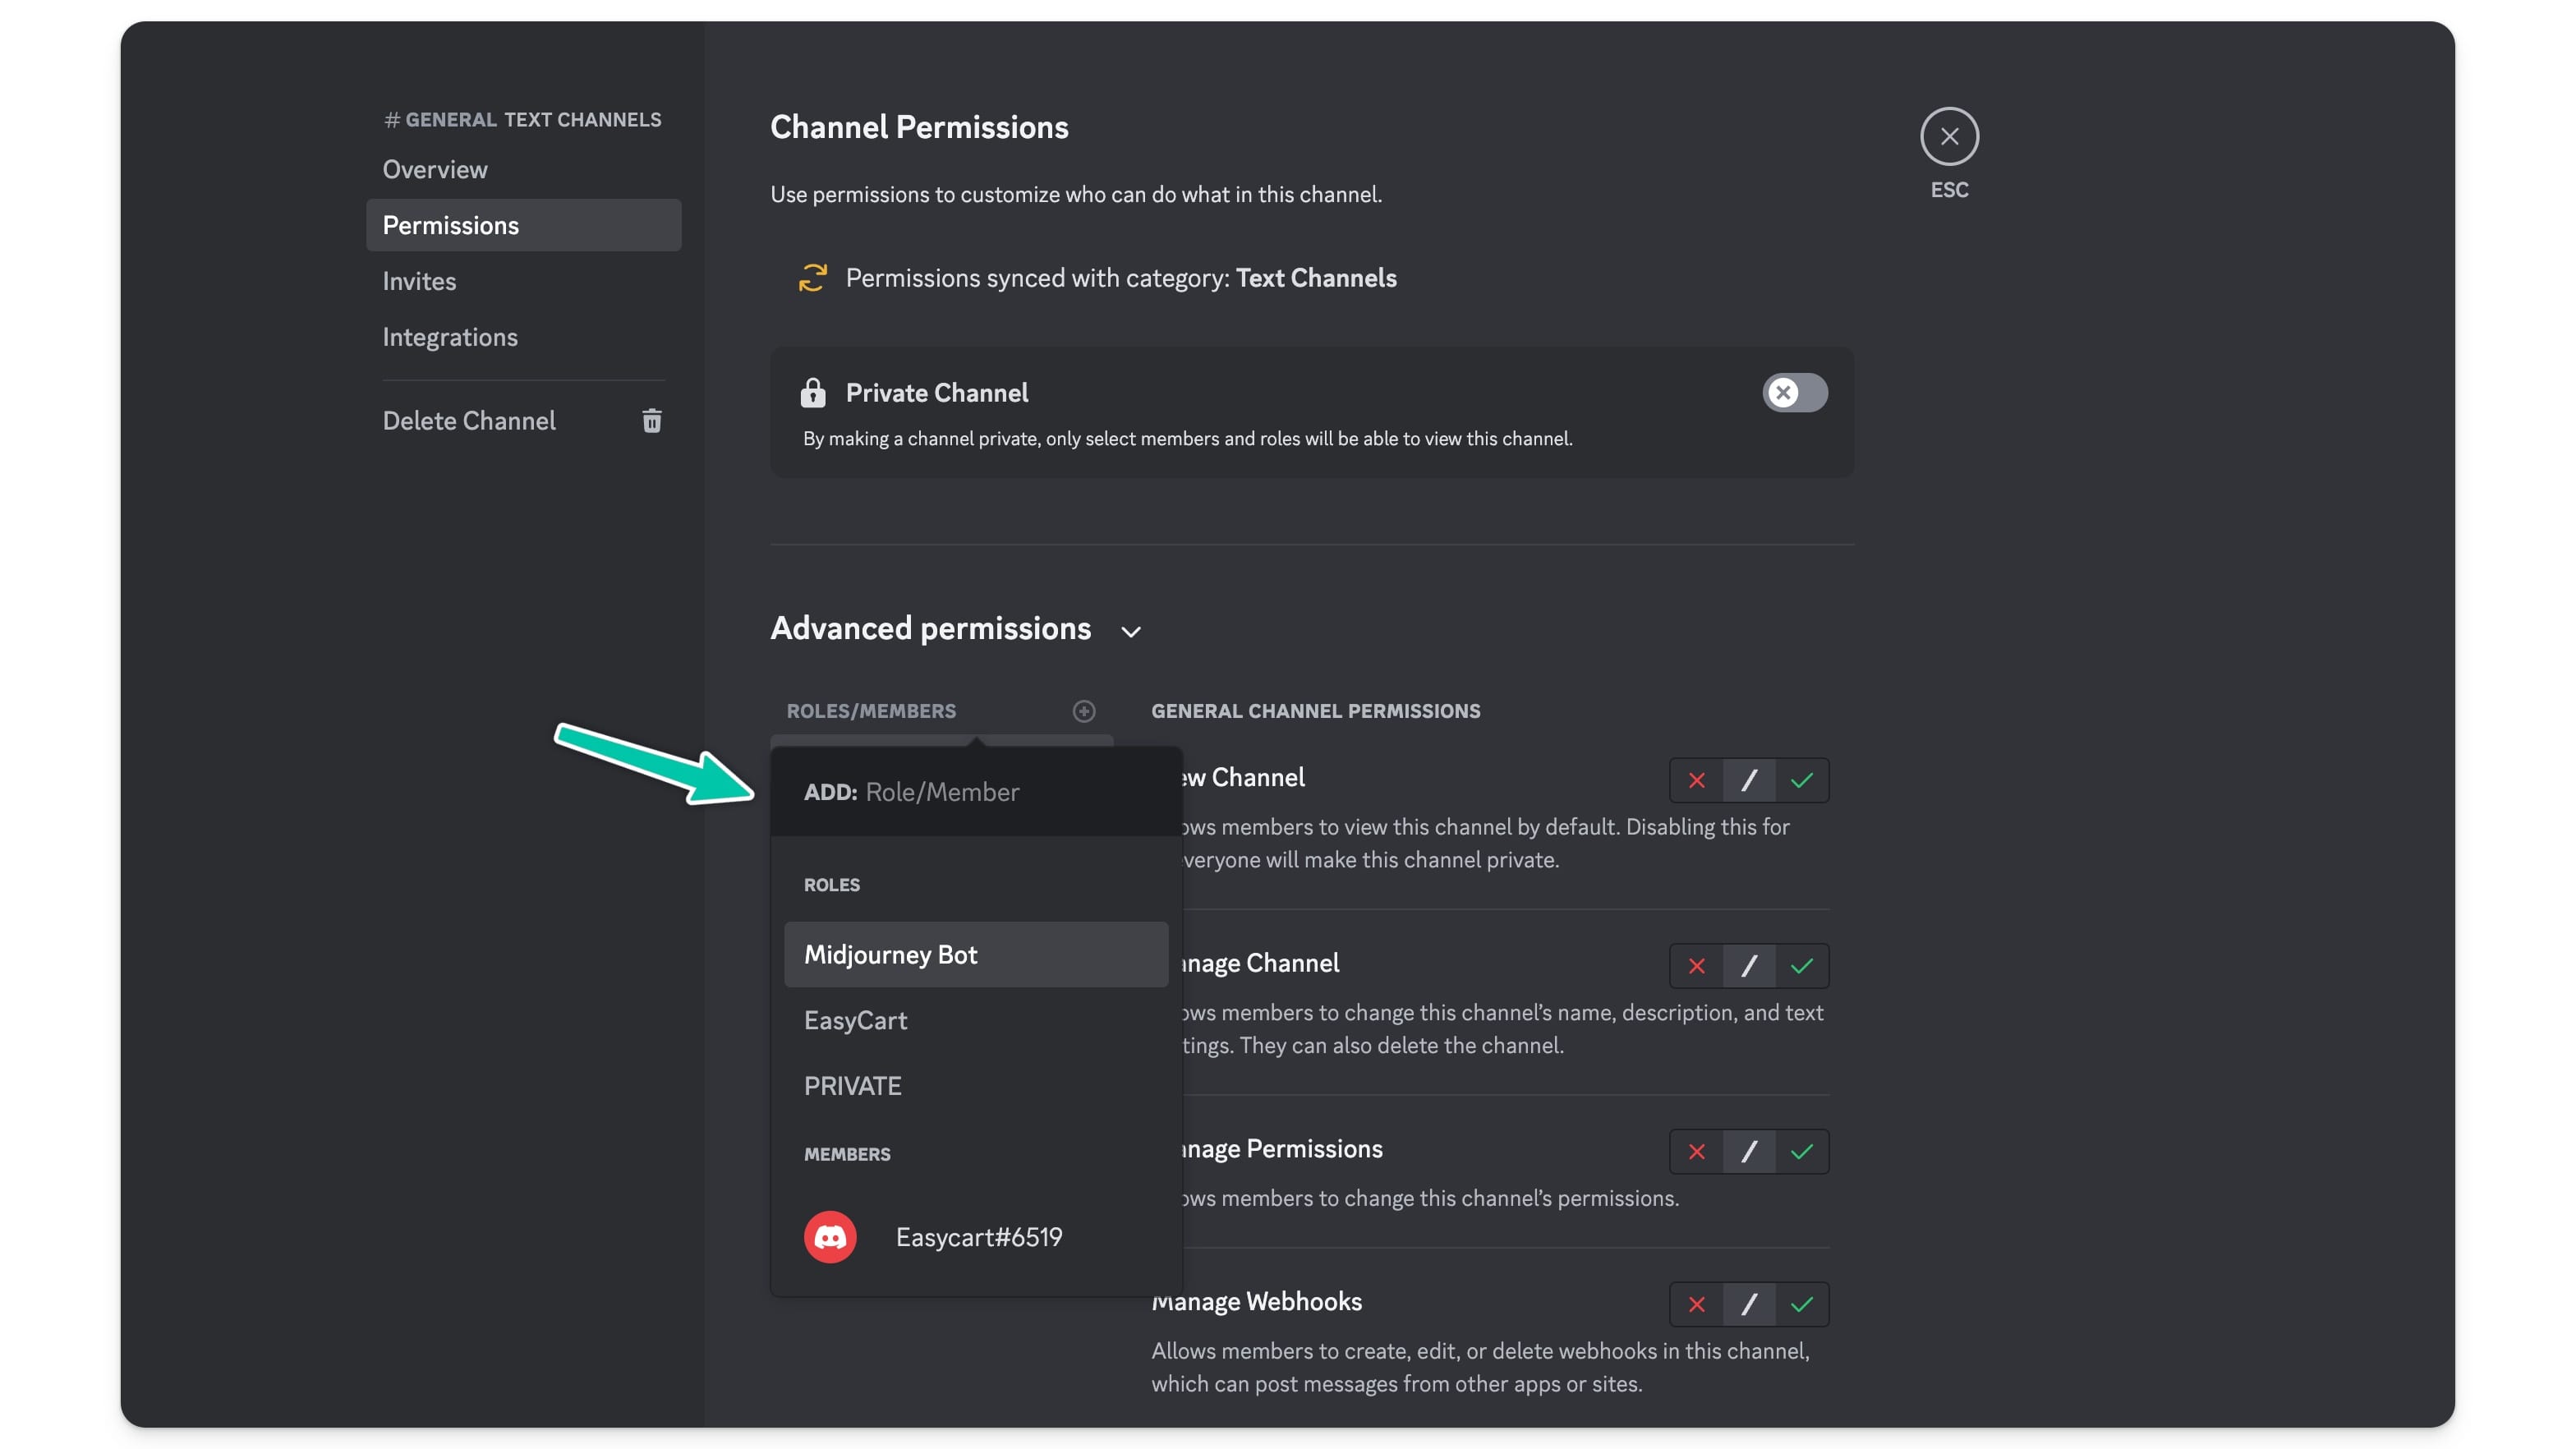
To add roles to an existing channel, click Edit channel and edit roles in the Permissions tab.
Assigning roles using automation
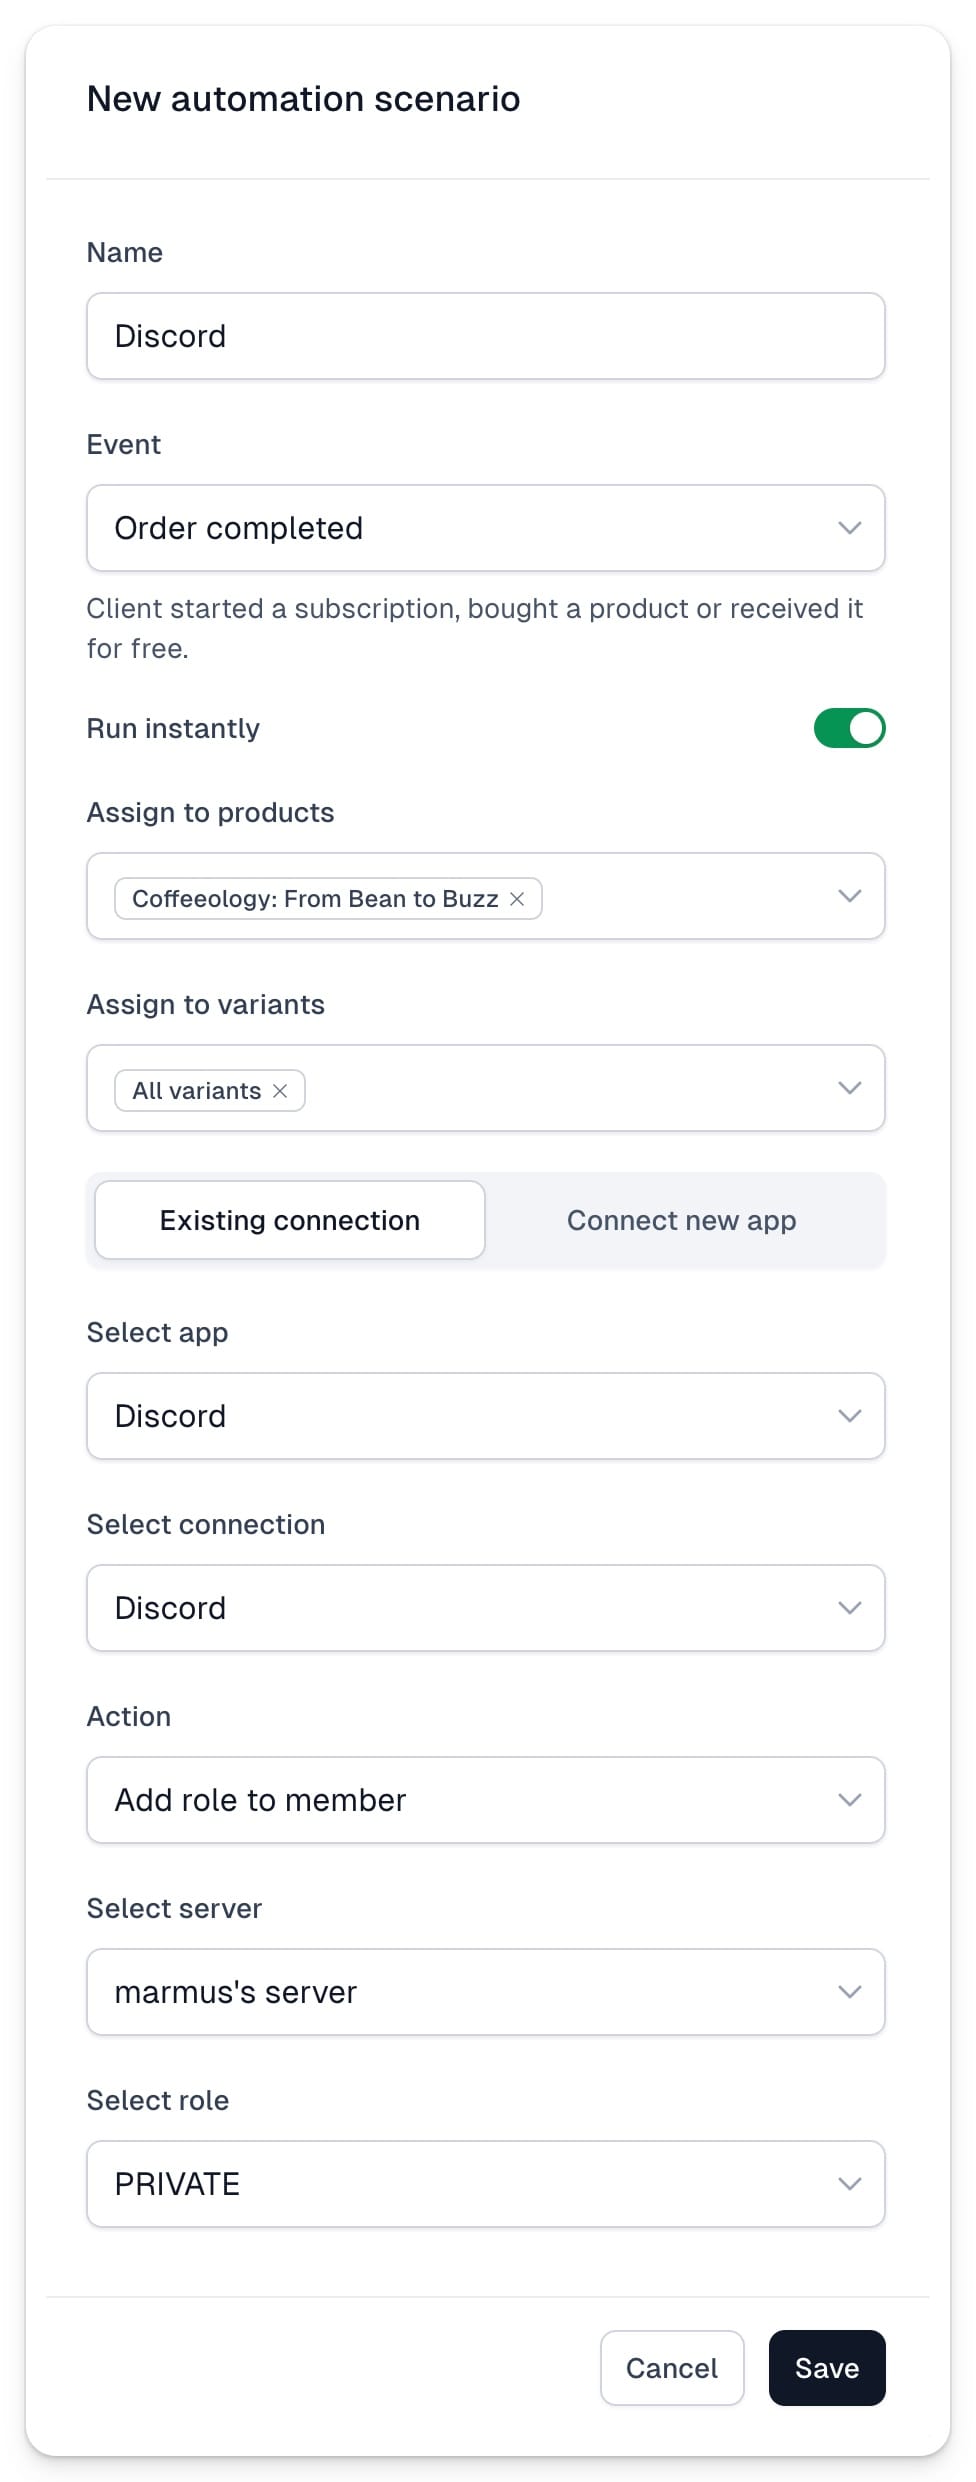
Now, it’s time to create a scenario that will assign roles to users based on their order status. You can use it to assign a specific role to someone who purchased access to your private channel or add users whose access has expired to an alumni channel. Here’s how you can do it:
1. Go to the Store → Automations section. 2. In the top menu, select the Scenarios tab. 3. Click +New scenario in the top right corner. 4. Enter a Name. 5. In the Event field, select Order completed or Access expired. 6. Assign the Product and Variants for which you want to run the scenario. 7. In the Select app field, select the previously created Discord integration. 8. In the Action field, select Add role to member 9. Now Select server and Select role that you previously created on Discord 10. Click Save.
When you use automatic role assignment, we will automatically add the user to your server - you don’t need to run a separate automation to invite them.
Removing roles using automation
All automatic Discord action are based on customer’s purchase or subscription status. This means we can only automatically remove user’s role if they were previously added to the server with Invite member to server or Assign role automation scenario.
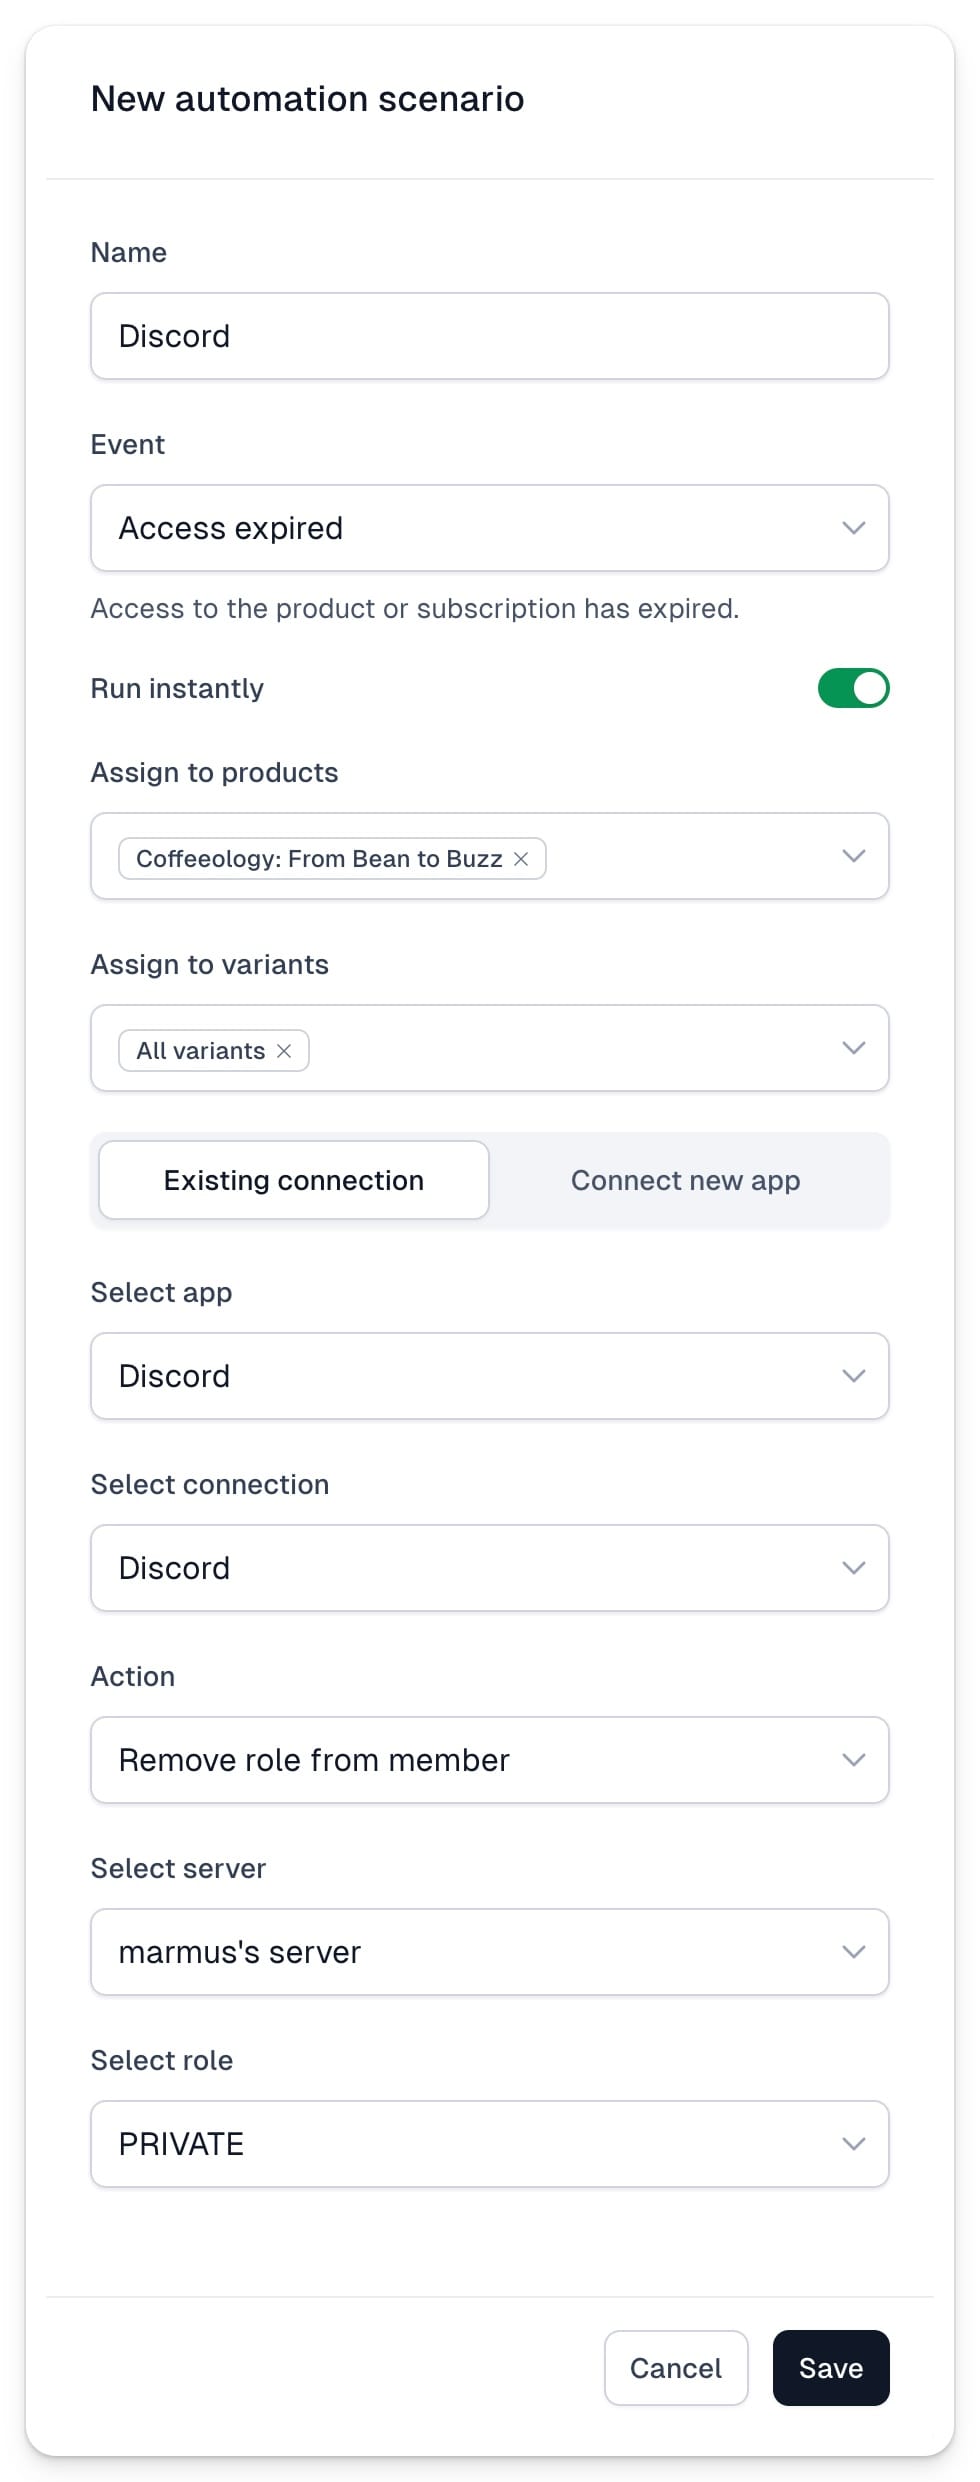
To automatically remove user roles:
1. Go to the Store → Automations section. 2. In the top menu, select the Scenarios tab. 3. Click +New scenario in the top right corner. 4. Enter a Name. 5. In the Event field, select Access expired. 6. Assign the Product and Variants for which you want to run the scenario. 7. In the Select app field, select the previously created Discord integration. 8. In the Action field, select Remove role from member. 9. Now Select server and Select role that you previously created on Discord 10. Click Save.