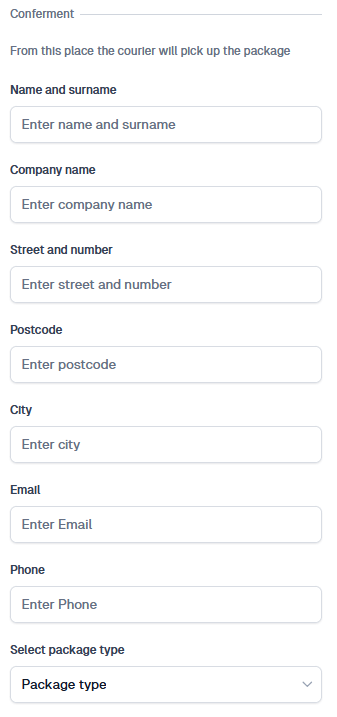
Go to the Automations tab and add a new scenario, select the event order completed, then assign the selected product(s) and price variants. Next, choose the existing integration tool Furgonetka and the action Create Package. At this point, a form for the package pickup location will appear. Here, enter the company or warehouse details from where the package will be picked up after packing and ordering the courier.
Configuring Customer Address Details
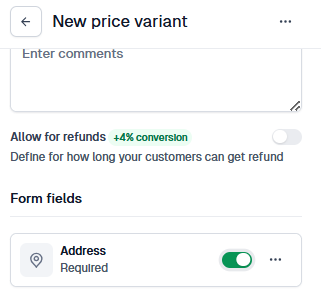
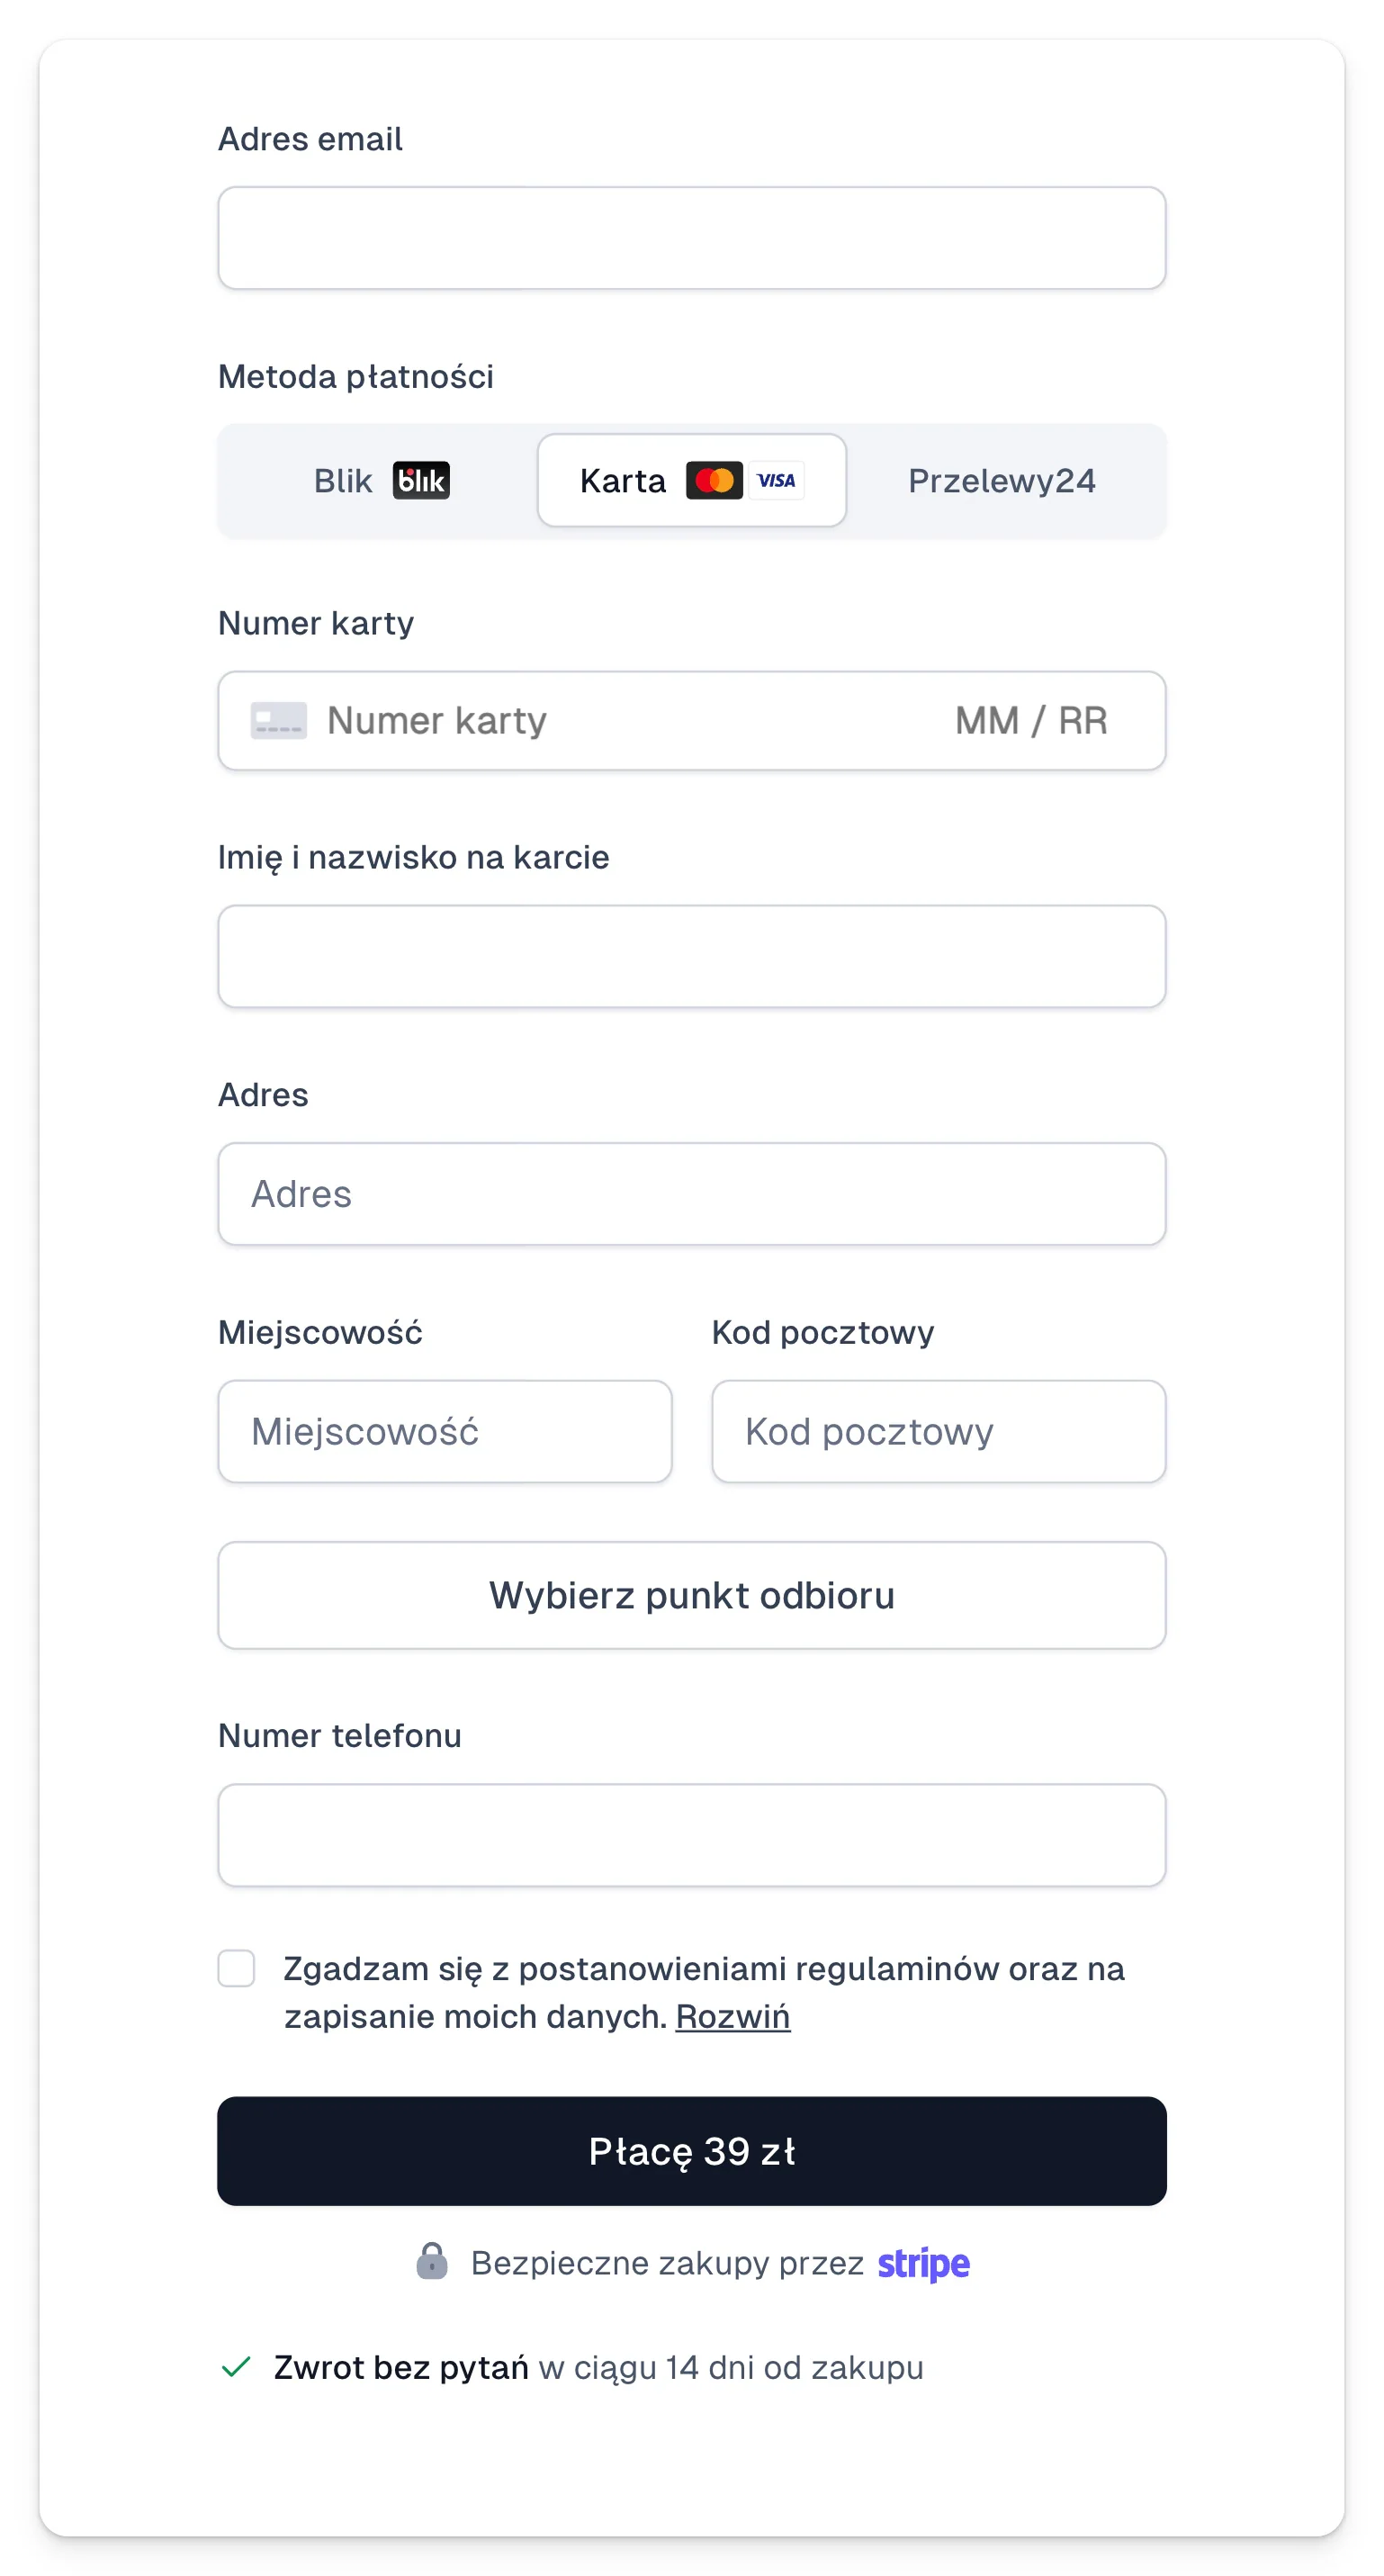
Since online products don’t require customer address details, you need to enable the option to require address input, which can be found in the price variant settings. This will add additional address fields in the customer’s cart that they must fill out before completing the transaction.
Configuring the Carrier, Package Size, and Contents
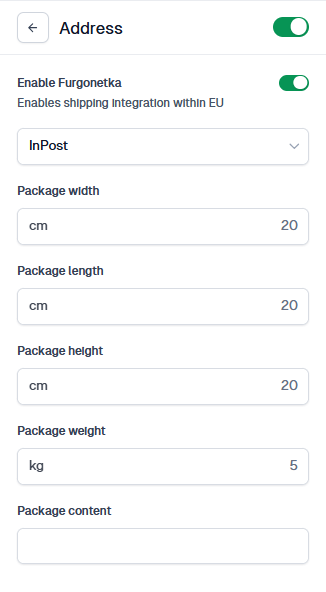
To fill in these fields, click on the address fields button, where you’ll select the option Enable delivery with Furgonetka.pl. Once these options are enabled and the information is filled out, the customer will see additional address fields and a button to select a parcel locker during checkout.
Important
When a new package is created through automation, it will appear in the To be Sent view on Furgonetka.pl. It is still necessary to pay for the shipping costs and, if needed, order a courier to pick up the package. After paying for the shipment on the service, Furgonetka will generate the package’s waybill.
Using Easytools and post-sale automation, you can easily send a package to your customer’s address or parcel locker with the Furgonetka integration.
We have prepared a special automation that creates a shipment in the Furgonetka system, so your next steps will simply involve packing, paying for, and sending the package.
Setting up the Furgonetka application in your store
To connect to your Furgonetka account, follow the steps below:
1. Go to Store → Automations
2. In the top menu, choose Applications
3. Click on the +New Application option
4. Assign a Name, and select Furgonetka from the list of applications.
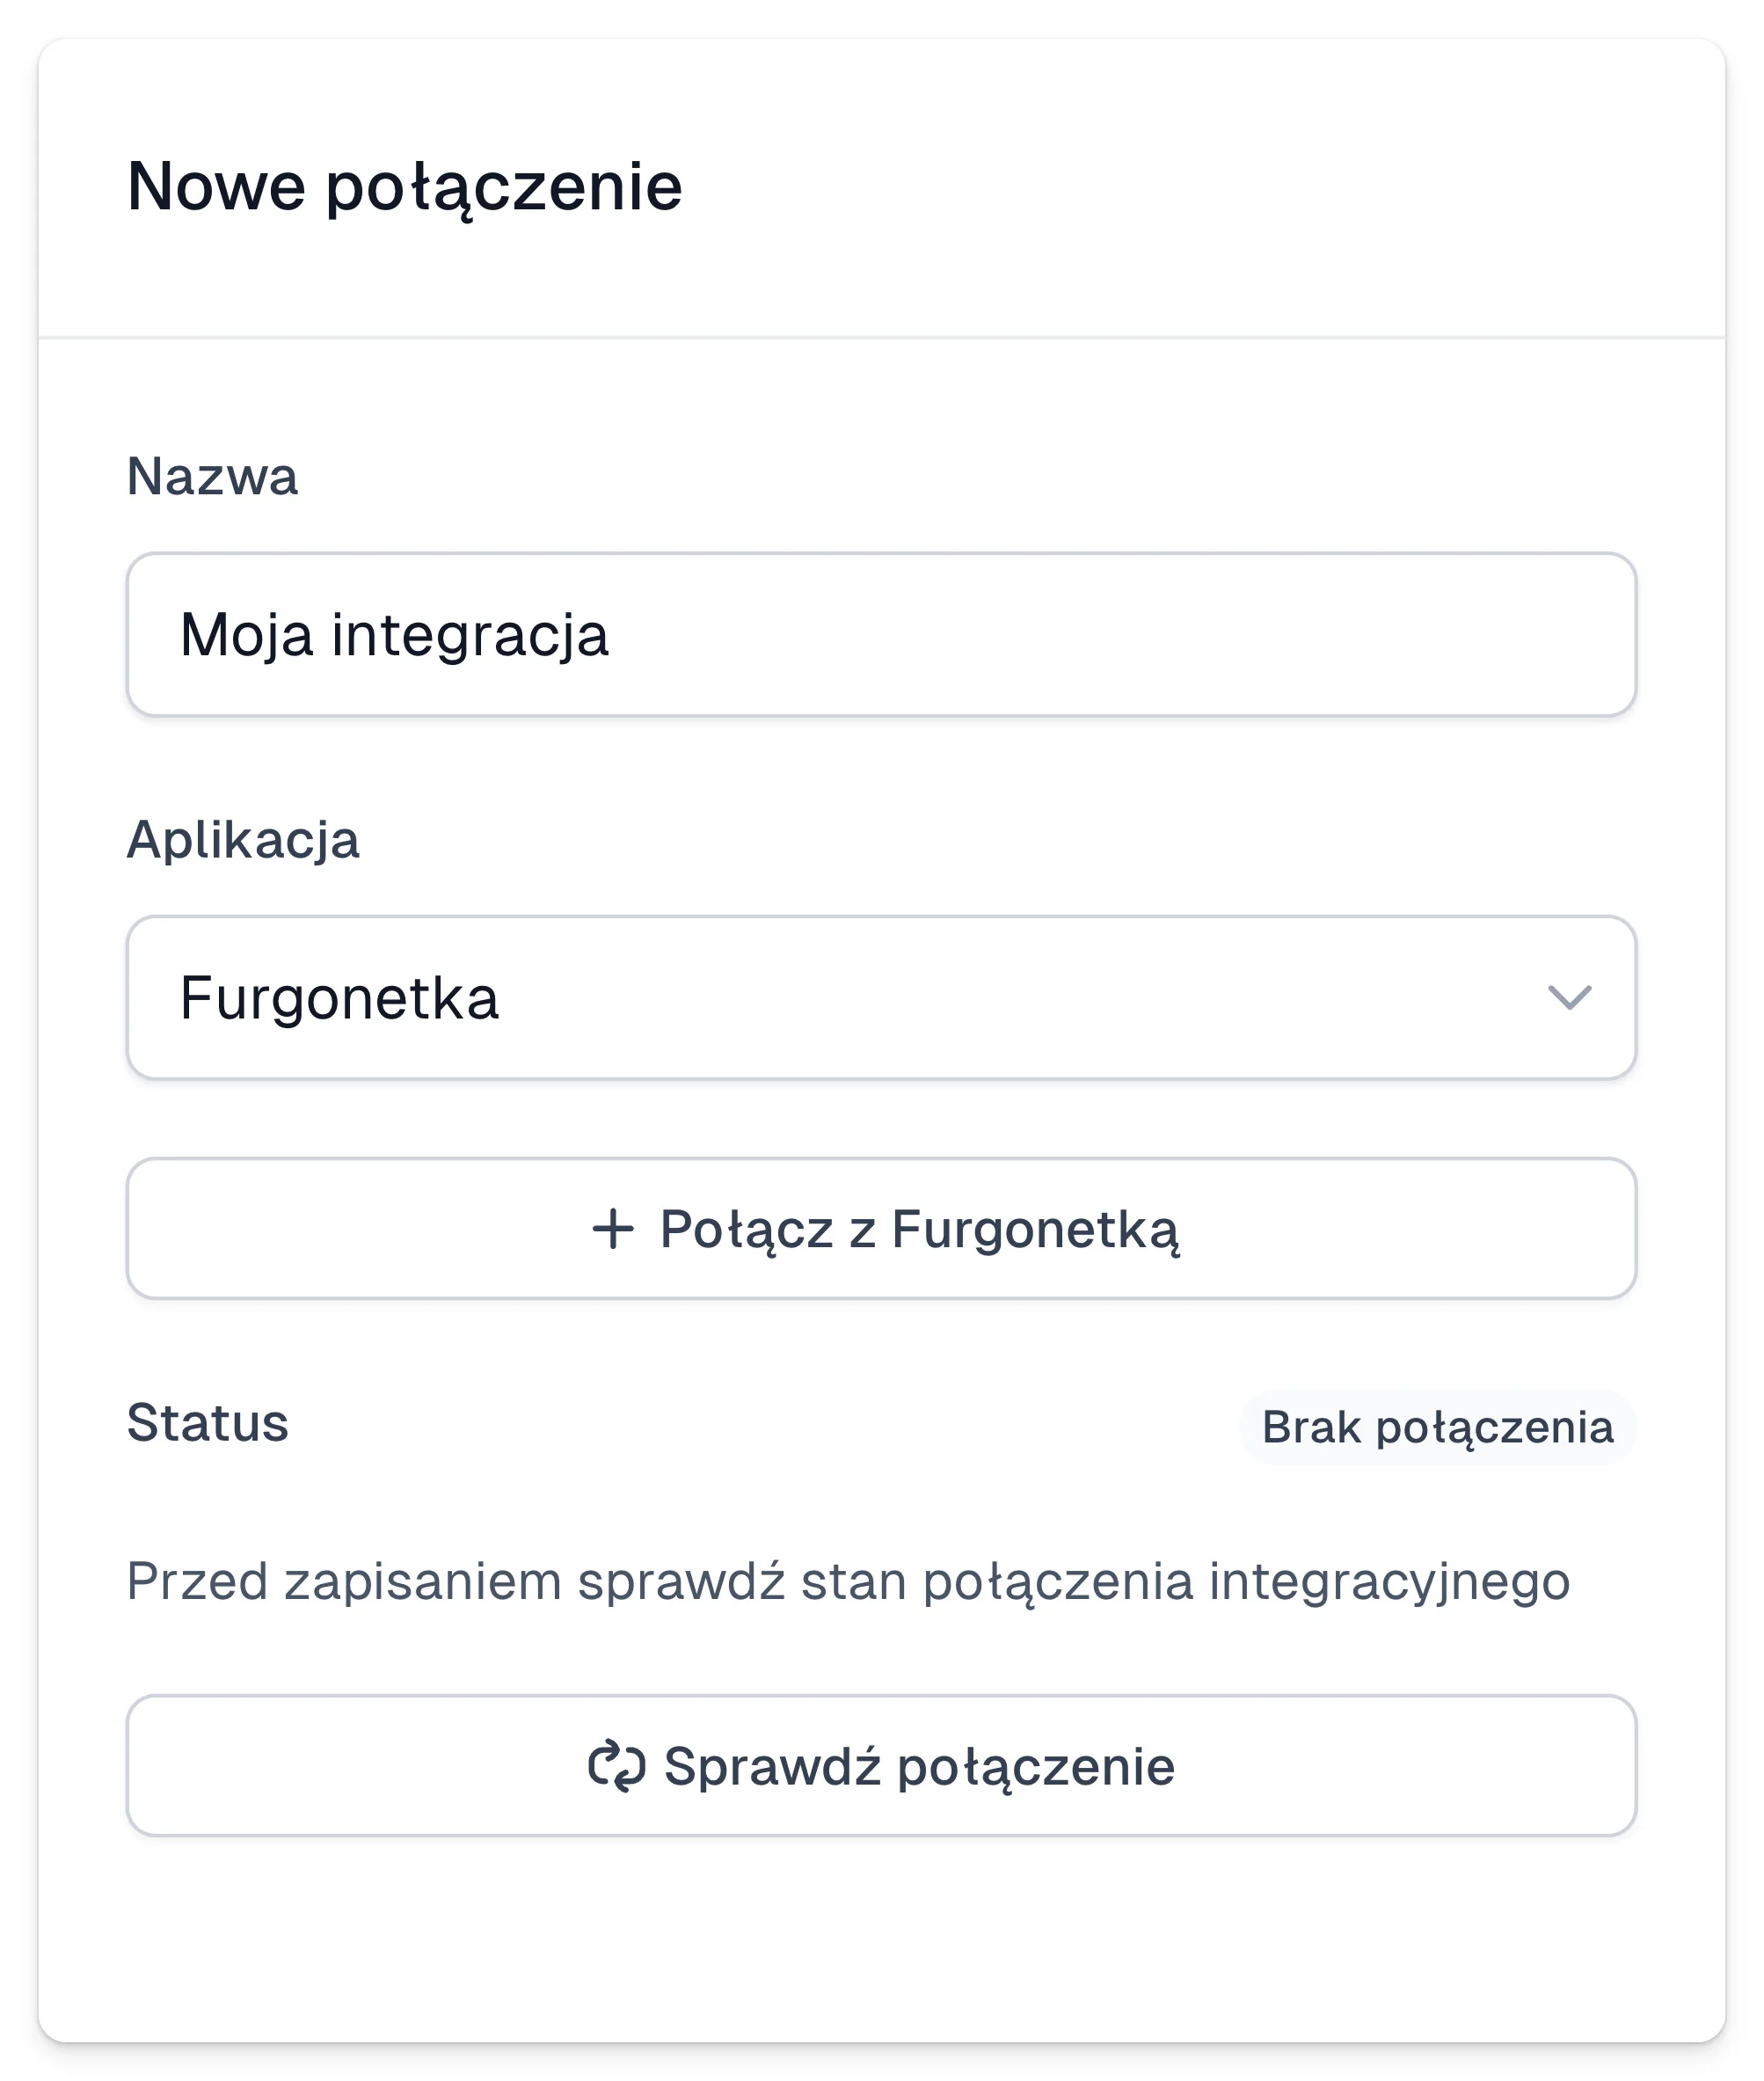
5. Click the Connect with Furgonetka button and sign in to your account or create a new one.
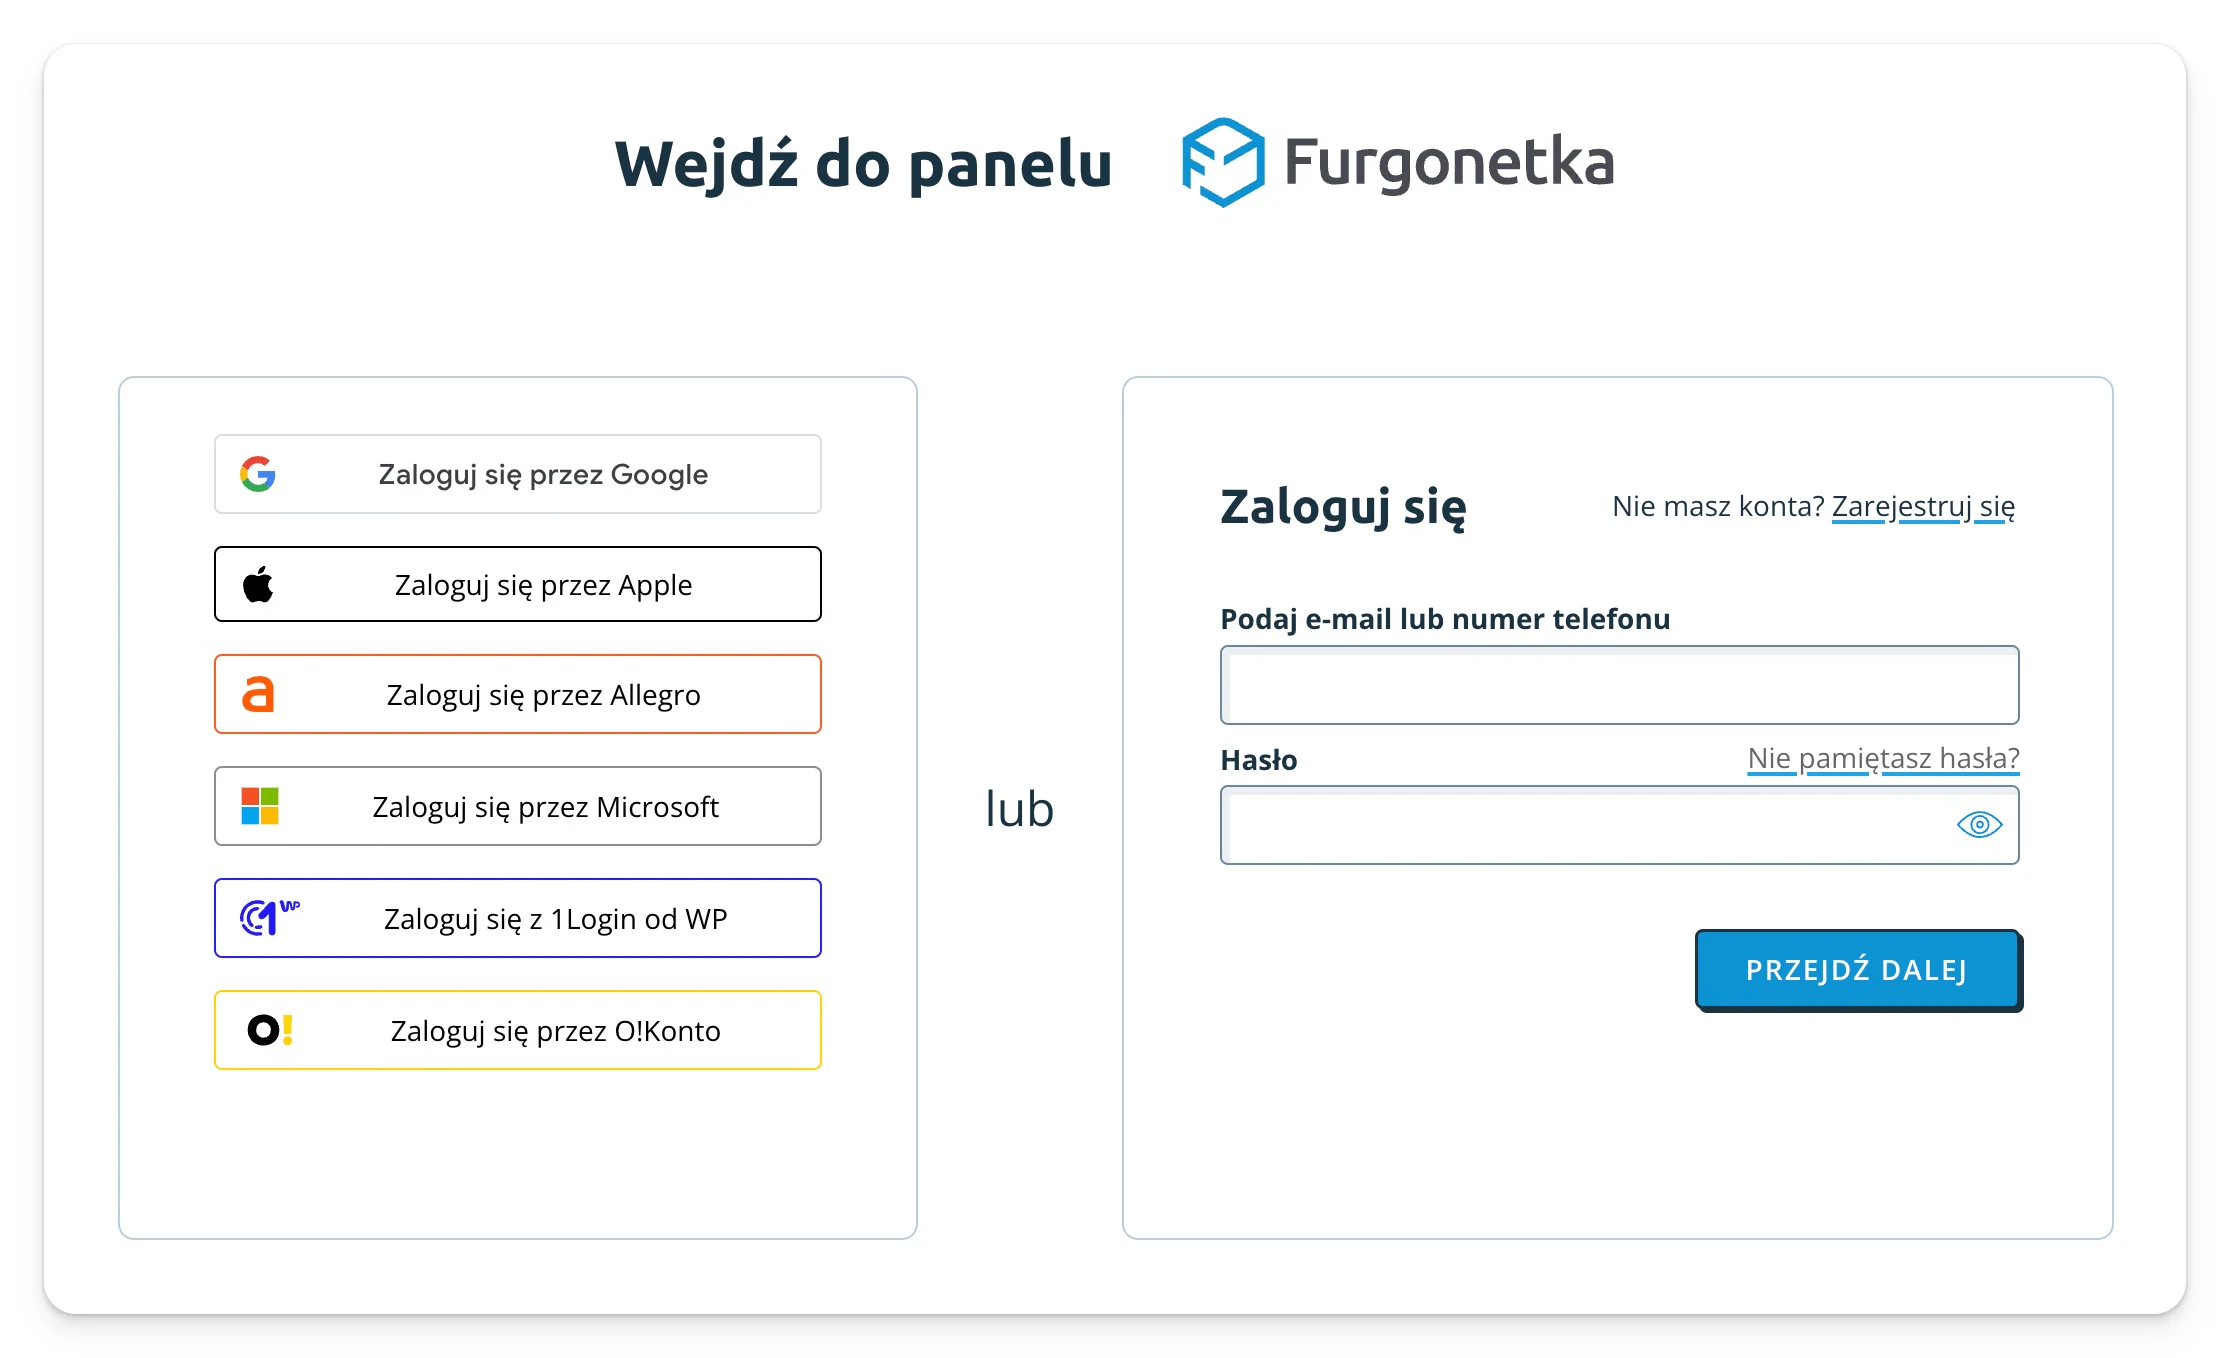
6. After you sign in, you’ll see a dashboard where you can authorize the integration with Easycart.

After you click I agree, the connection will be ready, and we’ll show a confirmation notification that the integration has been created. When you go back to the Easytools dashboard, you’ll see a new Furgonetka integration in your list of connected apps.
Now you can set up scenarios that let you easily ship a package after a successful transaction.
Create a package in Furgonetka after purchase
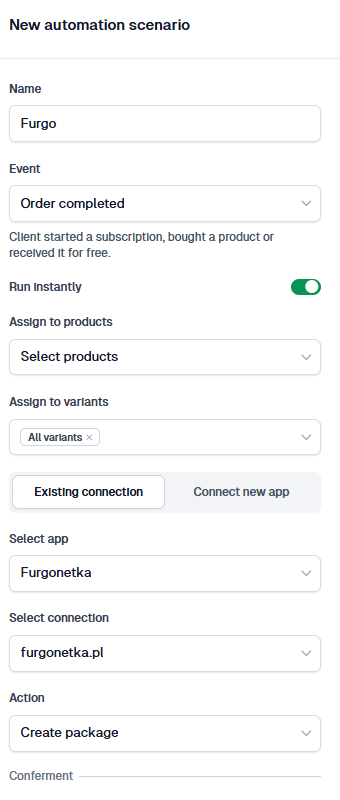
To automatically send transaction details to Furgonetka after a purchase and create the right package, you need to set up an automation scenario. Here’s how:
1. Go to Store → Automations
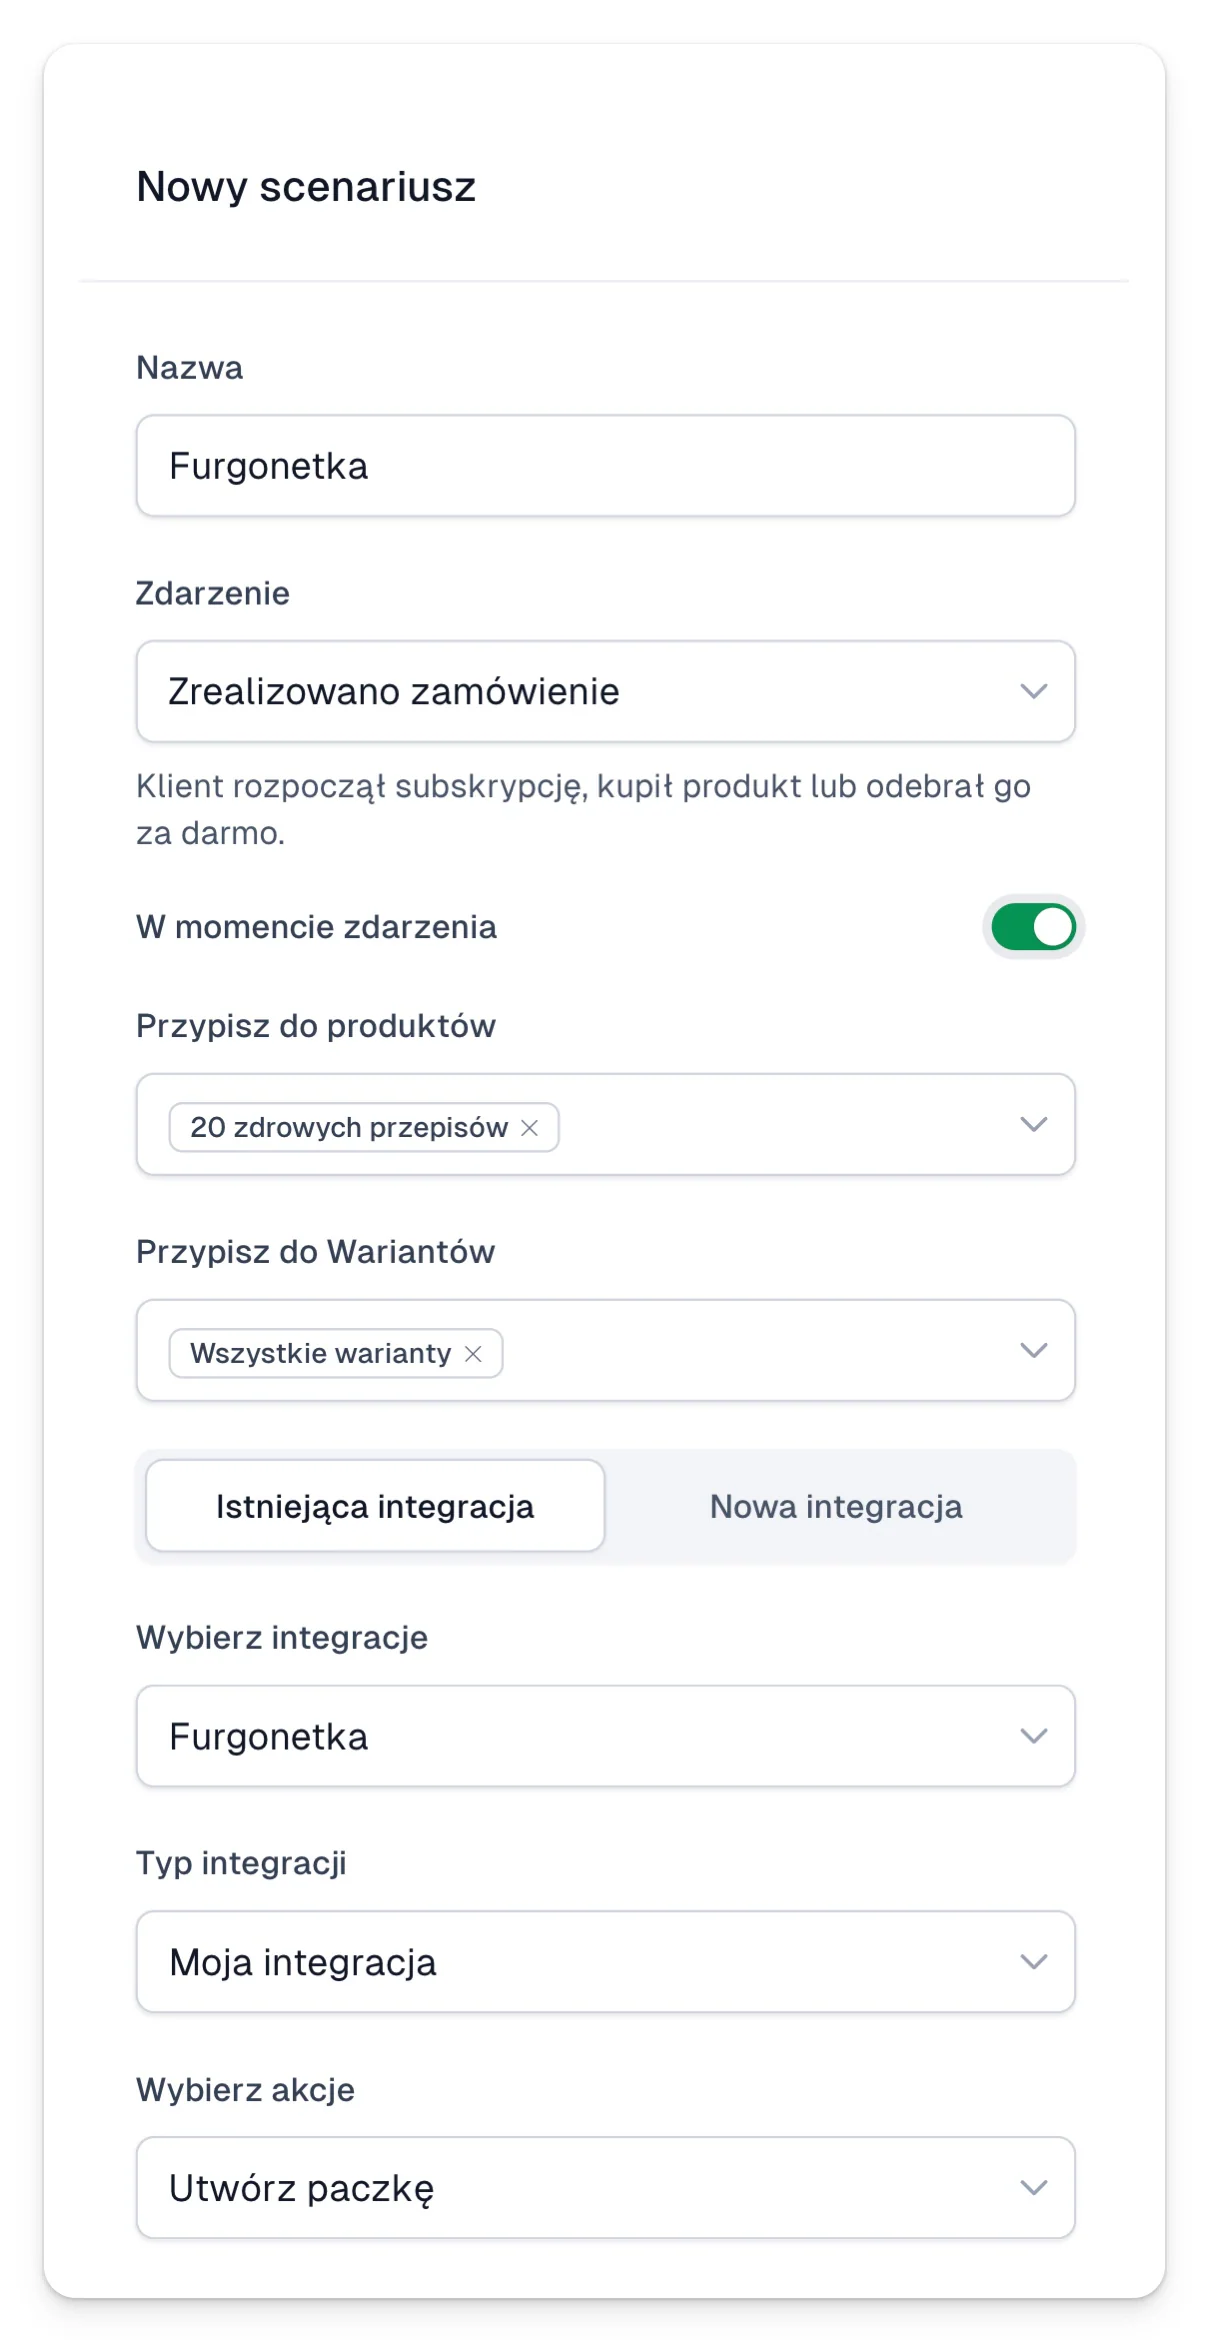
2. Add a new scenario by clicking + New scenario in the top-right corner.
3. Enter a name for your scenario.
4. Under Event, choose Order completed.
5. Enable Run instantly if you want the data to be sent immediately after the order is completed.
6. If you want to send the data to Furgonetka with a delay, disable Run instantly and choose when we should run the automation.
7. In Assign to products, select the product(s) you want this automation to run for.
8. In Assign to variants, select the product variant(s).
9. Check Existing integration and choose the right Furgonetka integration.
10. For the action, select Create package.
Next, we’ll ask you to fill in the sender details and the pickup address where the courier will collect the package. Don’t forget to choose the Shipment type as well.
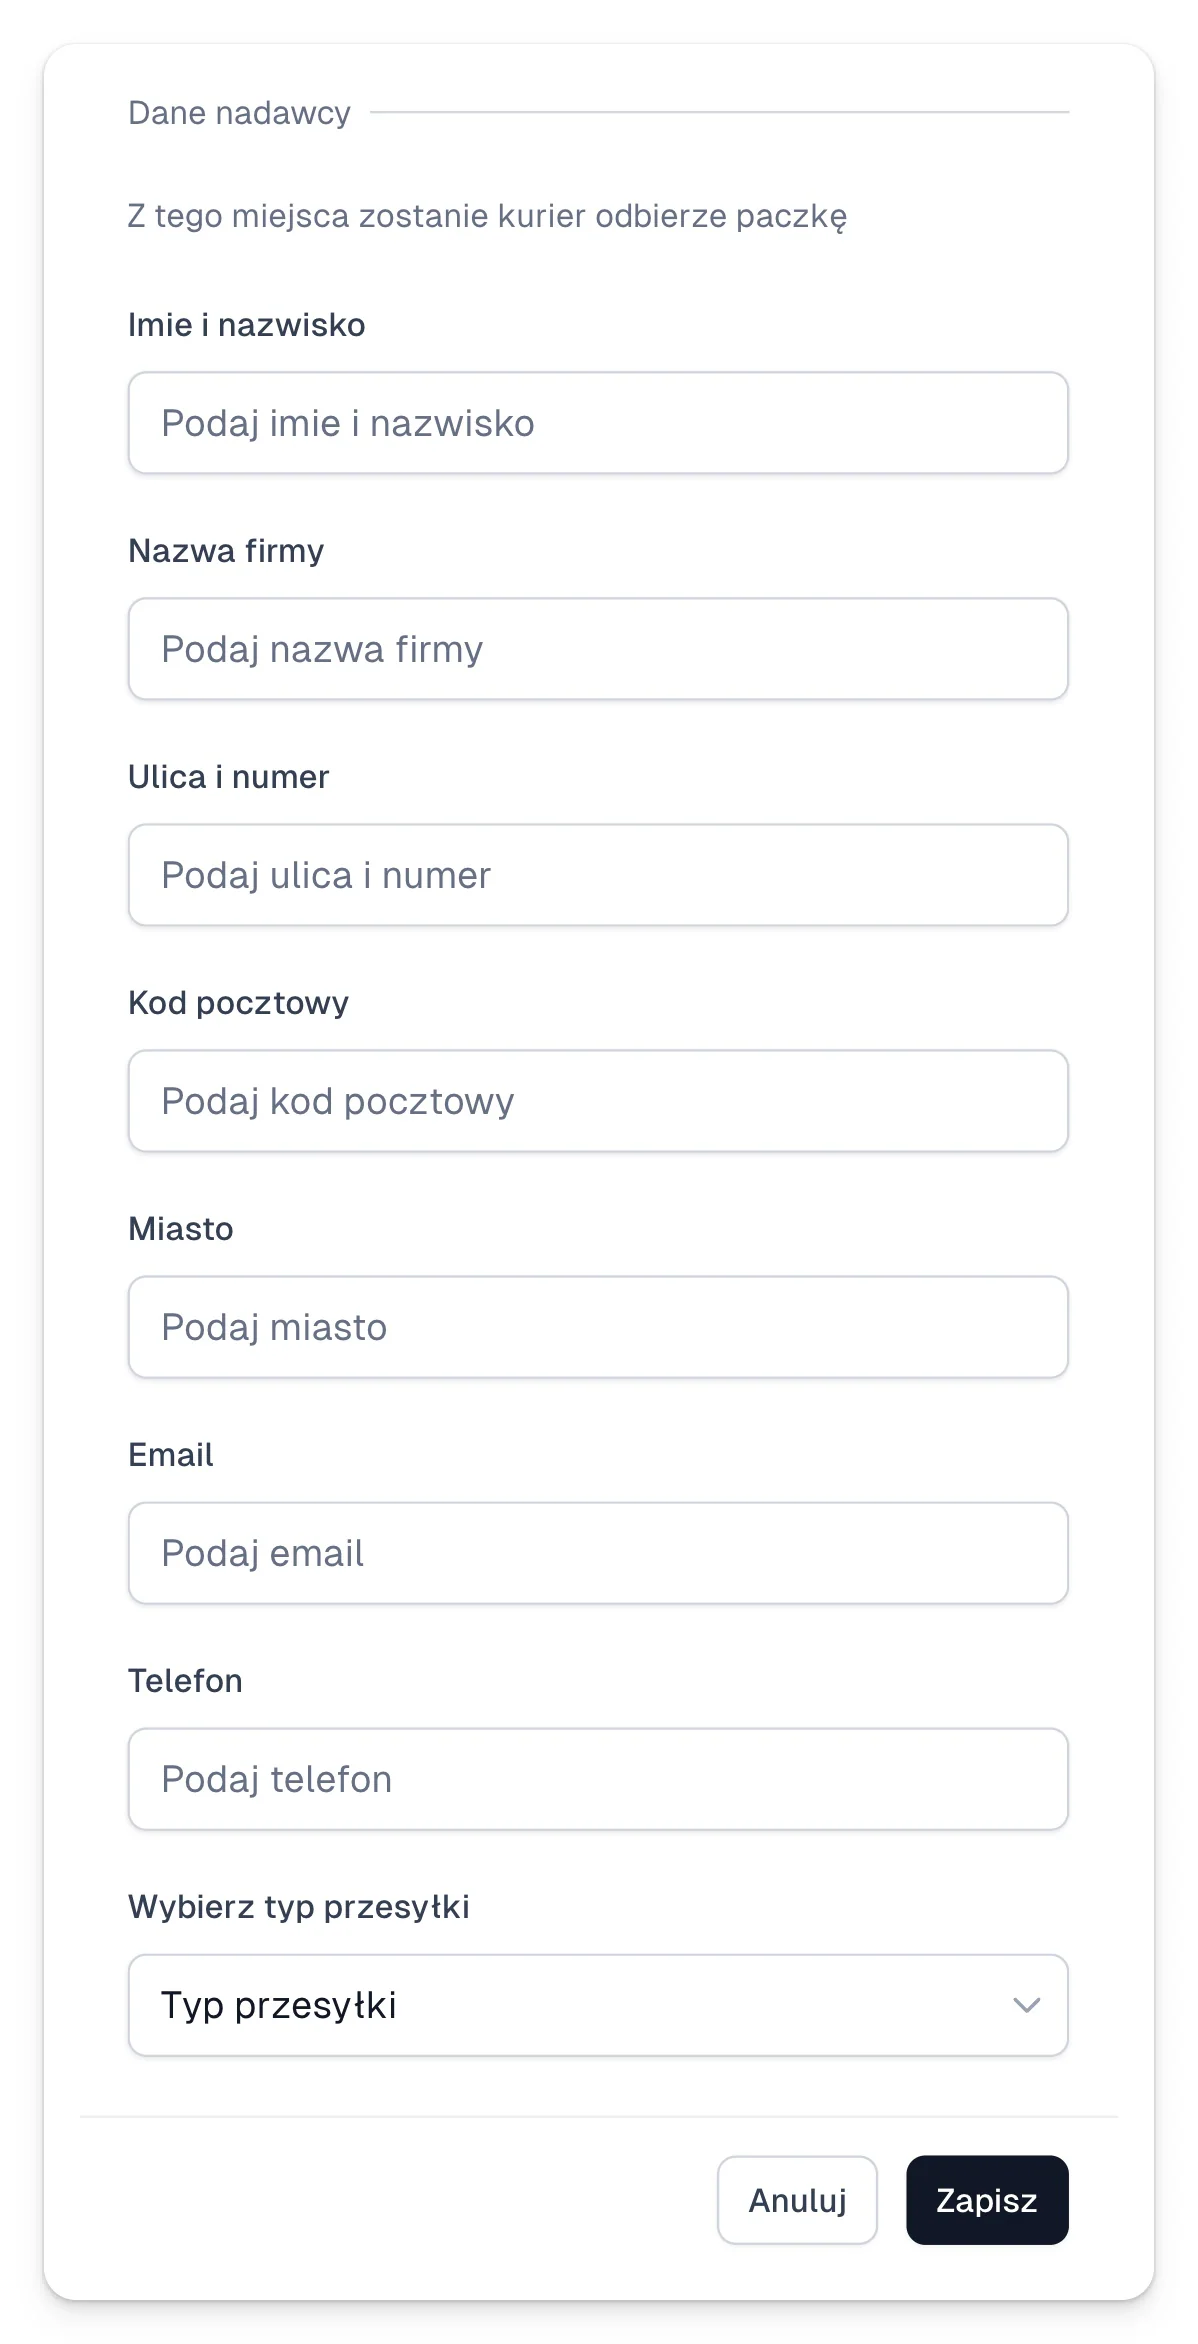
After you fill in all the details, click Save - you’ve just created your automation scenario. Now it’s time to set up your checkout.
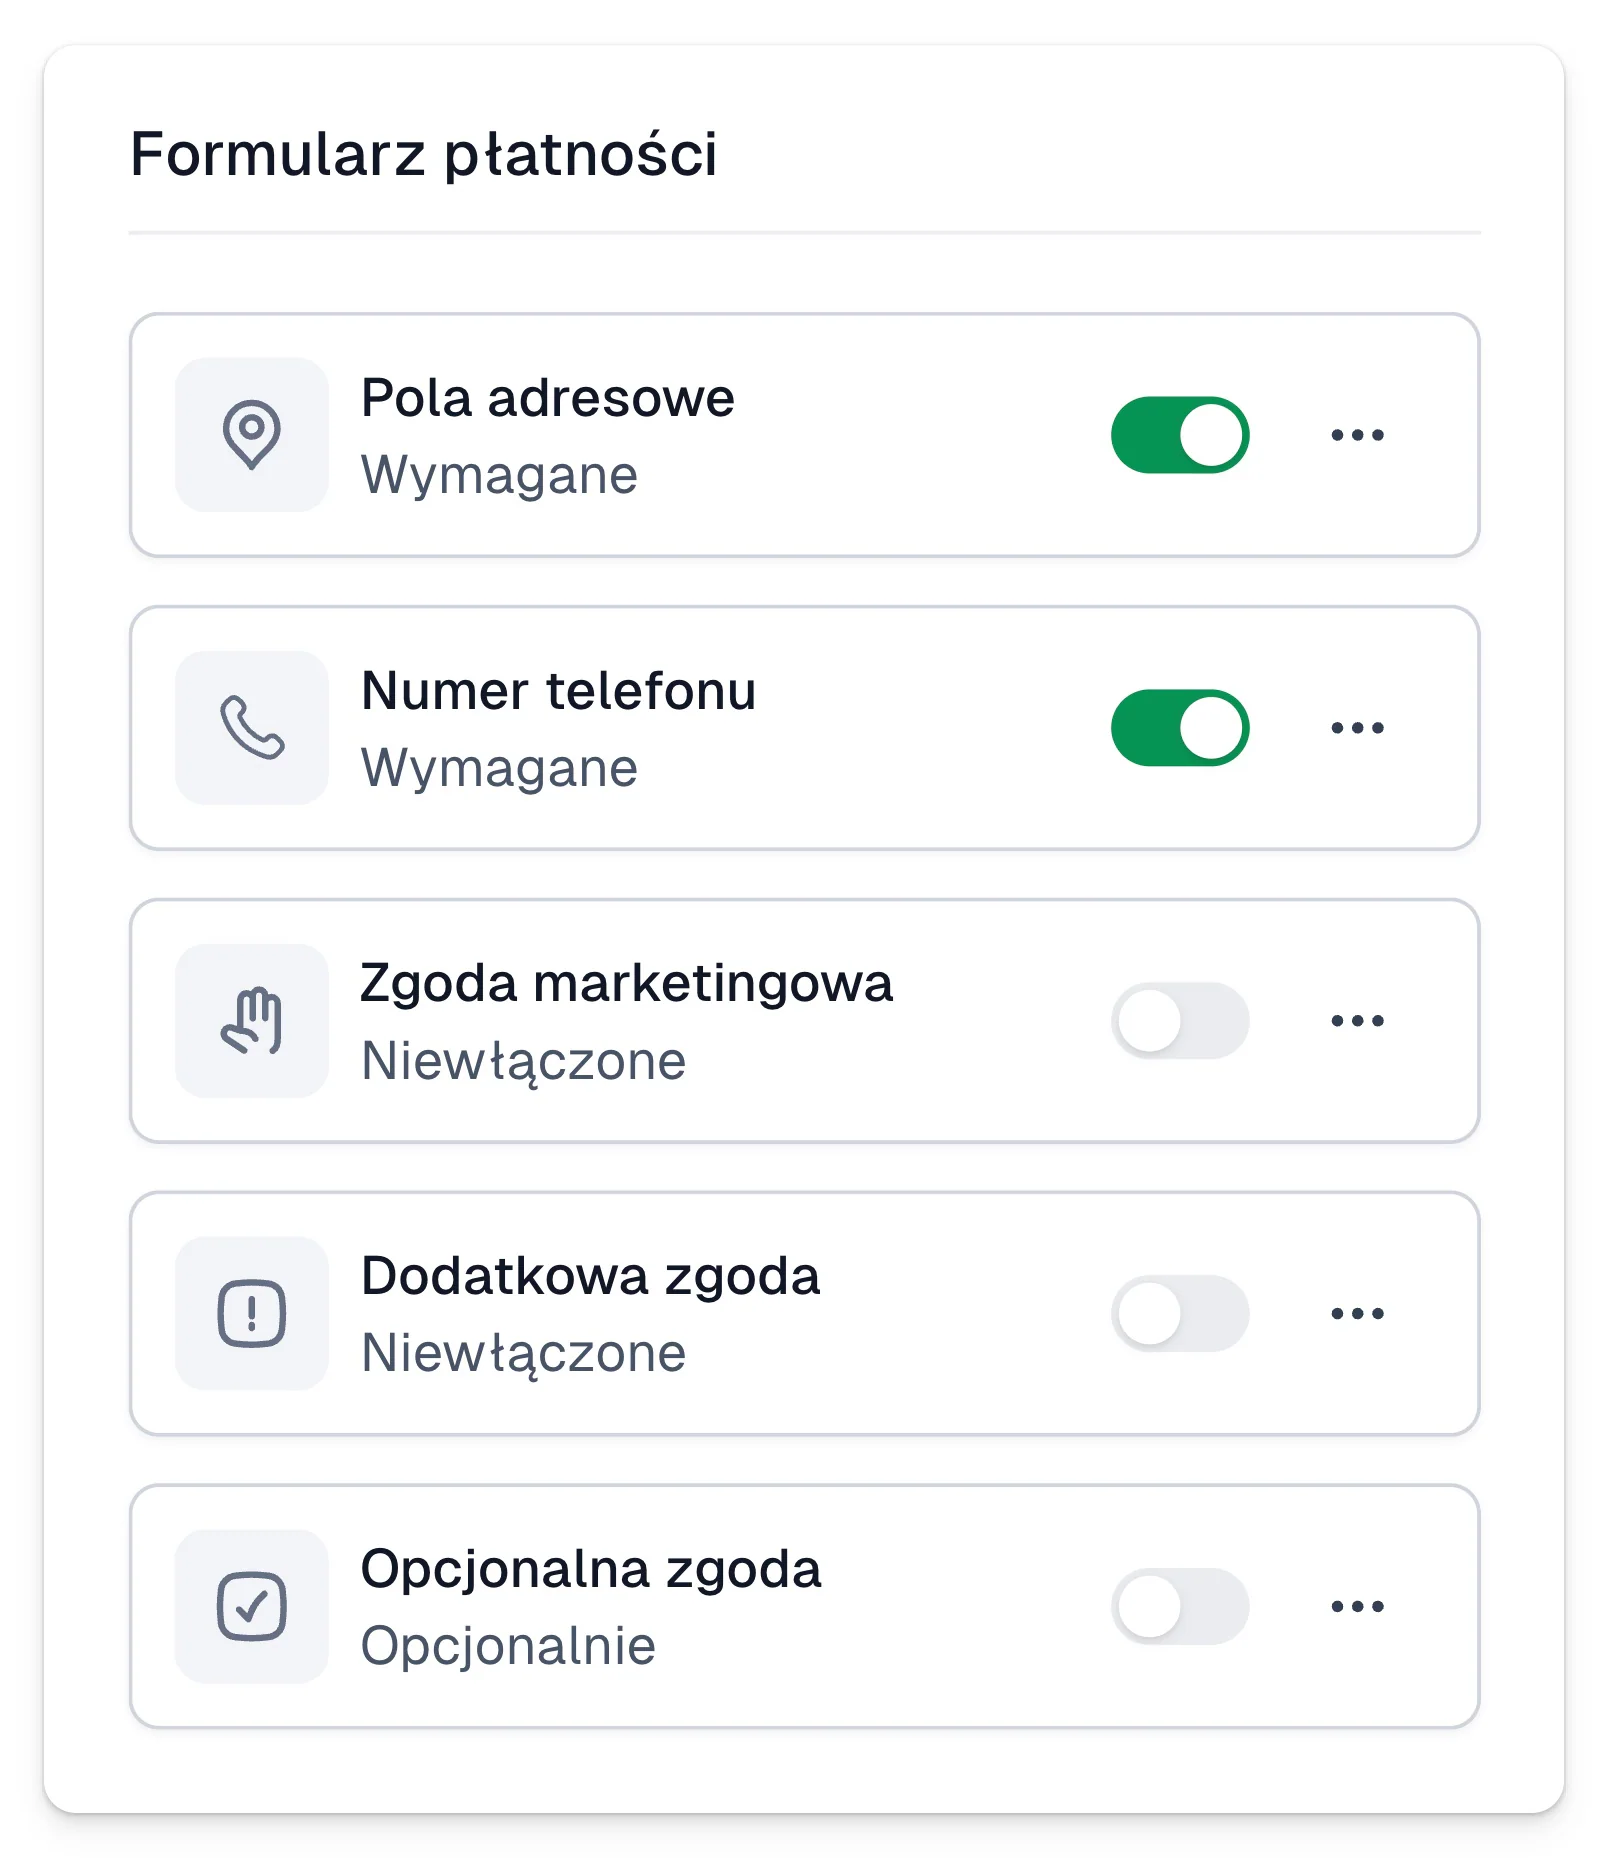
Add address fields to the checkout
Since you’re selling digital products, you don’t usually need to collect your customer’s address, so we don’t show address fields in the checkout by default. To enable shipping, you’ll need to add the required address option to your checkout:
- In the Easytools dashboard, choose the product you want to ship.
- Go to Product → Price variants and select the right variant.
- In the Form fields section, choose the additional fields the customer must fill in before completing the purchase.
Choose the carrier, package size, and contents
Next, you’ll need to choose which carrier you’ll use, and set the package dimensions and contents. Here’s how:
- Click the Address field to open the edit options.
- Enable Shipping with Furgonetka.
- Choose the carrier and fill in the package details.
- Click Save.

After you publish the checkout, every customer who buys this variant will see additional address fields in the checkout and a button to choose a Paczkomat locker.
Important: With this setup, the automation will create a package in Furgonetka that will appear in the To be shipped view. To finalize it, you still need to pay for the shipment and, if needed, book a courier pickup. Once the shipment is paid for in Furgonetka, it will generate the package shipping label.